Showing posts with label Makeup. Show all posts

Lana Del Rey Makeup Tutorial

Lana Del Rey Makeup Tutorial

Lana Del Rey Makeup Tutorial


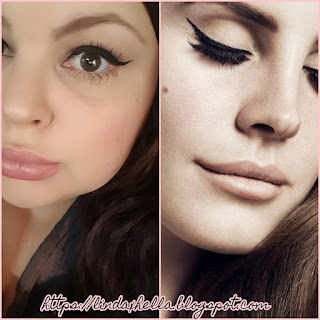
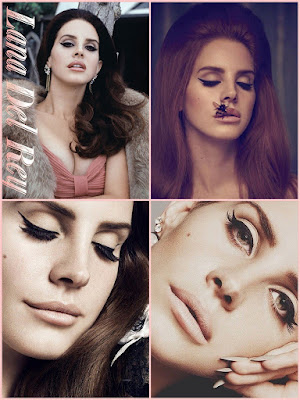
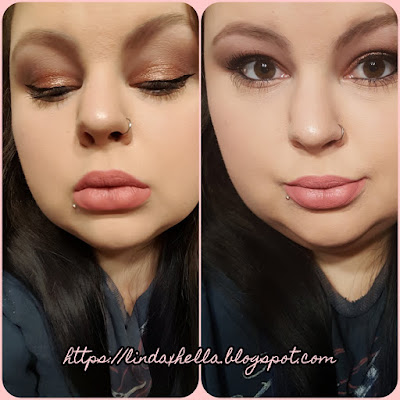
Hey guys and welcome back to my blog! Are you guys in love with Lana del Rey as much as I am? If so I hope you love this makeup look. It’s super natural and flawless looking with a bold cat eye! It’s almost a “no makeup, makeup look” with some sassiness. I’d honestly wear this look daily if I had time to do my makeup everyday, lol. The eyeshadow it’s self is minimal, but you have to be careful how you place the color through the crease.

Let’s get started with the eye makeup!

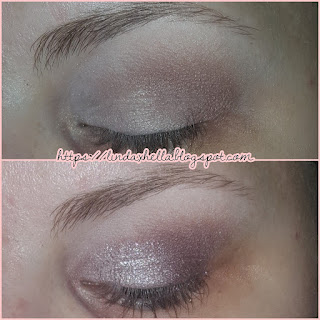
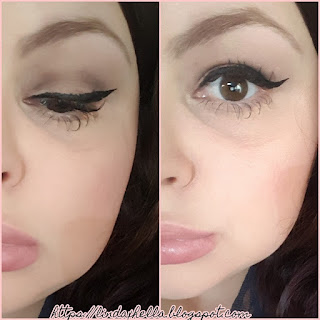
To start out this look I’m going to prime my eyelids with the Hard Candy Eyeshadow Primer and set it with a matte cream shade from the Shaaanxo palette. That’s going to give everything a smooth surface for blending, if you don’t set your eyelids your eyeshadow can drag and look choppy. For the crease, I’m going in with the darkest matte shade in the palette. What you want to do is take a tightly packed pencil brush, dipped in the darkest shade and keep it right in the crease. Lana does a soft a subtle dark faded line through the crease. It’s almost hidden, but brought pretty far into the inner part of the crease. If it’s too dark, take a soft fluffy brush with the light matte shade and blend the line out so it’s softer. To finish off the iconic Lana Del Rey Makeup look, you have to add the strong black wing! I’m using the Ulta Classic Felt Tip Liner. Lana has a long wing normally, so I’m going to use some scotch tape to keep the liner even and straight.
Lana Del Rey Makeup Tutorial

Bottom Lash Line & Mascara.

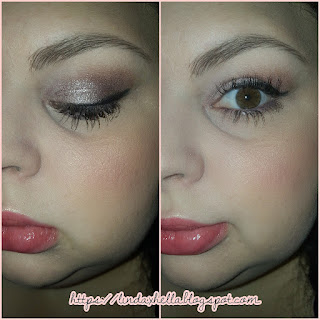
Now, for the bottom lash line, she does a few things. This is where you want to decide which if Lana Del Rey’s eye looks suit your look. Sometimes she has a thicker wing with heavy black liner on her lash line. One thing I’ve noticed, she doesn’t often have anything in her waterline. In your waterline you want to either use a nude or white pencil. If you’re the kind of person who hates the look of nothing in their waterline, line it, you do you. I have a hard time not having black liner on my waterline, but for the sake of the look I’m using a white liner. Lana's bottom lashes always have mascara, very spread out and evenly coated is the goal. A tip I have if your lashes want to clump, use a clean tooth pick to gently separate your lashes once they’ve dried. I’ll have all of the products I used in this look listed below!

Lana Del Rey Makeup Tutorial

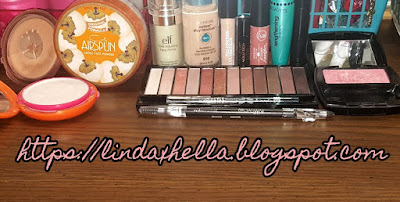
List of products used in the Lana Del Rey Makeup Tutorial.

Eyes:
Hard Candy Eyeshadow Primer
Bh Cosmetics Shaaanxo Palette
Ulta Classic Felt Tip Liner
Maybelline Volum' Express The Rocket Mascara
Broadway Beauty Eyebrow pencil in Black/Brown
L.A. Colors Auto Eyeliner in White

Face & Lips:
Maybelline Baby Skin Instant Pore Eraser Primer
Maybelline Fit Me Matte + Poreless Foundation, Porcelain 110
Revlon ColorStay Makeup with SoftFlex Combination/Oily Skin, 200 Nude
Ulta Full Coverage Concealer, Light Cool
Coty Airspun Face Powder, Naturally Neutral
L.A. Girl Pro Setting Powder, Translucent
DIY Glowy pink blush
NYC Smooth Skin Bronzing Powder, Sunny
Carli Bybel Highlight, Light nude shade
E.L.F. Cosmetics Makeup Mist & Set
Maybelline Color Sensational 015, Born With It


Lana Del Rey Makeup Tutorial
Thank you so much for checking out this tutorial. I hope you loved this Lana Del Rey inspired Makeup Tutorial! I love her and I love her music. Lana Del Rey has such a beautiful soul and a beautiful voice! Let me know in the comments what your favorite Lana Del Rey song is!
Xoxo
Lulu

Shaaanxo Palette Review and Tutorial


Shaaanxo Palette
Hey guys and welcome back to my blog! I recently ordered some items from Ulta, one of which was the Shaaanxo Palette. In today’s post I’m going to do a quick tutorial and review. I hope you enjoy! Let me know in the comments!

~~~~~~
Before I start this post, is like to give a huge shout out to the awesome Zeba Noor! She runs an awesome blog full of useful DIY's and reviews, including beauty and lifestyle posts! Please check out her blog!
 blog: https://heartydiaries.blogspot.in
Instagram: instagram.com/heartydiariesblog
Roposo: roposo.com/@heartydiaries
Twitter: twitter.com/heartydiaries
~~~~~~
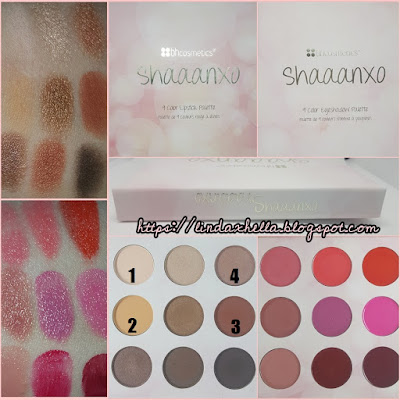
To start out, the packaging is beautiful. It looks like diffused and blurred twinkle lights, which are always in her video background. One side is more of a baby pink and white version of the lights, and the other side has a peachy pink tint to it. The palette contains nine eye shadows and nine lipsticks. Each side has a mirror, the side with the lipsticks has a smaller mirror, but still awesome that there even is one on each side. Can we just appreciate the fact that the lipstick and eye shadows are on completely separate sides? That is amazing. I hate when palettes have creams and powders side by side. Your lipsticks end up with powder in them and they’re ruined. Pigmentation for the eye shadows and lipsticks are both so amazing! The eye shadows blend like a dream! Some of the more shiny shades are even more intense wet, I’m so in love with it. You can go from day to night in a snap, the Shaaanxo Palette has all the matte, shimmer, lights, darks, cool and warm tones you could ask for! I see myself using it all the time. I’m so impressed with the pigment and quality of everything in the palette! I would definitely recommend the Shaaanxo Palette to anyone in search of an affordable palette that can lips and eyes!

Shaaanxo Palette
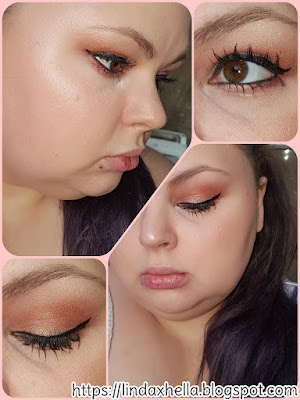
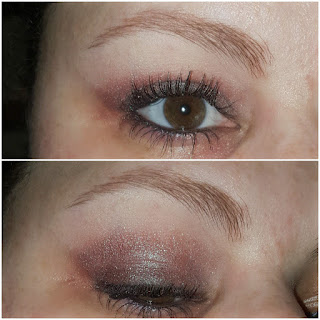
Let’s get into this tutorial! I definitely had fun with it! I'll be numbering the eyeshadows since they don't have names. I started out by priming my eyelids with the Hard Candy Eyeshadow Primer and set it with shade 1. I took a fluffy blending brush and blended shade 2 through and above the crease. In the outer crease and corner of the lid I blended shade 3 to deepen and warm things up a bit. To finish off the eyeshadow I light patted on shade 4 on my brow bone and lightly on my lid. Underneath the lash line I took shade 3 on the outer two thirds, and shade four on the inner third. Down below I’ll list all of the products I used to complete this look!


Shaaanxo Palette
Products Used Today:
Eyes:
Hard Candy Eyes the Limit Eye Shadow Primer
Shaaanxo 18 Color Palette
Ulta classic felt tip liner in black
Broadway Beauty Eyebrow pencil, Black / Brown
Broadway Colors Lengthening Mascara in Black
Rimmel Scandaleyes Waterproof Pencil, Sparkling Black
Face:
Maybelline Baby Skin Instant Pore Eraser Primer
[2 pumps] Maybelline Fit Me Matte + Poreless Foundation, Porcelain 110
[2 pumps] Revlon ColorStay Makeup with SoftFlex for Combination/Oily Skin, 200 Nude
Ulta Full Coverage Concealer, Light Cool
Coty Airspun Face Powder, Naturally Neutral
L.A. Girl Pro Setting Powder, Translucent
Ulta Velvet Blush in Princess
NYC Smooth Skin Bronzing Powder, Sunny
Carli Bybel Highlight, Light nude shade
E.L.F. Cosmetics Makeup Mist & Set

Thank you so much for checking out this tutorial and review. I truly hope you enjoyed it. Don't forget to stalk me on social media! Links below!
Xoxo
Lulu.


Carli Bybel Palette Review and Tutorial


Carli Bybel Palette Review and Tutorial

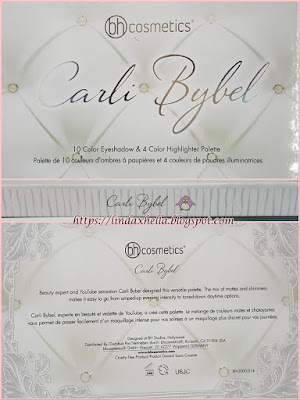
Carli Bybel PaletteHey guys and welcome back to my blog! I finally got the Carli Bybel palette! I know it's been out for about a year or so, but I was finally able to get it and some other things for my 28th Birthday. I was so excited when my Ulta package came that I immediately opened everything and was in heaven! My first Impressions of  the Carli Bybel Palette were that it was so clean and beautiful. The white tufted and pearl background are so beautiful, especially with the contrast of the silver and black text on the front. The inside has again a beautiful white and silver striped look with filigree accented corners, a large mirror on the inside of the life with the quote “Aspire to Inspire”. I honestly love that quote, not to sound too corny or ironic, it’s actually such an inspiring quote. There are ten eye shadows and four highlight shades. Five matte shades and five shimmer shades, and of course the highlight shades are shiny and shimmery. All of these shadows and highlights are silky, creamy and so pigmented and blendable. I was so impressed with the quality of the shadows and highlights, I’ve never had such a nice palette. The shades all range from nudes, browns, bronzes, pinks and plums. They’re all so beautiful. You can honestly create so many looks using the Carli Bybel palette! I'm so happy with my purchase!

Carli Bybel Palette

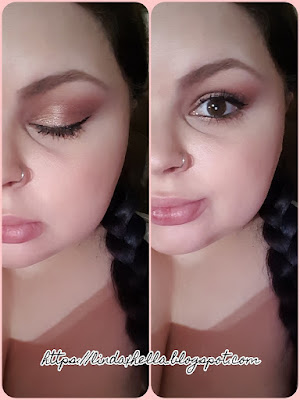
Carli Bybel PaletteTo start of this look I primed my eyelids with the Hard Candy Eye shadow primer, it’s the only one I’ve found that I love. Since the colors don’t have names, I have the photo numbered and will be referencing the shadows by the number on the photo. I set my eyes with shade 1 to create an even lid shade and make it smoother for blending. I went in and a little above the crease with shade 2 a few times, building up the faded hazy look. Then I went in the outer half of the crease with shade 3 and kept it in and just below the crease. On the lid, I used shade 4 and blended it up to the crease, and I brought it on to the bottom lash line. For my highlight, I used shade 5. Today I tried a lot of new products, I’m going to say a few things about each.


Carli Bybel PaletteProducts Used Today:
Hard Candy Eyes the Limit Eye Shadow Primer
Carli Bybel 14 Color Eyeshadow & Highlighter Palette
Ulta classic felt tip liner in black. - It’s so pigmented and easy to use. Would recommend.
Maybelline Fit Me Matte + Poreless Foundation, Porcelain 110. - Sheer to medium coverage.
Maybelline Baby Skin Instant Pore Eraser Primer. - Silky, clear, seems like it works alright.
Broadway Beauty Eyebrow pencil, Black / Brown. - I love this thing!
Broadway Colors Lengthening Mascara in Black. - Dryer formula, had fibers. I really like it.
Ulta Full Coverage Concealer, Light Cool. - Holy grail concealer!
E.L.F. Cosmetics Makeup Mist & Set. - This is the only setting spray I’ve tried, I like it.
L.A. Girl Pro Setting Powder, Translucent. - So silky and beautiful, Horrible flash back!
Ulta Velvet Blush in Princess. - Such a natural look, very soft and pigmented.
NYC Smooth Skin Bronzing Powder, Sunny. - Warm, pigmented and easy to blend.
Coty Airspun Face Powder, Naturally Neutral. – Holy grail setting powder.
Juice Infused Lip Oil, Cranberry + Pomegranate. – Goes on clean, smells amazing. Thick and stays on a long time.

Thank you guys for checking out my review today, I hope you enjoyed it! I had a lot of fun playing in the Carli Bybel palette and I love it so much! I’m going to do so many more looks using it! Don’t forget to comment down below and follow me on social media!

Xoxo
Lulu

Twitter: https://twitter.com/Luluslife_blog
Instagram: https://www.instagram.com/lindaxhella/
Facebook: https://www.facebook.com/Lulus-Life-Blog
Pinterest: https://www.pinterest.com/lindaxhella/pins/
Tumblr: http://lindaxwoods.tumblr.com/

Eyeliner Tips For Hooded Eyes


Eyeliner Tips For Hooded Eyes

Hey guys, welcome back to my blog! Today I’m doing a tutorial for all my hooded eye friends out there. I know for me in particular, I have a hard time pulling off winged eye liner with my hooded lids. So I’ve come up with a few tips and tricks for having my winged liner stand out and actually show up!

Tip #1: Always use very little product to start off with. If you go in with a bunch of product at the start, weather it’s liquid, gel or pencil, less is more. If you go in heavy, it tends to smear or bleed making a big mess.

Tip #2: Use a light hand! It’s never good to go in hard with your eye liner. That will cause dragging of the eye liner, and that just doesn’t look cute. It’ll also make your line thicket than you want it. Also, tugging on the eye lids causes wrinkles prematurely.

Tip #3: Go slow and take your time! There have been so many times I’ve been in a rush and messed up my entire eye look. It’s never fun having to redo your eye look and make it match the other eye.


Tip #4: Have a steady hand, having a shaky hand will generally mess you up. I know sometimes if I haven’t ate or had too much coffee, I normally mess up. Rest your elbow on a surface to steady your hand.

Eyeliner Tips For Hooded Eyes

Tip #5: Mirror angles are your friend. When you look straight ahead draw small dots to line up where you want your wing, and how much you want it to show. To do this, use whatever eye liner of your choice, or even eye shadow on a small angled brush.

Tip #6: Set your eye liner with shadow. If you don't set some liners, they’ll transfer and make a mess. I’ve had that happen to me far too many times! If you have oily eye lids, prime and set them before you start

Tip #7: Practice makes perfect. Just relax and practice whenever you have some free time. Makeup is meant to be fun and expressive. If you can’t get it right, just remember all of these tips and have fun with your liner. Doing wings on hooded eyes can be a pain, but practicing your technique will help you out dramatically.

I hope I’ve helped you out and that you’ve enjoyed this post! Thanks so much of checking out this post, feel free to share it and comment down below!

Xoxo
Lulu.

Kylie Jenner Inspired Makeup Look


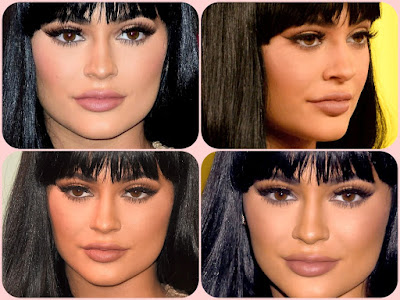
Kylier Jenner Inspired Makeup LookHey guys and welcome back to my blog! Today I’m going to do a makeup look based on one of my many Queens, Kylie Jenner! I love her makeup look from the 2015 MTV VMA's. It's a very beautiful full glam golden goddess look with a thin long wing, bronzed up with a nude lip. Now, I'm definitely not as tan as her, so this will be adjusted to suit us more pale women. If you have a darker skin tone, just adjust and use your favorite products. I for one, am very fair and burn easily. I am so jealous of people who get a tan in the summer. If I get one, I have to get sun burnt first. I will never be as tan as Kylie, Lol.
Kylier Jenner Inspired Makeup Look
First things first, I had to dig through all of my eye makeup to find a gold shadow that works. It would be so much easier if my Ulta order came in already! I ordered the Carli Bybel palette, that would of been perfect for this look! Luckily I was able to find the perfect gold shade in the Makeup Revolution Iconic 3 palette. All of these shades are so pigmented and buttery! One down side to the palette is, the shades don't have names. I'll have to number the shades and list them that way! Also, huge bonus is that this palette is only $7.00 on the Ulta website, and they always have deals going on!


Makeup Revolution Iconic 3 Palette
Kylier Jenner Inspired Makeup Look
To start out this look I used the mini eye shadow primer that came with my makeup revolution #slay palette. It’s a sheer frosty texture. This is my first time trying it, so hopefully it doesn’t crease, it had a silky texture that I’m not sure about. I completed this look using only four eyeshadow. To set the primer I used the matte nude shade and used the light cool toned taupe shade through the crease. I kept building it up until my crease was hazy and soft. On the lid I used a flat shader brush, spritzed with setting spray, and packed on the gold shade all over the lid and just above the crease. On the outter corner I blended in some of the dark gray / purple and used a clean brush to blend out all of the edges and make everything blended and soft. To finish off the eye look, I used a black liquid liner and did a very thin line and thin wing. I finished the rest of my makeup look by doing my normal foundation routine, which you can find here. This time I switched bronzer for my NYC bronzer in sunny. That completes this look! If you enjoyed this post and get inspired to recreate it, tag me on social media! Thank you for checking out this tutorial!

Xoxo
Lulu.

Pink Sparkly Eyeshadow Tutorial


Pink Sparkly Eyeshadow TutorialHey guys, the last few weeks of actually playing in my Ulta box, I’ve discovered that the glitter shades are actually really pretty on the eye. I decided to use them today because I was feeling a little sassy I guess lol. I promise, this will be the last post using this makeup box for a while since I know you can’t buy it anymore. But I know Ulta sells their own range of singles. I think some of these are part of their range.


The Ulta Be Discovered 67 piece Collection
To start out this look, I used my trusty Hard Candy Eyeshadow Primer all over the lid and set it with the shade Au Natural. I thought that shade would be too dark, but it actually matched my skin perfectly. I lightly tapped into Brave and Camel, running them lightly through the crease and put her corner, just to bring in warmth and some depth. On the lid, I tapped on In The Buff, but it hardly showed up at all. So I rolled with it and went into the bottom drawer of colors and used the Color Coat in Platinum, it’s a thick cream shadow that kind of drags on the lid. I just used it as a base across the eyelid and packed on the glitter shade Pretty Princess on the inner two thirds and Glam Rock on the outter third. Then I took my blending brush and softened all the edges and added a little Havana Nights in the outter corner the help blend things out.

The Ulta Be Discovered 67 piece Collection

The Ulta Be Discovered 67 piece CollectionFor eyeliner I used the purple eyeliner that came in the box set, it wasn’t very pigmented soon used a little of that same dark purple just to smudge under the outter half of my lash line. On the top lash line I used the same purple liner and set it with a black shadow. Recently I've been taking the liner two thirds on my lash line, it makes my eyes look bigger, which I love the look of. For my brows I used the Broadway Beauty Eyebrow pencil in Black / Brown and the Broadway Colors Lengthening Mascara in Black. Those two have become some of my favorites. To finish off my face makeup, I used my cover girl 3 in 1 foundation, Ulta Full Coverage Waterproof Concealer, Coty Airspun Loose Face Powder, Wet n Wild Contouring and Highlight palette, blush and Highlight duo and lip gloss included in the ulta box. I actually really liked the highlight, it was really silky and had great pigment. The gloss had a pretty shine without being sticky and stayed on for an hour or two!
Covergirl, ulta, hard candy, broadway colo, wet n wild,

Thank you so much for checking out this tutorial, I hope you love this look as much as I do. I wore out to Red Lobster for my birthday dinner with my boyfriend and daughter! Might I add, their Cheddar Bay Biscuits give me life! Haha.

Xoxo
Lulu.

Purple Smokey Eye Tutorial


Makeup Tutorial
Hey guys! I’m back this week with a makeup tutorial! I want to do more glamorous looks, because let’s face it, they're fun! This week I want to work with purples! Purple is one of my favorite colors in general and to wear on my eyes, it makes the little bit of green I have in my eyes stand out more. I’ve always wanted green eyes, the purple helps them look a little more green! Today I’m going to be using the Ulta “Be Discovered 67 piece Collection”. I bought it about two years ago online, and they no longer sell it. There are a lot if similar colors you can buy online or in store. I never get to use this thing, so I decided to bust it out this week! I’m also going to be trying out two new products my boyfriend randomly bought me at our local Dollar General. There’s a brow pencil in Black / Brown (we'll see how the color is) and a Lengthening Mascara in black. Both of them are by the brand Broadway Color, which is manufactured by Kiss Products. I believe these are dollar items but I’m not sure.


Ulta Be Discovered 67 piece Collection


Makeup TutorialI started by prepping my eyelids with the Hard Candy Eyeshadow primer, and setting it with the shade Au Natural. It’s a creamy nude matter, it makes blending so much easier. Through the crease I tapped into Gentle and Camel to add some depth and shadow. In the outer corner I blended some Havana Nights in through the outer crease, then I blended some Galaxy in crease as well. On the lid I packed on some of the color Impulsive Purple. It ended up being really dark and harsh, so I took some Orchid and Blood and lightly blended them over top of everything to soften it up. On the bottom lash line, I used Havana Nights about two thirds in and in the inner corner I faded in some of Bloom.


Covergirl, Elf, Ulta, Wet N Wild, Avon, Pueen,
For the rest of my makeup, I used the Cover Girl Outlast Stay Fabulous 3 – in – 1 foundation with spf 20 in the shade 820. I applied it with a duo fiber foundation brush by Pueen. I concealed my under eye area with the Ulta Full Coverage Waterproof Concealer in Light. To set everything I used my trusty Coty Airspun Loose Face Powder in Neutral Natural. For bronzing and brightening I used the Wet N Wild Coloricon Contouring Palette. I lightened up under my eyes, center of my forehead, down my nose and the middle of my chin. I warmed up around my face and lightly contoured my cheek bones. I don’t know how to contour very well, so I just warm my face up some. I highlight using one I made myself and repressed into an old powder foundation compact. I used Avon's blush in Classic Aura, Which is now discontinued.


Broadway Color, Broadway Beauty, Rimmel Scandleyes

To finish off my look I use the Rimmel Scandaleyes waterproof eye liner in Sparkling Black to tight line and in my water line. For brows I tried out the Broadway Beauty Eyebrow pencil in Black / Brown. It turned out it’s a really nice color for me. I always have a problem with my brows coming off too warm. The pencil itself is a hard was with not a ton of pigment, which worked in my favor to be honest. For mascara I also tried out something new! Broadway Colors Lengthening Mascara in Black. It turns out this formula has little fibers in it and is soft on the lashes, it didn’t go crunchy or flake. The wand has spread out bristles that really helps separate. I really like it a lot! For my lips I put on my J Cat Beauty Lipfinity Matte Lip in Champagne Pop! It’s my favorite matte lip color. To finish I sprayed my face with the Elf setting spray.


That is it! Pretty cute look, but a bit dramatic for a day time look. Thank you so much for checking out this tutorial. Hit me up in the comments and let me know if there’s anything you want me do a tutorial on or a review of!

Xoxo,
Lulu.


In This Moment Concert Looks


In This Moment, Motionless In White, Avatar and Gemini Syndrome


In This Moment
Guys! My boyfriend and I are going to be seeing one of our favorite bands! April fifteenth in Columbus Ohio! In This Moment! We are so fucking pumped for it. I normally try not to swear in my blog, but I’m too excited! If you guys don’t know who they are, they’re a bad ass metal band with a female singer. The beautiful Maria Brink! At the concert there’s supposed to be three other groups with them on tour. Motionless In White, Avatar and Gemini Syndrome! I like all of these bands, the only ones I don’t know as well are Avatar and Motionless In White. But I do enjoy what I’ve heard by them so far! Now, you guys know what this means! Testing and trying out hair and makeup looks for the show. They have got to be long lasting and sweat proof! Most of all, I have to look cute of course. I have a few ideas in mind and I wanted to talk about and get some input on!

Makeup Look one:

This is the most basic look I came up with. I’m thinking either a classic messy bun or a donut looking bun. What are those called? A ballerina bun maybe, lol. For the makeup look, I’m thinking a simple minimal makeup look with a winged liner. With some bottom lash line smoky-ness with a deep purple shadow! Of course a ton black eyeliner in the waterline. For the lips, J Cat’s kissproof liquid lipstick in Champagne Buzz. It’s a nude shade with a slight orange tint.


Makeup Look two:

For the second look I thought a sleek ponytail and more of a dramatic eye! This eye look would be a late night smoky glam vibe. I’m thinking of using my Wet n Wild Comfort Zone pallet. The bottom right shade is my favorite color in the palette, which you can tell by how used it is. It’s like a blue brown shade. I guess it’s a dupe for MAC's blue brown pigment. That shade all over the lid with some red through the crease and some glitter! Depending on how much glitter there ends up being, I probably won’t do a wing with this look. I will be adding black eyeliner to the waterline and some of of that blue brown shade on the lash line. For my lips, I’m thinking the same liquid lipstick in Champagne Buzz.


Makeup Look three:

Okay, this is probably going to be what I end up going with. I think it really fits my personality most. For the hair I want to do double twist back braids into a side braid. That’s generally my go to hair style when I have to have my hair out of my face. I know I’m going to be sweating a lot, I do anytime I’m out doing something. For my makeup I want to do a black and silver smoky eye look. Very Goth looking and pulling some Maria Brink vibes! This one is would pair with a red matte liquid lipstick. A lot of black in the water line, and some smudging under that.


If you guys are wondering about what I’m going to be wearing, I’m thinking of wearing my blue jeans and low top black and white classic Converse. I have no clue what shirt I’m going to wear! I think I’m going to buy a new shirt for the concert. I really don’t have anything I could wear to the concert, shirt wise anyways! Guys, I’m so excited! Let’s talk in the comments about our favorite music and bands! If you enjoyed, make sure you give it a share on social media. You can follow me on most platforms. My links are all listed on my social media page! Thanks so much!


Xoxo
Lulu ♡

Makeup Revolution #Slay palette!


Hey guys, so I guess you could say I’ve jumped on the peachy eye shadow band-wagon. Never in my life would I have ever thought I would wear orange eye shadow. Honestly, what is my life these days? I'm almost 28 and I’ve started wearing colors on my eyes I never would have even considered a year ago! So needless to say, I’m going to tell you guys what I did to get this look using the Makeup Revolution #Slay Eye Shadow Pallette! First things first, I am one of those weirdos who does their eye shadow before their face makeup. I always get fallout under my eyes and on the tops of my cheeks. If I do a winged eyeliner, I’ll do it after the rest of my makeup, but before my mascara. Otherwise my lashes get in my way, lol. For a primer, I use the Hard Candy eye shadow primer “Eyes the Limit”. It has a silky creamy texture with a little nude color to it. Now to the fun part, the colors! I recently bought the Makeup Revolution palette called #Slay. It has ten very pigmented shadows in it, only four of them are the matte. That and the fact that there were warm shades in it, is what pulled me in. I love a good satin or shade, but mattes are perfect for transitional shades and more glam looks. Although shimmer and glam go hand in hand lol.

Makeup Revolution #Slay Eye Shadow Pallette
I start out with putting the shade ‘Great’ all over my lids, making sure to put it on while the primer is still tacky. There is a fine shimmer in it, so it helps if the primer still has some stickiness to it. I then put a little of the golden bronze ‘Impress’ on the inner quarter. On the upper part of my lid I put a light wash of ‘Destroy’ and ‘#Slay’ make everything blend out softly. For the crease I tap into the orange ‘Impress’ and ‘Killed It’ for that reddish peachy vibe I’m focusing this look on. I blend until I like the level of hazy soft blending. If the color isn’t as vibrant as I want, I add more and continue blending. The outer corner and into the crease I blend in the color ‘Hit’. If I’m wanting to keep it less smoky, I skip the last step and I’ll maybe add some ‘Queen’ to warm it up even more. Today I am skipping ‘Hit’ and just adding ‘Queen’. Next I use a warm soapy wash cloth and wipe away any fallout, with this palette I haven’t had much at all.

Now time to beat my face. I always make sure I have a freshly washed and moisturized face! I use the Biore charcoal face wash and the Nicel Daily Repair with Vitamin A and Retinol. For primer I use the Elf Mineral Primer in Green to reduce the redness on my cheeks, in the creases my nose and any redness from blemishes. On days I was more of a full coverage look I use my Real Techniques Perfection Complexion sponge damp. For foundation I’m currently using the Cover Girl 3in1, I make sure I blend down the neck. Otherwise you’ll end up with a “mask”, which just isn’t cute lol. I recently purchased two new concealers, the Ulta Full Coverage waterproof concealer in Light Warm, it’s the lightest shade with a yellow undertone. I also got the L.A. Girl HD Pro Concealer in Light Ivory. I’m still testing them both out right now. So far I like the Ulta one for under my eyes and on any spots. But I also like the L.a Girl one for the same things. I just don’t know which I like better as of right now! For setting and caking everything I am in love with the Coty Airspun loose face powder in Neutral Natural, it’s so silky and finely milled. I bronze and pretend to contour with the Wet N Wild Coloricon Contouring Pallet in Dulce De Leche and I use my favorite, yet discontinued Avon blush in Classic aura, it’s a natural tone pinky mauve. I highlight with a highlighter I made myself that’s a soft frosty pink, I’m obsessed with it. To finish up everything I lightly pencil in my brows with the Jordana fabubrow in dark brown, then I brush it through. It is too dark for me so I have to use a light hand with it. For mascara I use the Holy Grail, and always trusty Maybelline The Rocket in Waterproof. After my mascara dries I tight line and line my waterline with Rimmel waterproof sparkling black eyeliner. After that, use a little of the orange ‘Impress’ and ‘Queen’ to lightly smoke out the lash line! I recently bought a J.Cat kissproof liquid lipstick in Champagne Buzz, I love it! It’s very thin and pigmented for being only like four dollars. Right now I don’t have any setting spray, so I use water in a spray bottle to settle down the powders and prevent them from looking cakey. Although it doesn’t do anything but setting everything down, I still use it for now. I need recommendations for a setting spray that won’t break my bank, and that will hold up to sweat lol. If you know of any good ones, hit up the comments section.

Thank you so much for taking the time out of your day to read this. I appreciate every bit of feedback you guys have to offer! I hope you have an amazing day!

Xoxo
Lulu.

My Effortless Makeup Look!


When I have to run errands and I don't want to do a full face of makeup, this is my "go-to" look. I still use a fair amount of products, but it is a more natural everyday kind of look. It's for those days when I don't have the time or energy to "Beat my face to the gods". There are a few different eye looks I'll do, but this is my usual look. I hope you enjoy!


First things first, I always wash my face with a charcoal face wash and a normal wash cloth. I've noticed if I don't wash my face just before I do my makeup, it doesn’t sit right. I often have breakouts and dry skin around my nose and chin, so washing and rinsing my face well is always a must! The face wash I use is Biore Deep Pore Charcoal Cleanser, it's has a cooling feeling and does seem to work. It’s honestly really thick and has little black flecks of charcoal in it. If I leave it on for more than a minute or two, my face starts to tingle and feel warm. So I just wash it off and move on to my moisturizer. I have been using the Nicel Daily Repair with Vitamin A and Retinol for about three years. I always got it at Big Lots for less than two dollars, but I have not been able to find it the last few times I had been there. I have seen it on Amazon though! Before I start my makeup, I throw on my chap stick in the flavor Pumpkin Pie.


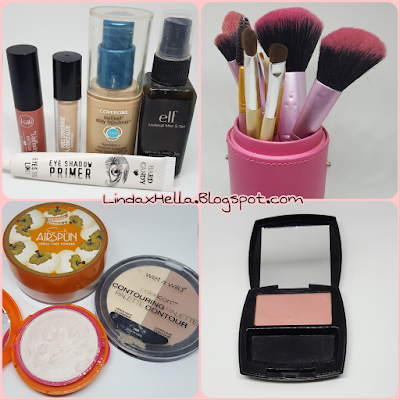
Now on to the actual makeup! I always do eyes first. No matter what I do, I always have fall out. I start by priming my eyes with the hard candy primer and I put down a matte creamy nude color all over by wet n wild in Brulee. It helps make the rest of the shadows blend better and even everything out. I use the Wet N Wild Pallet in Comfort zone. It has super soft, pigmented shadows. I take the warm pinky brown shade on my lids then put the warm brown / blue shifty one in the crease. It’s comparable to Mac’s Blue Brown pigment.


After that, I clean up the fall out and move on to primer and foundation. I mix one pump of my green redness relief elf primer in with two pumps of my covergirl foundation in shade 810. Mixing them like that seems to make my foundation stay on longer than normal. When I’m in a rush, and want my foundation to look natural, I blend it in with my hands. The coverage is still nice and looks so much more natural than if I use a sponge. If needed, I’ll add some extra foundation to any spots and my under eyes with my real techniques miracle complexion sponge. I do have pretty dark circles. After, I set everything with my coty Air spun loose face powder. I love how it smells, it reminds me of my grandma. I always add a Bronzer to the "classic 3" area, if I don’t I look washed out. I like to bronze up with the Wet N Wild Coloricon Contouring Pallet. It also has a matte highlight shade, which I sometimes use under my eyes if I need more brightening. My favorite Blush is my Avon blush in Classic aura. It’s a gentle mauve, and looks really flattering on my skin tone. For highlight, I use the one I made myself. I highlight my cheek bones and above my brow, the tip of my nose and my cupids bow.


Last thing I do is finish my eyes, lips and set everything. I put on Rimmel Scandleyes waterproof "sparkling black" eye liner. I put it in my water line and tight line. Then I use my holy grail Maybelline the rocket mascara in waterproof on my top and bottom lashes. I put on like one and a half coats. focusing on my top lashes. I lightly fill my brows and brush them out in with the Jordana Fabubrow eyebrow pencil in dark brown. Personally, it’s too warm for me, and I’m looking into getting a more ashy one. If you have any suggestions, let me know down below. I use my Elf Mist & Set to keep everything in place and while its drying, I put on some gloss. My favorite is Maybelline The Elixir Colorsensational in shade 90, Rose Redefined. It's one of those glosses that is super shiny and long lasting, but not sticky. It has a grandma smell I love!

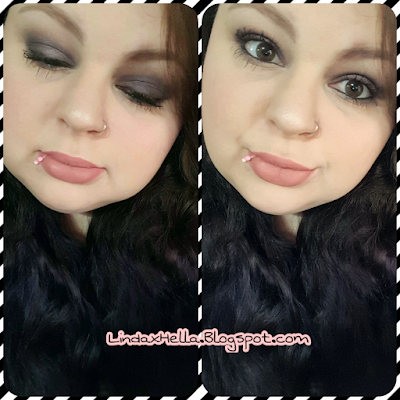
Then I’m done! It usually takes me about fifteen to twenty minutes to do it all and feel a lot more confident going out and about. I do have a lot of acne, acne scars and redness on my cheeks that bother me. If I’m having a decent skin day I’ll just wear mascara, eye liner, fill my brows in lightly and wear some chap stick and call it a day. I’m going to have some photos of the products and me throughout the steps! I hope you’ve enjoyed this post and if you want me to do anymore like this with different looks, let me know down below!

Thank you all for reading!
Xoxo Lulu.


How I clean my makeup brushes!


My favorite way to clean my makeup brushes has got to be with organic virgin coconut oil and Dawn dish soap… A lot of people like to use olive oil, but I think it’s much harder to get out of the brushes and makes the task take a lot longer! Now let’s all be honest, how many of us actually clean our brushes out after we use them? Not me, that’s for sure! I don’t have time to do it and it’s not the most fun thing to do. Since I don’t do my makeup as often as I’d like, I only need to wash my brushes twice a month.


You know how putting organic virgin coconut oil in your hair is really good for you hair? Well, coconut oil contains lauric acid, and that’s been known to reduce candida, it fights bacteria, and awesomely enough it also creates a hostile environment for viruses. Are you starting to get why I use it do clean my brushes? It’s going to be a lot better for your skin if there’s any residue of it left in the bristles. When you use Dawn Ultra Concentrated dish soap, it removes all dirt and, oils and germs! If you’re wondering “Why use an oil if you’re going to be using soap anyway?”. Well simply put, it breaks down any powders stuck inside the bristles of the brushes and breaks down creams and liquids that contain oils. Then after you wash the brushes with soap to remove all of the makeup residue and oils. You always want the brushes at a downward facing angle after they have been washed. Always set them down so the water is being drawn down the length of the bristles and out towards the tips. Never set your brushes upright while they are wet. Doing so weakens the glue, rots the wooden handles and makes it a lot easier for bacteria to breed and mold to grow. Now that all of the details and basics have been mentioned, let’s get into explaining my process!

Here’s what you are going to need:
Virgin organic coconut oil.
Your preferred soap.
Your makeup brushes and sponges.
Some paper towels.
Last but not least, something to rest them on.
I usually use two hand towels, one rolled for height and one laid out.

You want to start with a small amount of coconut oil in a microwave safe dish. About a teaspoon worth for twenty or so brushes. Dampen them as you go in warm water, dip the end in a little bit of the oil and swirl the brushes on your hand, between your fingers and really work the oil into the brush. Once you have the oil worked in take your soap and put a drop on your hand and swirl and work the soap in on your hand, massaging the soap in and occasionally squeezing the brush. Repeat that step until the water runs clear. You do this with all of your brushes and sponges until everything is clean. Once you’re done, make sure to gently squeeze out ad much water as possible, then set up your brushes facing down to draw the water out. Let them sit for a few hours or up to a day and you are done!
This is by far the easiest way I’ve ever found for washing my brushes! I hope this post helped you and was informative! If you have any questions, let me know in the comments!


Xoxo
Lulu
How to make your own pressed powders!


Hi guys! Okay, so today I wanted to share with you how I make custom color eye shadows, highlighters, and well anything powder based! It’s the simplest way to do it and probably the least messy! I promise if you like makeup, you’ll have as much fun as I do making these! Always remember to leave them for at least twenty four hours!

This is what you will need:
Your chosen powders.
Rubbing alcohol, 90% +.
Clean containers for mixing. Glass is best.
Q tips and cotton rounds for cleaning things up.
A new or sanitary Orange stick or a foundation spatula.
An empty compact, metal pan, or cleaned palette.
A clean spoon to help break up the powder.
Something to press the powder with.
Paper towels, tissues or toilet paper.


When it comes to picking the eye shadow or powder your wanting to make, take into consideration if you want matte, frosty or glittery. For well, obvious reasons… You wont want shimmer or glitter in your matte shadow, lol. If you want to make both matte and a shimmery shadow, make the matte ones first if you only have one orange stick. As to not have shimmer in the matte shadow. You want to get everything out and set up on a clean dry table or desk. Wherever you feel like doing it really.

Step one! Pick your colors and start breaking them up carefully with the orange stick and put them into the container you’ll be mixing them in. Once you have all of your colors chosen and in the container, continue breaking the powder up so that it’s really fine and mixed up. You can test the color by swatching  it, adjust the color how you see fit!

Step two! Adding the rubbing alcohol. You want to start with adding a few drops and mixing it in. You need to add enough alcohol to form a thicker paste consistency, you don’t want it so thick that it’s still crumbly yet thin enough to be able to put in the pan you’ll be setting it in.

Step Three! Pouring and pressing your powders. Make sure before hand that you clean and wash the pans, palettes or compacts your going to use with some warm soapy water. Dry out everything and give it a wipe down with rubbing alcohol and a cotton round to ensure everything is sanitary. Once you’re ready to put the product in the pan, make sure you do a little at a time, using the orange stick to push the product in the corners.

Step Four! Pressing your powders! Find an object that fits the shape of the pan. Sanitize it and make sure it’s dry. Take a paper towel, tissue or toilet paper square (they’re literally all the same thing, just different thicknesses and textures). Put the paper towel and put it over the bottom of what you’ll be using to press it. Make sure there aren’t any folds on the bottom of it, you probably wouldn’t want that to show on the top of your powders. Press gently and evenly over the surface to help soak up some of the excess alcohol.

Step Five! Now that everything is done, let your needs product sit in a dry clean area for twenty four hours to dry out! Then your product is not ready to use!

I hope this was helpful and I hope you enjoyed this post. If you
did enjoy it please share with your friends make sure to leave a comment. Thank you so much for reading.

Xoxo, Lulu.


Drug store Foundation Routine!


Hey everyone! Today I'm going to talk you through my foundation routine, for days when I do my makeup. I don't always have time to do my makeup on a daily basis, but this is a go to list of products! If you have any feedback or recommendations, hit up the comments! Xoxo Linda.


Elf Mineral Primer

First I start with the Elf Mineral Primer. I use the green one for redness that I have around my nose and on my jaw line / cheek area. I'm not sure what it is, but I do know a lot of women seem to have it. There is a lot of bumpy texture to it as well. I'd say over all this primer does work pretty well for it being from the drug store.


Covergirl Outlast Stay Fabulous foundation, Real Techniques Perfection Complexion spongeSecond, I use Covergirl's Outlast Stay Fabulous foundation in the shade 810, Classic Ivory. It's the second lightest shade with a slight yellow undertone. To apply this I use my damp Real Techniques Perfection Complexion sponge. This is a medium coverage foundation and covers my spots and scars pretty well. I always end up going back to this one. I like to try out other drug store brands that get a lot of hype, but they're never as good as this one. Not to mention I'll use the sponge and dab on extra to cover my dark circles and it works wonderfully! These two are a must have in my collection! But remember, blend down your neck!


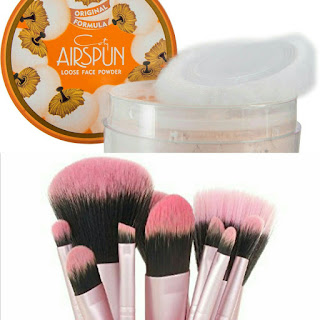
Coty Airspun loose face powder, Natural, Pueen 12 piece Brush set, Third! Setting powder! Coty Airspun loose face powder, in Natural. What else can I say? Holy Grail setting powder for sure. I have had the same container of it for almost 2 years and it's still three quarters full, and that's with me using it on my eldest step daughter too! It has a granny smell to it and I happen to love that. It reminds me of my grandma! I use this to set and bake my under eye area. After a few minutes I'll use my fluffy brush and dust off and swirl in any extra. I bought myself a set of Pueen makeup brushes for my birthday almost three years ago, I think it's a set of 12 with a case for travel. It was only twenty buck on Amazon! Heck of a deal. They are so soft and help my powders blend flawlessly!

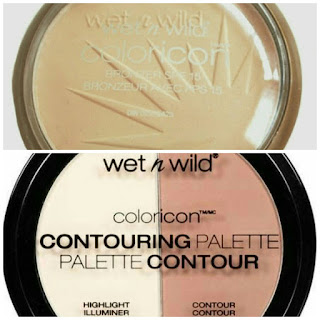
Wet N Wild Coloricon Contouring Pallet, Dulce De Leche, Wet N Wild Coloricon, Reserve Your CabanaFourth, Bronzing and Highlighting. To warm up my skin and make me look more alive I use the Wet N Wild Coloricon Contouring Pallet in Dulce De Leche. It's a two in one matte Bronzer and Highlighting powder. It's a super soft formula and blends like a dream. I like to use the contour color in the usual 3 shape on the face and the highlight powder under my eyes. It is completely matte! For the shimmery highlight I use again the Wet N Wild Coloricon line, in Reserve Your Cabana. This is a silky soft highlight, it doesn't have a lot of sheen to it. So I actually broke it up and added some frosty eye shadows to it and re-pressed it. Now it works like an actual highlighter should, lol.


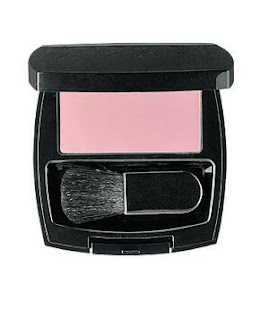
Avon Ideal Luminous Blush, Classic Aura,
Fifth and last, Blush! Avon Ideal Luminous Blush in Classic Aura. This is a discontinued color, which is so sad. It's a muted pink color that looks good on so many skin colors! I love this color it's so soft and subtle yet it has awesome pigmentation! I don't know why they don't sell it anymore. I know a family member had given it to my daughter because they didn't use it. Well, she put it all over her face and her face turned beat red and broke out. She was like 7 at the time. I use it every time I do my makeup and I have never had a reaction from it.


Thank you all for taking the time out of your day to ready this. I hope you found it interesting or helpful in some way! Let me know what I should post next!
Xoxo
Lulu.

Popular Posts