Showing posts with label Makeup Tutorial. Show all posts

Speak Now Taylors Version Inspired Makeup Tutorial!

Speak Now Taylors Version Inspired Makeup Tutorial!


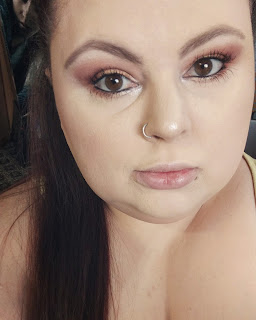
Hi! I decided to redo my Speak Now Taylors Version Inspired Makeup Tutorial! I didn't have a pastel purple when I did it initially. I wanted to do a softer look that would be a more "wearable" look for people who don't like as bold of looks, but still wanted to do a brighter look! I used 3 shades of purple and used my cheek highlight on the brow bone!


Here's The Video:


My go-to base:
Primer: Elf Cosmetics Power Grip, + 4% Niacinamide 
Foundation: ColourPop No Filter Foundation [fair 05] 
Concealer: Too Faced Born This Way Super Coverage Concealer [Cloud]
Powder: Coty Air Spun [Translucent]
Bronzer: Revolution X Fortnite Face Palette
Blush: Blush: ColourPop Lizzie McGuire Collection [You Are Magnifico]
Blush Topper: Revolution X Fortnite Face Palette
Highlight: Revolution X Fortnite Face Palette
Setting Spray: Urban Decay All Nighter Ultra Matte Setting Spray
Lipstick: Trestique Matte Lip Crayon; Florence Fig & Nantucket Nude


Eyes:
Primer: Too Faced Born This Way Super Coverage Concealer [Cloud]
Palette: Makeup Revolution X Fortnite Supply Llama Palette
     - The Storm 
     - Royale 
     -  Llama 
Eyeliner: Trestique Eyeliner; Santorini Black Sand
Mascara: Elf Cosmetics Lash N' Roll, Black
Brow Pencil: Billion Dollar Brows, Brows On Point: Micro Brow Pencil; Taupe
Brow Gel: Saint Luxe [Clear]

Makeup Revolution x Fortnite; Peely Collection!


Makeup Revolution x Fortnite Collection! Peely set!

Makeup Revolution x Fortnite Collection!

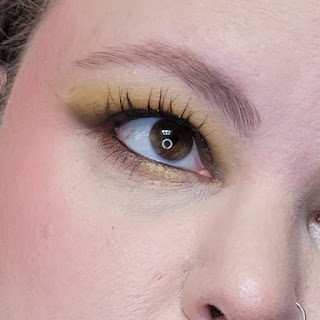
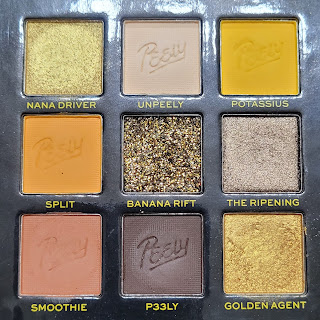
Makeup Revolution and Fortnite dropped a collaboration! Today I used the Peely collection! Now that I've used all three palettes, I can honestly say I'm impressed. They're all pigmented and smooth. They blend like a dream too, that's so nice to experience, a palette that blends without effort! This look is such a "trust the process" look! It looks so messy till it comes together lol. Everything I used is listed and I have the website linked! I hope you like this look, If you enjoyed, don't forget to Like & Subscribe on Youtube
xoxo Lulu


My go-to base:
Primer: Revolution X Fortnite Supply Llama Dewy Swirl Primer
Foundation: ColourPop No Filter Foundation [fair 05]
Concealer: Too Faced Born This Way Super Coverage Concealer; Cloud
Powder: Revolution X Fortnite Peely Banana Light Baking Powder
Bronzer: Revolution X Fortnite Face Palette
Blush: Revolution X Fortnite Face Palette
Highlight: Revolution X Fortnite Face Palette
Setting Spray: Revolution X Fortnite Peely Fixing Spray
Lip Gloss: Makeup Revolution X Fortnite Peely Banana Lip Oil

Tools used from the Collection:
Revolution X Fortnite Trio Sponge Set
Revolution X Fortnite Trio Brush Set


Makeup Revolution x Fortnite Collection! Peely set!
Eyes:
Eyeshadow Primer: Too Faced Born This Way Super Coverage Concealer; Cloud
Palette: Makeup Revolution X Fortnite Peely 9 Pan Eyeshadow Palette
     - Potassius
     -  P33ly
     - Unpeely
     - Golden Agent
     - Banana Rift
Eyeshadow Primer: NYX Glitter Primer
Eyeliner: Trestique Eyeliner; Santorini Black Sand
Mascara: Makeup Revolution X Fortnite Peely Banana Lash Mascara
Brow Pencil: Billion Dollar Brows, Brows On Point: Micro Brow Pencil; Taupe
Brow Gel: ColourPop Brow Boss Gel; Clear
Makeup Revolution x Fortnite Collection! Peely set!


Thank You from checking out this post!
Xoxo, Lulu

Morphe x Jaclyn Hill Dark Magic Eyeshadow Palette tutorial

Morphe x Jaclyn Hill Dark Magic Eyeshadow Palette
 Dark Magic Eyeshadow Palette Tutorial


Hello everyone! Today I have a simple makeup tutorial for you using the Morphe x Jaclyn Hill Dark Magic Eyeshadow Palette! I don't believe this palette is still for sale, but you can get this look using similar eyeshadow shades! I did the whole look with 5 eyeshadows from the palette. With it being a more neutral look, I was able to work in a pop of green and keep it on the more natural side! I have a YouTube short of the eyeshadow and a video of the full makeup look uploaded for you to check out and watch the process. 

Thank you so much for stopping by! I appreciate you!
Xoxo, Lulu


Follow me everywhere;

Here's the Short:

Full Video: 


My go-to base:
Foundation: Becca Ultimate Coverage 24-hour Foundation; Linen [Discontinued brand]
Concealer: Too Faced Born This Way Super Coverage Concealer; Cloud
& ColourPop No Filter Concealer; Light 10
Powder: Beauty Bakerie Face Flour Baking Powder; Oat / Translucent
Bronzer: Hanalei Matte Bronzer
Blush: ColourPop Lizzie McGuire Collection; You Are Magnifico
Highlight: Revlon SkinLights Prismatic Highlighter; Daybreak Glimmer
Setting Spray: Urban Decay All Nighter Ultra Matte Setting Spray
Lipstick: Trestique Matte Lip Crayon; Florence Fig

Eye Look:
Primer: Pretty Vulgar 
Palette: Morphe x Jaclyn Hill Dark Magic Palette;
     - Shhh (A medium warm brown shade)
     - Poof (A cream tone shade)
     - Mojo (A dark chocolate brown shade)
     - Power Cut (A metallic silver / light brown shade)
     - Trickery (A metallic dark green shade)
Eyeliner: Trestique Eyeliner; Santorini Black Sand
Mascara: L'Oreal Lash Paradise Waterproof Mascara; Black
Brow Pencil: Billion Dollar Brows, Brows On Point: Micro Brow Pencil; Taupe
Brow Gel: ColourPop Brow Boss Gel; Clear

Taylor Swift Debut Album Inspired Makeup Tutorial

Taylor Swift Debut Album Inspired Makeup Tutorial

Taylor Swift Debut Album Inspired Makeup Tutorial

Hello! I'm back with another Taylor Swift album inspired makeup tutorial! This time I went back to the beginning with her Debut album. The greens and blues in the albums photoshoot and album artwork are so pretty. I'm  not someone who normally wears cool tones on my eyes, like greens and blues, but I had to for this look! I think this look is pretty easy to do as well. It's a lot less intimidating than it looks! Let's get into it!


The Morphe x Jaclyn Hill Eyeshadow Palette

Shades Used;

ROW 1:
Enlight / satin oat milk

ROW 5:
Pool Party / shimmering turquoise
Jada / matte teal
Diva / shimmering emerald
Enchanted / matte forest green


Starting out this look, I primed my eyelids with my concealer and set it with my setting powder. I'm going to have everything I used listed below! I did this eyeshadow look before I did my foundation or anything because I knew I was going to make a mess of my whole face lol. Starting out in the crease on a big fluffy blending brush, I took the shade Jada and blew it out all over the lid, stopping a little below the brow bone. To soften that edge, I took a smaller blending brush and blended the edge out with the shade Enlight. Deepening up the outer crease I took the shade Enchanted on a smaller blending brush, creating more of a V shape. On a flat packing brush I took the shimmer shade Pool Party and packed it on the inner 2/3's of the lid. Continuing to deepen up the outer 3rd of the lid, I used the shade Diva and packed it on, blending the two shimmer shade together. Then I cleaned everything up and sharpened the edge with a cotton round and micellar water!

Thank you so much for stopping by! I hope you enjoyed the tutorial. Make sure you follow me on my other social media platforms! I post videos almost daily!
Xoxo, Lulu


My go-to base:
Foundation: Becca Ultimate Coverage 24-hour Foundation; Linen [Discontinued brand]
Concealer: Too Faced Born This Way Super Coverage Concealer; Cloud
& ColourPop No Filter Concealer; Light 10
Powder: Beauty Bakerie Face Flour Baking Powder; Oat / Translucent
Bronzer: Hanalei Matte Bronzer
Blush: ColourPop Lizzie McGuire Collection; You Are Magnifico
Highlight: Revlon SkinLights Prismatic Highlighter; Daybreak Glimmer
Setting Spray: Urban Decay All Nighter Ultra Matte Setting Spray
Lipstick: Trestique Matte Lip Crayon; Florence Fig & Nantucket Nude

Eyes:
Palette: The Morphe x Jaclyn Hill Eyeshadow Palette
Eyeliner: Trestique Eyeliner; Santorini Black Sand
Mascara: Essence Lash Princess, False Lash Effect Waterproof Mascara; Black
Brow Pencil: Billion Dollar Brows, Brows On Point: Micro Brow Pencil; Taupe
Brow Gel: ColourPop Brow Boss Gel; Clear
Fake Lashes: Ardell Wispies; 113
Lash Glue: Lavaa Eyelash Adhesive, Latex Free, Waterproof, Clear

Taylor Swift Lavender Haze Inspired Makeup tutorial

Taylor Swift Lavender Haze Inspired Makeup tutorial

Taylor Swift's Lavender Haze Inspired Makeup tutorial
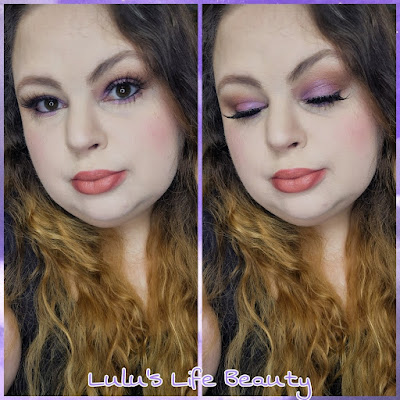
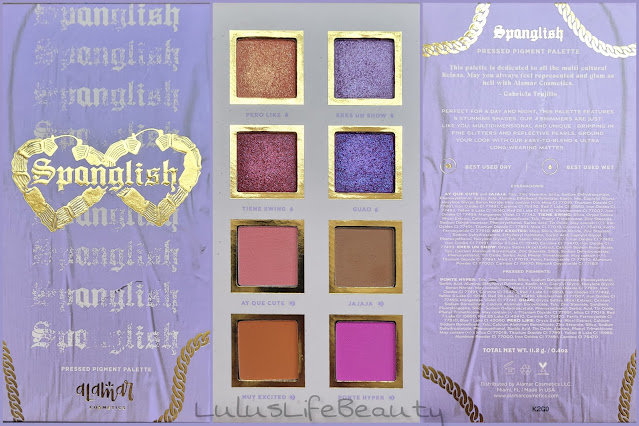
    Hello everyone! It's been a weird time but I'm back and better than ever! I filmed an eye makeup look inspire by the new Taylor Swift song Lavender Haze! I love Taylor's music and have since the MySpace days lol. I felt like I should mix my love of Taylor Swift & Makeup, and do some makeup looks inspired by her songs and albums! This look in particular ended up being super simple! Let's get into it! For the eyes, I used the Alamar Cosmetics Spanglish Pressed Pigment Palette! The really cool thing about this palette is there's little symbols showing which shadows are best used dry and best used wet! You can basically turn the shimmer / metallic shades into cream eyeshadows. UPDATE! She just announced the music video comes out tonight (Friday, January 27th) at Midnight (of course because what other time would she even drop something from the Midnights album?!)!! Another makeup tutorial inspired by the music video may be coming soon!!!

Alamar Cosmetics Spanglish Pressed Pigment Palette

    Starting out this makeup look I used the shade Ja Ja Ja all through the crease and smoked it out to make it super soft and blended out. I went in and added extra to the outer corner and crease to concentrate the color and depth! For the inner 2/3 of the lid I used the shade Erus Un Show, wet with a packing brush and brought it just above the crease  and used some dry to soften the edge. For the outer corner I took the shade Guao, wet and packed it on, blending it in with the lid shade. That's literally it too, It's such a simple and beautiful look. I'm obsessed with this palette, it's so pigmented, the shimmers are so shiny and beautiful! Thank you so much for stopping by, I hope you enjoy the tutorial! I linked the palette, Just click the picture of it! No affiliation, just a helpful link. 

Xoxo,
Lulu

My go-to base:

Foundation: Becca Ultimate Coverage 24-hour Foundation; Linen [Discontinued brand]
Concealer: Too Faced Born This Way Super Coverage Concealer; Cloud
& ColourPop No Filter Concealer; Light 10
Powder: Beauty Bakerie Face Flour Baking Powder; Oat / Translucent
Bronzer: Hanalei Matte Bronzer
Blush: ColourPop Lizzie McGuire Collection; You Are Magnifico
Highlight: Revlon SkinLights Prismatic Highlighter; Daybreak Glimmer
Setting Spray: Urban Decay All Nighter Ultra Matte Setting Spray
Lipstick: Trestique Matte Lip Crayon; Florence Fig & Nantucket Nude

Eyes:

Palette: Alamar Cosmetics Spanglish Pressed Pigment Palette
Eyeliner: Trestique Eyeliner; Santorini Black Sand
Mascara: Essence Lash Princess, False Lash Effect Waterproof Mascara; Black
Brow Pencil: Billion Dollar Brows, Brows On Point: Micro Brow Pencil; Taupe
Brow Gel: ColourPop Brow Boss Gel; Clear
Fake Lashes: Ardell Wispies; 113
Lash Glue: Lavaa Eyelash Adhesive, Latex Free, Waterproof, Clear

TikTok and Instagram updates!

Hello!!

Lately I've been posting short form beauty content on TikTok and Instagram! I'm trying to hit the required followers to monetize my videos! I need 10k on Instagram and TikTok. If you'd be so kind to drop a follow on one or both if appreciate it so much!!! I have the links below, or look up LulusLifeBeauty. These are some recent looks I've posted! Drop a like and a follow please! <3 

Simple makeup lookTeal and Brown eyeshadow


Also, would you like the videos posted here as well and the list of products used below? Testing out some new ways of posting beauty content.

Warm Autumnal Tutorial

Hello everyone and welcome back to my blog. As it's now the end of October and we're really into the autumnal season, it's time for me to do all of my favorite fall makeup looks! This is my favorite time of year! Let's just hope and pray I'm not covered in hives all fall and winter this year, like I was last year ugh. Let's get into this look!

Starting out this look I did my base, all of the products will be down below! I primed my eyelids with foundation for this look. I've been doing that a lot lately and it's been holding up all day so much better than the eye primer I was using. For this look, I used two of the Jaclyn Hill Vault palettes!

Palettes Used:
Jaclyn Hill Vault: Bling Boss
Shades: Bling Bling, Hush Hush, Spark, Rockstar
Jaclyn Hill Vault: Ring The Alarm
Shades: Lolli, Siren


On a big fluffy brush I took Hush Hush and blew it out in the crease to start out a smooth base for the rest of the crease colors. On a smaller tapered natural fiber brush I took Spark and Rockstar and blended them through the crease, taking it almost all the way to the inner corner. To darken the outer corner, I picked up Siren and some Spark and kept them pretty tight in the corner and a little in the crease to help blend everything. I cleaned off my big fluffy brush and buffed the edges of everything out to create more of a hazy blended look. On the lid I used my fingers to pat on and blend out Lolli in the edge of the outer crease towards the inner corner, the I took Bling Bling and patted it from the inner corner, about half way in. I was in a rush to a wedding this day and completely forgot to put anything on my bottom lash line! I would of used some of Spark and a little of Bling Bling to brighten the year duct.


These are some of my favorite colors to work with! I'm kind of spooked by cool tones, but warm tones are my favorite! I have green rings an a weird green spot in my eyes and warm tones really help the green pop! I know I haven't been blogging much, I was going through a lot of things inside myself. Self hatred and feeling not good enough or like I'm not going to go anywhere with my career I'm trying to build. I'm doing better about all the self loathing, and I'm going to be putting more effort into myself and my website! I post a lot more on Instagram if you want to keep updated! My Instagram is Luluslifebeauty!


Products used:
Face:
Colourpop No Filter / Morphe (mixed 50/50)
Morphe Concealer
Makeup Revolution, Baking Powder, Translucent
Elf Contour Palette
L.a. Color Blush Brick, Glow
Elf Highlight kit (golden yellow color)
Essence, Pure Nude, Spacelighter (iridescent pink shift)

Eyes:
Jaclyn Hill, Bling Boss
Jaclyn Hill, Ring The Alarm
Essence Waterproof Eyeliner
Maybelline Greatlash Waterproof Mascara
Drugstore Brown / Black Brow Pencil

Lips: 
J.Cat Beauty Lipfinity Kiss-Proof Liquid Lip, Champagne Buzz

Brushes / Tools: 
Real Techniques Foundation Sponge
SIXPLUS 15pc Brush Set
BH Cosmetics, Royal Affair Brush Set

Find me elsewhere:

Purple Royalty Smokey Eye - Jaclyn Hill Palette


Purple Royalty Smokey Eye Jaclyn Hill Palette

Hello everyone and welcome back to my website! Today is another tutorial using the original Jaclyn Hill palette! I've been wanting to dive into Royalty and Twerk, so that's exactly what I did. I think this tutorial is pretty easy to follow a long with. I used minimal colors and tried making sure it wasn't hard. Now I am pretty annoyed that I could not get good photo's of this eye look, Either it was too dark and wasn't showing the color's in the eyeshadow, or everything was super washed out and making the black eyeshadow look kind of gray. So we went with the photo's that were too bright, because at least you can see the colors I put on my lid!


Starting out this look I primed my lids using my Wet n Wild Photofocus Eyeshadow Primer and left it tacky to help the eye shadows stick and be a little more pigmented. These shadows don’t need any help with pigmentation but it also helps with the longevity of the eyeshadow on your eyes. Picking up the shade Pukey on a big blending brush I buffed it all over the outer corner, about two thirds of the way in. Next up I used a smaller / medium blending brush and the shade Central Park and blended it tighter in the crease, focusing on the outer third of the lid. Taking a flat shader brush, I picked up Abyss and created the outer corner shape while also just packing on a bunch of the black eyeshadow. I then dragged the black under my bottom lash line and faded it into some of the shade Pukey. For the lid, I didn't bother cutting the crease, I picked up Royalty on my finger and swiped it across my lid two thirds of the way in. On the center on the lid, again on my finger, I picked up Twerk and patted it on. Mixing Royalty with Twerk was such a good decision. It created almost a duo chrome look and I'm obsessed! On the brow bone and inner corner, I patted on Beam with a smaller pencil brush!

Thank you all so much for stopping by and checking out this tutorial. As you can see, this is a pretty simple look. It turned out so pretty, I just wish I had better photos of the look. I love a dark smoky look! It makes the green in my eyes pop more. If you enjoyed this tutorial, please feel free to share it and check out my social medias. Especially my Instagram, I post more looks over there! LulusLifeBeauty on Instagram, I recently hit 1k and I'm trying to hit 5k by May 5th, Which is my birthday! Please help me make this goal a reality!
Xoxo Lulu


Products used today. 
Eyes: 
Wet n Wild Photofocus Eye Primer
Morphe x Jaclyn Hill Palette
Essence Kajal Eye Pencil, Black
Broadway Beauty eyebrow pencil, brown / black
Maybelline Great Lash, Clear, Brows
Maybelline Great Lash, Black, Waterproof

Face: 
(Foundations mixed 1:1)
Revlon Colorstay Foundation, 200 Nude
Maybelline Matte & Poreless, 110 Porcelain
Morphe Fluidity Full-Coverage Concealer, C1.25
Makeup Revolution, Baking Powder, Translucent
Elf Contour Palette
Maybelline, Fit Me Blush, Mauve

Highlight: 
E.L.F. Cosmetics Highlighting set (It's a light golden yellow, had no name.)

Lips:
Maybelline; Super Stay; Matte Ink; Loyalist

Brushes / Tools:
Real Techniques Foundation Sponge
SIXPLUS 15pc Brush Set
BH Cosmetics, Royal Affair Brush Set

Find me elsewhere:

Romantic Mauve - Jaclyn Hill Bling Boss Palette


Jaclyn Hill Bling Boss Palette

Hello everyone and welcome back to my website! Today I played in the Jaclyn Hill Bling Boss palette from her Vault collection! The color story is right up my alley! Berries, Pinks, Purples and Mauve's are my literal comfort zone! I don't think I'm going to do much of a review of this collection, because everyone has reviewed the Jaclyn Hill Vault Collection. We all know the palettes are buttery, pigmented and beautiful. There's four palettes and they each have their own vibe, tone and theme! These palettes are going to push my boundaries. I hate stepping out of my comfort zone, but I'm going to be doing that very soon. Kind of funny story, I originally went in with the Dark Magic palette the evening I did this makeup look. I was going in with the greens, trying to do a fun St. Patrick's day look, But I got real spooked and was scared to go to iHop with green eyeshadow on. I mean, can anyone else relate? I love bright colors, But i'm scared of blues and greens... Alright, let's get into the Jaclyn Hill Bling Boss Tutorial. By the way, There are so many looks you can do with this palette, this is just my first time playing in the palette!


To start out this eye look, I primed my eyelids with the Wet n Wild Photofocus eyeshadow primer and set it with the Makeup Revolution Baking Powder in Translucent. On a nice and fluffy blending brush I picked up the shade Hush Hush and blew it out all over the lid, inner corner to outer corner and to the brow bone. I absolutely love a good mauve eyeshadow! On a more normal size blending brush I picked up Rockstar and ran it through the crease and outer third of the lid, trying to keep the lid a little less smoky, but I got carried away! I wanted to darken up the outer crease a little more so I picked up a tiny bit of Mystic and really focused it in the outer edge of the lid. I brought it about a third of the way on the bottom lash line. For the pop of beautiful shimmer on the lid, I picked up Bling Bling on a flat shader brush with a little spray to intensify the metallic-ness of the pink. On the brow bone and inner corner, I cheated a little and used the shade VIP from the Armed & Gorgeous palette. Such a beautiful frosty white, I imagine this color being insanely blinding if you use it with a setting spray!


That is it for this Jaclyn Hill Bling Boss Palette tutorial, It's such a simple look that's also super pretty. I see this eyeshadow look being a soft romantic vibe. I just crave these kinds of looks, no matter the occasion, the day or the time, I know a look like this will have me feeling confident. Also I don't know if it's just me but pinks, mauve's and burgundy shades seem to make the green in my eyes pop a lot more. My eyes tend to look more brown, unless I wear certain eyeshadow colors! Thank you so much for checking out this tutorial. I'm sorry for always being a rambley mess! 


Follow me on Instagram! @LulusLifeBeauty


Products used today. 
Eyes: 
Wet n Wild Photofocus Eye Primer
Morphe x Jaclyn Hill Bling Boss Palette
Essence Kajal Eye Pencil, Black
Broadway Beauty eyebrow pencil, brown / black
Maybelline Great Lash, Clear, Brows
Maybelline Great Lash, Black, Waterproof

Face: 
(Foundations mixed 1:1)
Revlon Colorstay Foundation, 200 Nude
Maybelline Matte & Poreless, 110 Porcelain
Morphe Fluidity Full-Coverage Concealer, C1.25
Makeup Revolution, Baking Powder, Translucent
Elf Contour Palette
Maybelline, Fit Me Blush, Mauve

Highlight: 
E.L.F. Cosmetics Highlighting set (It's a light golden yellow, had no name.)

Lips:
Maybelline; Super Stay; Matte Ink; Loyalist

Brushes / Tools:
Real Techniques Foundation Sponge
SIXPLUS 15pc Brush Set
BH Cosmetics, Royal Affair Brush Set

Find me elsewhere:
Youtube: https://www.youtube.com/user/LINDAxHELLA
Twitter: https://twitter.com/Luluslife_blog
Instagram: https://www.instagram.com/LulusLifeBeauty/
Facebook: https://www.facebook.com/Lulus-Life-Blog
Pinterest: https://www.pinterest.com/lindaxhella/pins/
Tumblr: http://lindaxwoods.tumblr.com/

Spring Vibes - Jaclyn Hill Palette Tutorial

Jaclyn Hill Palette Tutorial - Overview


Hello everyone and welcome back to my website. Today I have the original Jaclyn Hill Palette! I know it's going to be two years old in June or July, But I finally just got it. It's not for a lack of wanting it or anything like that. I was never able to afford it till now. I also got her vault collection and I'll have tutorials for each of those as well. I'm so excited for all of the tutorials I'll have going up over the next month or so... I already I one of those done, I just have to write it... After I'm done with this post! The look I did with this palette, I know I know, It's kind of underwhelming! I was so panicked by all of  the beautiful colors that I just didn't know what to do or where to begin! So I went with a warm toned kind of smokey eye with a super shimmery baby pink lid color. Lets get started boi's!
Starting out this eye look, I primed my lids with the Wet n Wild Photofocus Eyeshadow Primer, and set it with the Makeup Revolution Baking Powder in Translucent. I decided to set my lid with this look because I wanted to see how pigmented the shadows were without a sticky base. Going into the Jaclyn Hill Palette I started off with the shade Pukey and brought it almost all the way into the inner corner on a bigger fluffy brush. I went in twice with it, bring it up a little bit higher for more of a blown out look. To deepen up the crease I tapped into Roxanne and kept it more in the outer third, blending it lower and keeping it focused in the outer corner. I ran Pukey and Roxanne lightly under the lash line, blowing Pukey out a little more, keeping Roxanne tighter to prevent it from looking too dark. On the lid I took a flat shader brush and some spray and picked up the shade Sissy, and put it all over two thirds of my lid, slightly blending it into the outer third. I also brought it on the lower lashline about a third of the way in. On the inner corner and brow bone I used the shade Beam.


Thank you all so much for stopping by, please feel free to share this post! Just a little wrap up here, I love this palette. Oh my god, the mattes are soft, creamy, blendable and pigmented! The shimmers are so buttery and pigmented. I can't wait to play in the Jaclyn Hill palette again, But I also have other new palettes and I want to try all of them out more. My next look with this palette is going to involve Royalty and Twerk! I don't know how I'm going to do it, but i'm using both of them together somehow! There are endless color combinations and looks that can be done with it. I'm so beyond happy the Jaclyn Hill palette wasn't sold for a limited time!
Products used today.
Eyes: 

Wet n Wild Photofocus Eye Primer
Morphe x Jaclyn Hill Palette
Essence Kajal Eye Pencil, Black
Broadway Beauty eyebrow pencil, brown / black
Maybelline Great Lash, Clear, Brows
Maybelline Great Lash, Black, Waterproof

Face: 
Morphe Fluidity Full-Coverage Foundation, F1.50
Morphe Fluidity Full-Coverage Concealer, C1.25
Makeup Revolution, Baking Powder, Translucent
Elf Contour Palette
Maybelline, Fit Me Blush, Mauve

Highlight: 
E.L.F. Cosmetics Highlighting set (It's a light golden yellow, had no name.)
Maybelline Master Chrome, Molten Gold

Lips: 
Maybelline Color Sensational Lipstick, Romantic Rose

Brushes / Tools:
Real Techniques Foundation Sponge
BH Cosmetics, Royal Affair Brush Set
SIXPLUS 15pc Brush set

Find me elsewhere:
Youtube: https://www.youtube.com/user/LINDAxHELLA
Twitter: https://twitter.com/Luluslife_blog
Instagram: https://www.instagram.com/LulusLifeBeauty/
Facebook: https://www.facebook.com/Lulus-Life-Blog
Pinterest: https://www.pinterest.com/lindaxhella/pins/
Tumblr: http://lindaxwoods.tumblr.com/

Golden Smokey - Morphe Bronze Goals 35G Palette


Morphe Bronze Goals

Tutorial & Review


Hello everyone and welcome back to my website! Today I have a tutorial and review using the new Morphe Bronze Goals 35G palette! I bought this palette in Ulta on a whim, I hadn’t heard anything about it, nor had I even heard Morphe dropped a new palette! I was so sucked in by all of the browns, bronze, gold’s, coppers and pops of burgundy shades. I just had to pick it up. This palette is pretty dark as well. There aren’t many lighter shades. So if you like to set your lid before applying eyeshadow, you’ll have to use either your setting powder, or a shade from another palette that matches your skin tone. That’s the one down side I’ve noticed off the bat. Let's get into the tutorial first, it's pretty simple!


Tutorial Using Morphe Bronze Goals 35G Palette:
Starting out this tutorial, I primed my eye lids with my Wet n Wild Photofocus primer and set it with the Makeup Revolution Translucent Baking Powder. Going in with the Morphe Bronze Goals 35G Palette, on a bigger blending brush, I took the shade Sandy and brought it from the outer corner all the way through the crease, building up the warmth. On the same brush, I picked up Nekked and Equator and buffed them into more of the outer corner, bring it in the crease about a third of the way. Going into the copper shade, Summer Vibes, I picked it up on my finger and swiped it across the lid about two thirds of the way over. I felt it was looking kind of dark, so I picked up the shade Sol on a finger and patted it in the middle of the lid, making sure to blend the edges as I went. On the bottom lash line, I used a combination of Sandy & Nekked and softly blended them out, using Glare on the inner third, inner corner and brow bone. As you can see, The colors are beautiful! I do have a few things to say about the formulas on some of them, so lets get into the review of the palette.


Review of Morphe Bronze Goals 35G Palette:
Let's talk about the formula of the matte shades in the Morphe Bronze Goals 35G Palette! I went through and swatched all of the shades and checked how they felt and the opacity of each of them. The mattes are pigmented, smooth and just beautiful browns. The black is so pigmented and beautiful, I was a little shocked at how good it was, to be honest. There's a really good mix of lighter and darker browns, as well as cool and warm tones. 

Now on to the shimmer shades in the Morphe Bronze Goals 35G Palette! I had some trouble getting pay off on a lot of them. It seems like their formulation is a little dry and definitely could of used more oils in them. They work beautiful if you use your finger, I did have some trouble getting pay off with a wet synthetic brush. Using a wet natural fiber brush on the other hand had really good pay off, again, when wet. They really don't pick up well on a dry brush. 

Overall my final thoughts on the Morphe Bronze Goals 35G Palette, despite the issues with the shimmer shades, I still highly recommend this palette. The mattes are creamy and blendable. The shimmers go on beautiful with a finger, as long as I can make them work without it being a fight, I honestly don't mind. Keep that into consideration. If that's something that you don't like to deal with, then maybe skip this on. But the colors alone make the palette 100% worth it. Not to mention this palette is 35 shades for only $25.00!

Thank you all so much for stopping by to check out this tutorial and review on the Morphe Bronze Goals 35G Palette! If you want to see me use any shades particularly, let me know! This palette is so pretty and I can't wait to play in it next! Should I go cool or warm? Bronze, Gold or Burgundy or Pinkish. As always I will have everything I used in the tutorial, listed below! Follow me on Instagram! LulusLifeBeauty ;)

Vic Cosmetics
Here is the makeup look with three different lip colors. In these pictures, I'm demoing 3 sample lip colors I received from my daughter who works for the up and coming company VIC Cosmetics! The mattes are super pigmented, creamy and thin. They are not sticky or patchy and last a long time! The two glosses are a plumping kind of gloss and I love them! The pink one has a gold shimmer and the wine colored one has no shimmer and does stain which I Love!!! I'm so scared to wear bold colors on my lips but this is a color i'll be wearing a lot more often. I'm going to have to purchase a full size plumping gloss asap! I'm going to leave my daughters link so you can order from her! They are a new company and coming out with some amazing stuff! Definitely check out their new mascara! 


Products used today.
Eyes: 

Wet n Wild Photofocus Eye Primer
Morphe Bronze Goals 35G Palette
Essence Kajal Eye Pencil, Black
Broadway Beauty eyebrow pencil, brown / black
Maybelline Great Lash, Clear, Brows
Maybelline Great Lash, Black, Waterproof

Face: 
(Foundations mixed 1:1)
Revlon Colorstay Foundation, 200 Nude
Maybelline Matte & Poreless, 110 Porcelain
Morphe Fluidity Full-Coverage Concealer, C1.25
Makeup Revolution, Baking Powder, Translucent
Elf Contour Palette
Maybelline, Fit Me Blush, Mauve

Highlight: E.L.F. Cosmetics Highlighting set (It's a light golden yellow, had no name.)

Lips: Black Cherry Glaze [Stained from the plumping gloss]

Brushes / Tools:
Real Techniques Foundation Sponge
SIXPLUS 15pc Brush Set
BH Cosmetics, Royal Affair Brush Set

Find me elsewhere:
Youtube: https://www.youtube.com/user/LINDAxHELLA
Twitter: https://twitter.com/Luluslife_blog
Instagram: https://www.instagram.com/LulusLifeBeauty/
Facebook: https://www.facebook.com/Lulus-Life-Blog
Pinterest: https://www.pinterest.com/lindaxhella/pins/
Tumblr: http://lindaxwoods.tumblr.com/

Sunrise Eyes Tutorial (a year later)

Sunrise Eyes Tutorial

Sunrise Eyes Tutorial 

(a year later)

Hello everyone and welcome back to my website! Today's eyeshadow tutorial I have for you was one I was super excited to do! About a year ago I did a similar look using the BH Cosmetics Take Me Back to Brazil palette, which turned out beautiful. I decided to give it a second attempt, using the James Charles x Morphe palette! With the difference in quality of the eyeshadows and my skills improving, I thought it'd be a fun idea! I did do this look about two weeks ago and honestly forgot I had done it and realized it a few days ago. This look is so much more pigmented and blown out looking. It does look like it has less purple, but that's due to the lighting being a little weird and the purple being taken over by the red lol. In the regular selfie (not the close up) you can see more of the purple! Let's get into this boi's!


Sunrise Eyes Tutorial

Stating out the look, I primed my eyelids with the Wet n Wild Photofocus Eye Primer. A tacky base makes all the world of difference when using this palette! Concealer does this weird thing with the pigments and makes them go dark. Here in the image of the palette, I have all 6 shades I used circled and numbered to make things a little easier. On a large blending brush I picked up the shade Bee (1) and backed it into the outer corner and the buffed it out almost to the brow bone. Leave a little room so you have space to put a highlight shade. On a medium size blending brush, I picked up 518 & You're Kidding (2 and 3) and blew them out on the crease, making sure the yellow was still visible. On a flat shader brush I picked up Love That (4) and packed it all over the lid, avoiding the outer corner. On a smaller blending brush I blended the edges of Love That into the crease. I then used it to pick up the shade Escape (5) and darkened up the outer corner to bring in some more depth. On a pencil brush I picked up Ring Light (6) and put it on the brow bone and inner corner. Using the same pencil brush, I took Escape and Ring Light and put them on the bottom lash line, blending them into each other!


Sunrise Eyes Tutorial

That is the final look for the eyes! The rest of my face I did like I normally do, Which you can see me do in any of my YouTube videos! Linked below. I hope you love this look as much as I do. If you want to recreate this look, Tag me on social media! I'd love to see that yours turns out! Please remember to follow me on social media, I just hit 1k on Instagram and i'm so excited! 
Xoxo Lulu.


Products used today.
Eyes: 

Wet n Wild Photofocus Eye Primer
James Charles x Morphe palette
Essence Kajal Eye Pencil, Black
Broadway Beauty eyebrow pencil, brown / black
Maybelline Great Lash, Clear, Brows
Maybelline Great Lash, Black, Waterproof

Face: 
(Foundations mixed 1:1)
Revlon Colorstay Foundation, 200 Nude
Maybelline Matte & Poreless, 110 Porcelain
Makeup Revolution Concealer, C3
Makeup Revolution, Baking Powder, Lace
Elf Contour Palette
Ulta Beauty Blush, Tiger Lily / Sweet Pea duo

Highlight: Wet n Wild Megaglo, Precious Petals

Lips: Maybelline Color Sensational, Romantic Rose

Brushes / Tools:
Real Techniques Foundation Sponge
BH Cosmetics, Royal Affair Brush Set

Find me elsewhere:
Youtube: https://www.youtube.com/user/LINDAxHELLA
Twitter: https://twitter.com/Luluslife_blog
Instagram: https://www.instagram.com/LulusLifeBeauty/
Facebook: https://www.facebook.com/Lulus-Life-Blog
Pinterest: https://www.pinterest.com/lindaxhella/pins/
Tumblr: http://lindaxwoods.tumblr.com/

James Charles Palette | Skip & Artistry Tutorial

James Charles Palette | Skip & Artistry Tutorial


Hello everyone and welcome back to my website! Today I have another makeup tutorial for you in the form of a YouTube video! I have been really enjoying filming and I hope you're enjoying the videos and update in content. I'm sorry I keep using the new James Charles palette, but IT'S SO GOOD!!!!! I will try to switch up some more products for the next look and probably film that as well. As much as I love writing, i've been finding filming so much fun. I bet you're enjoying being able to visually see how i'm doing my makeup, rather than reading. If you prefer to read, rather than watching a video, let me know in the comments down below! I'm new to filming and editing so just give me some time to get better. I just discovered how to add text to the clips. I'm using Windows Movie Maker, It's simple and free. I'll eventually upgrade to something with more effects and pizzazz!
Xoxo Lulu


 Here I have all of the shades that I used, Marked with little  purple hearts for reference!

Products used today.
Eyes:
Wet n Wild Photofocus Eyeshadow primer
Morphe x James Charles Palette
Essence Kajal Eye Pencil, Black
Broadway Beauty eyebrow pencil, brown / black
Maybelline Great Lash Mascara; Clear (Brows)
Maybelline Great Lash Mascara; Waterproof; Black

Face:
Nivea Creme (For moisture and primer) (before recording)
Wet n Wild Photofocus Foundation; Nude Ivory
Makeup Revolution Conceal & Full Coverage Concealer; C3
Makeup Revolution Baking Powder; Lace
Elf Contour Palette
Ulta Beauty Blushes; Tiger Lily & Flush
Mario Badescu; Facial Spray With Aloe, Herbs and Rosewater

Highlight:
Wet n Wild; Mega Glow, Precious Petals

Lips:
Maybelline Color Sensational, Romantic Rose

Brushes / Tools:
Generic Natural Fiber Blending Brush
Generic Flat Small Cream Brush
Generic Blending Brush
Real Techniques Foundation Sponge
Pueen Large Powder Brush
Pueen Angled Blush Brush
Elf Highlighting Brush

Bronze Holiday Makeup! | James Charles X Morphe


Hello everyone and welcome back to my blog! Today's tutorial is filmed! It's not my best work, my eyelids were being rude, causing patchiness from my eyelids having looser skin on them. If anyone know of any food skin firming creams, Hit me up!! I'm using the new James Charles X Morphe palette for the second time. I really hope you enjoy this look as much as I do. It would be great to wear this holiday season. The golden bronze is so shimmery and beautiful! Everything is listed down below. Including Products, Tools and social media. Please subscribe to my YouTube channel! I'm going to be uploading weekly!!

Xoxo Lulu


Products used:
Eyes:
Wet N Wild; Photofocus eye primer
James Charles x Morphe; Unleash Your Inner Artist Palette
Maybelline; Great Lash; Waterproof
Essence Black Pencil Liner
Broadway Beauty Eyebrow Pencil; Brown / Black
Maybelline; Great Lash; Clear (brows)

Face:
[My foundations are mixed evenly.]
Maybelline Matte & Poreless 120
Revlon Colorstay, combo skin, 200
Makeup Revolution; Conceal & Define Full Coverage Conceal & Contour, C3
Makeup Revolution; Lace Baking Powder
Elf Contour Kit
Blush; [self made]
Mario Badescu; Facial Spray With Aloe, Herbs and Rosewater

Highlight: 
James Charles x Morphe; Unleash Your Inner Artist Palette; Face

Lips:
L.A. Colors Matte Liquid Lip Color; Vixen

Brushes / Tools:
Real Techniques, Miracle Complexion Sponge
Pueen Large Powder Brush
Pueen Angled Blush Brush
Generic Flat Packing Brush
Generic Brand Fan Brush
Generic Flat Angled Shader Brush
Generic Natural Fiber Blending Brush
Generic Fluffy Brush

Find me elsewhere: 

James Charles, Escape Makeup Tutorial!

James Charles x Morphe; Unleash Your Inner Artist Palette
Hello everyone and welcome back to my blog! Today i'm posting my very first look using the new James Charles Palette! I had to wait till the second Morphe relaunch to actually buy it. It kept selling out everywhere! I was on my phone in the middle of the car dealership, debit card in hand, just waiting! We got one boi's! I ordered it on Thursday, December 6th, I received it on Sunday, December 9th. For whatever reason, this time a year if you have packages, the local post office will drop them off even on Sunday's and national holiday's. One thing i'm kind of sad about is that when it came, I had no clue what it was... The Morphe box was inside out. How does this happen? Other than that I love this palette so far. I've only used it for one look and everything went so smoothly!


James Charles x Morphe; Unleash Your Inner Artist PaletteStarting out this makeup look I primed my eyes using the Wet n Wild Photofocus primer, This is the first time i'm using it and really like it. It's super smooth. My eyes have stayed pigmented and creaseless for hours. On a packed blending brush, I picked up Escape and packed on my outer corner and into my crease. I only had to pick up the shade twice to get full pigmentation! It looked really messy, but it's all part of the process. Wiping off the brush and picking up a mix of Skip & Pinkity Drinkity, I used them to help blend out the edges and add some warmth to the cooler dark purple. I picked up more Pinkity Drinkity to blend up to the brow bone and soften up everything further. Cutting the crease I took a flat synthetic and my Makeup Revolution concealer in C3 and painted on a thin later making sure to get as straight of a line as I could. Onto the concealer I used a angled eyeshadow brush and packed on Artistry. This by far is one of my favorite colors! It's a soft lavender with a pink to blue shift. It's everything I've ever wanted in a shimmery eyeshadow! I almost forgot to add that I put Spooky on the outer 2/3 of my bottom lash line, on the inner third I used Artistry again, and on the inner corner I used Ring Light.

James Charles x Morphe; Unleash Your Inner Artist Palette

Thank you all so much for stopping by and checking out my website! I hope you did enjoy this tutorial! Down below make sure to check the list of products, tools and social media links... Can I just mention real fast that we are almost to 115K views!!! That is amazing. I appreciate all of the views and clicks, Don't forget I do have a YouTube channel, I'm going to start posting more soon. Let me know in the comments down below what you want to see from me, here on my website and on YouTube!!
Xoxo Lulu


Products used:
Eyes:
Wet N Wild; Photofocus eye primer
James Charles x Morphe; Unleash Your Inner Artist Palette
Maybelline; Great Lash; Waterproof
Essence Black Pencil Liner
Broadway Beauty Eyebrow Pencil; Brown / Black
Maybelline; Great Lash; Clear (brows)

Face:
[My foundations are mixed evenly.]
Wet N Wild Photofocus Foundation; 363C, Nude Ivory
Makeup Revolution; Conceal & Define Full Coverage Conceal & Contour, C3
Makeup Revolution; Lace Baking Powder
Elf Contour Kit
Blush; [self made]
Mario Badescu; Facial Spray With Aloe, Herbs and Rosewater

Highlight: 
James Charles x Morphe; Unleash Your Inner Artist Palette; Face

Lips:
Maybelline; The Elixer Gloss; Rose Redefined


Brushes / Tools:
Real Techniques, Miracle Complexion Sponge
Pueen Large Powder Brush
Pueen Angled Blush Brush
Generic Flat Packing Brush
Generic Brand Fan Brush
Generic Flat Angled Shader Brush
Generic Natural Fiber Blending Brush

Find me elsewhere: 
Youtubehttps://www.youtube.com/user/LINDAxHELLA
Twitterhttps://twitter.com/Luluslife_blog 
Instagramhttps://www.instagram.com/lindaxhella/ 
Facebookhttps://www.facebook.com/Lulus-Life-Blog 
Pinteresthttps://www.pinterest.com/lindaxhella/pins/ 
Tumblrhttp://lindaxwoods.tumblr.com/


Popular Posts