New Years Eve Makeup Tutorial

New Years Eve Makeup Tutorial


Hello everyone and welcome back to my blog! It’s almost New Years Eve, and have I got a makeup tutorial for you! The look turned out so much better than I expected. I wasn’t sure how the Smokey eye would pair with a yellow / gold lid, but it turned out so pretty, if I do say so myself! I had a lot of fun doing this look, I hung out with my daughter and watched spooky shows on Netflix and ate dinner. Right now my hubby is out of town for 5 weeks going through training for trucking. So I’m going to power all of my sadness into my blog posts! Let’s get into this thing!

To start out this look I used the Hard Candy Eyeshadow Primer and as always, set it with a matte cream shade (Clarity) to create an even blending surface. Going into the crease with a natural fiber blending brush I picked up a creamy orange shade (buttercup) and fluffed it through the crease building depth. To deepen the crease and add dimension I blended in some brick red (Terracotta) in as well. The end result doesn't doesn’t show much of the warm tones, but it definitely helped create a good hazy blend. Now for the Smokey tones, I went in with a brownish black (silhouette) and just darkened everything up. I took the dark shade in pretty far. I wanted to create a lot of depth and sexiness. For the sparkly golden yellow lid, I took my eye shadow primer and applied it to my lid from inner corner to two thirds out. I then used my finger and patted on the Ulta Glitter Top Coat in Gold Digger, all over the primer so it’ll stick. These glitter shades need a sticky base or they'll fall off and go everywhere. That’s the eye look done, with winged liner, pencil liner and mascara added to finish!


Thank you so much for checking out this tutorial! I want to wish all of you a Very Happy New Years! If you recreate this look, tag me on social media or with #luluslife! All of the products I used are listed & linked along with all of my social media links are all below! Please be sure to leave a comment and share this post if you’re feeling kind. All of the views count.
Xoxo Lulu

Products used today.
Eyes:
Hard Candy Eyeshadow Primer
BH Cosmetics Shaaanxo Palette
Ulta Beauty Glitter Top Coat, Gold Digger
Broadway Beauty Eyebrow pencil, Black / Brown
E.L.F Eyebrow Kit, Light
Broadway Color Lengthening Mascara, Black

Face:
Maybelline Baby Skin Poreless Primer
Maybelline Fit Me Matte + Poreless Foundation, Porcelain 110
Dermacol Foundation Cover, 210
Coty Airspun Face Powder, Naturally Neutral
Wet n Wild Contouring and Highlight palette, Dulce De Leche
E.L.F. Cosmetics Makeup Mist & Set
Shaaanxo Eyeshadow for Highlight, Holy Grail

Lips:
BH Cosmetics Shaaanxo Palette, second lightest nude shade

Brushes / Tools:
Generic Compact flat top Foundation brush
Pueen Large Powder Brush
Pueen Angled Blush Brush
Pueen Flat Shader Brush
Elf Defining Eye Brush
Elf Eyeshadow Brush
Generic Brand Fan Brush
Generic Blending Brush
Generic Natural Fiber Blending Brush

Find me elsewhere:
Youtube: https://www.youtube.com/user/LINDAxHELLA
Twitter: https://twitter.com/Luluslife_blog
Instagram: https://www.instagram.com/lindaxhella/
Facebook: https://www.facebook.com/Lulus-Life-Blog
Pinterest: https://www.pinterest.com/lindaxhella/pins/
Tumblr: http://lindaxwoods.tumblr.com/


Christmas Makeup Tutorial

Christmas Makeup Tutorial 
Hello everyone and welcome back to my blog! Today I’m sharing with you this festive Christmas makeup tutorial. It should have gone up yesterday, but I’ve been very sick. I couldn’t even do my own makeup. My eleven year old daughter thankfully let me do the makeup on her! Now I know she doesn't need makeup, she’s still young but she loves playing with it sometimes too. A few hours after I did her makeup, her and her dad went to a Christmas dinner at his dad’s. I sadly had to stay home. Yay for being sick, lol. Let’s get right into this tutorial!


Christmas Makeup Tutorial
For this look I used all drugstore items! Apart from an ulta shadow, but they’re drugstore priced. The eyeshadow palette I used today is an Elf 100 piece palette I got a few years ago. I think they bring a variation of the same palettes out every season. To start out this look I primed her eyelids and set them with a cream color shadow. I took a flat shader brush and dipped into the Red and started patting it and blending it across the lid. Sadly it was not showing up red. So I took setting spray and packed it on, which worked thankfully! To soften the crease edge, I took a clean natural fiber blending brush and went back and forth till it had a softer fade. For the center of the lid I took more primer just on the center and patted on the silvery gray color. It didn’t have the pop I was looking for, so I took a wet brush and picked up Ulta’s Glitter eye Top Coat in Put a Ring on It (silver) and patted it over the gray and it worked out so well! For the rest of the look, I did the rest if the face makeup and finished by taking a dark green on the outer half of the bottom lash line and a brighter green on the inner half, blending them into each other! That completed the look and it make her eyes pop!


Thank you so much for checking out this tutorial! I hope you have a very Merry Christmas, if you celebrate that is. Or just have an amazing Monday! Let me know how your day was and how you liked this tutorial. As always, tools, products and social media links are all below!
Xoxo Lulu
Christmas Makeup Tutorial


Products used today.
Eyes:

Hard Candy Eyeshadow Primer
E.l.f Cosmetics 100pc Eye shadow palette
Ulta Beauty Glitter Top Coat, Put a Ring on It
Broadway Beauty Eyebrow pencil, Black / Brown
Broadway Color Lengthening Mascara, Black


Face:
Maybelline Baby Skin Poreless Primer
Maybelline Fit Me Matte + Poreless Foundation, Porcelain 110
Revlon Colorstay Foundation, shade 200
Ulta Beauty, Full Coverage Liquid Concealer, Waterproof Light Cool
Coty Airspun Face Powder, Naturally Neutral
NYC Bronzer, Sunny
E.L.F. Cosmetics Makeup Mist & Set

Lips:
Maybelline Color Sensational, 015, Born With It

Brushes / Tools:
Real Techniques, Miracle Complexion Sponge
Pueen Large Powder Brush
Pueen Angled Blush Brush
Pueen Flat Shader Brush
Elf Defining Eye Brush
Elf Eyeshadow Brush
Generic Brand Fan Brush
Generic Blending Brush
Generic Natural Fiber Blending Brush

Find me elsewhere:
Youtube: https://www.youtube.com/user/LINDAxHELLA
Twitter: https://twitter.com/Luluslife_blog
Instagram: https://www.instagram.com/lindaxhella/
Facebook: https://www.facebook.com/Lulus-Life-Blog
Pinterest: https://www.pinterest.com/lindaxhella/pins/
Tumblr: http://lindaxwoods.tumblr.com/

Burgundy and Gold Halo Eye

Burgundy and Gold Halo Eye


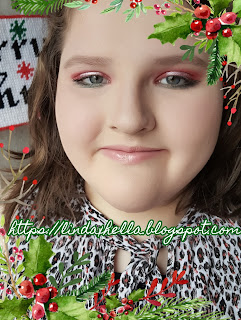
Hello everyone and welcome back to my blog! Today I felt like doing a halo eye look. I’m not the best, but I’m not too shabby lol. I went with a burgundy / plum look and gold. I love the way these colors contrast and make each other pop. Today when I’m doing this tutorial, it’s a chilled out Sunday relaxing and watching Christmas movies with my family. For today’s eye shadow, I’m using all Ulta Beauty shadows I got in one of their big kits they do every year. These shades are really pigmented and definitely worth the money. They aren’t expensive either so that’s a bonus! Let’s do this thing, lol!

Starting out today’s makeup look, instead of using an eyeshadow primer, I used my foundation and set it with ‘Lively'. I honestly wasn’t sure what I wanted to do today. I went in the crease with the shade ‘Gentle’, a light warm Carmel brown, and started building up some of the shadows. Going all the way from outer to inner corner. To darken the look up even more, I went in with the shade ‘Milk Chocolate’. It’s the exact color it says it is, lol. On the lid I used a flat shader brush and elf mist and set setting spray with the shade ‘Orchid'. This color is a burgundy / plum satin color with a fine pink shimmer. I packed the color on the lid and took a clean natural fiber blending brush to soften edges of the shadow. For the pop of gold on the lid, I took the color ‘Precious on my finger and patted it in the center. These colors are so complimentary to each other, I’m going to be using these Ulta eye shadows so much more!
That's it for today’s makeup tutorial! I love this one a lot. If you liked it, let me know in the comments down below! Thank you so much for checking out this tutorial. I’m so happy you've stopped by. Don’t forget to comment on and share any of my tutorials you enjoy. I can only continue blogging if I start making money doing it. So I need to start posting a lot more, get more traffic and get ad clicks lol. Is there any looks you want to see? Let me know!
Xoxo Lulu

Products used today.
Eyes:
Ulta Beauty shadows from Holiday kit
Broadway Beauty Eyebrow pencil, Black / Brown
Broadway Color Lengthening Mascara, Black
Rimmel Scandaleyes Waterproof pencil liner, Sparkling Black

Face:
Maybelline Fit Me Matte + Poreless Foundation, Porcelain 110
Revlon Colorstay Foundation, shade 200
Ulta Beauty, Full Coverage Liquid Concealer, Waterproof Light Cool
Coty Airspun Face Powder, Naturally Neutral
NYC Bronzer, Sunny
E.L.F. Cosmetics Makeup Mist & Set

Lips:
Maybelline Color Sensational, 015, Born With It

Brushes / Tools:
Real Techniques, Miracle Complexion Sponge
Pueen Large Powder Brush
Pueen Angled Blush Brush
Pueen Flat Shader Brush
Elf Defining Eye Brush
Elf Eyeshadow Brush
Generic Brand Fan Brush
Generic Blending Brush
Generic Natural Fiber Blending Brush

Find me elsewhere:
Youtube: https://www.youtube.com/user/LINDAxHELLA
Twitter: https://twitter.com/Luluslife_blog
Instagram: https://www.instagram.com/lindaxhella/
Facebook: https://www.facebook.com/Lulus-Life-Blog
Pinterest: https://www.pinterest.com/lindaxhella/pins/
Tumblr: http://lindaxwoods.tumblr.com/

Liquid Copper Makeup Tutorial

Liquid Copper Makeup Tutorial


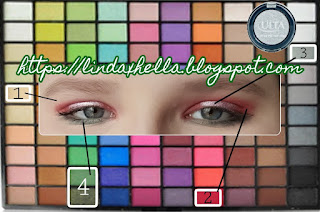
Hello everyone and welcome back to my blog! Sorry I was honest week, I have the flu and it wasn’t pretty lol. I’m better now and back with a new post! One thing I should let yall know is, I’m obsessed with copper things. When I discovered I could foil the strip of copper shadow in the Makeup Revolution Vivid Shimmer Brick, I about cried. I was so excited, I looked forward to doing my makeup even more than I had already. This tutorial uses the Shaaanxo palette and one shade from the Makeup Revolution Vivid Shimmer Brick in Rose Gold. Let’s get right into this tutorial!


To start out this look I used my favorite eyeshadow primer and set it with the shade Clarity. Going back and forth in the crease I used the cream orange shade called Buttercup, the deepened it up in the outer half with the brick shade Terracotta. To tame down some of the orange, I used Clarity to tone it down a bit. On to the fun part that had me super excited! For the foiled, or liquid copper look I took the copper shade in the Makeup Revolution Vivid Shimmer Brick  and patted it on with a flat shader brush, wet with setting spray, on the inner half of my lid. This is what made the whole look! I felt like the outer edge wasn’t popping like it should, so I took some of the shade Silhouette on a tiny blending brush and just deepened up the outer edge.

That’s the eyeshadow look complete! I added some liquid liner, waterline liner and mascara along with the rest of my face makeup. Thank you so much for checking out this tutorial. If you liked it, let me know in the comments down below! At The bottom of this post you’ll find all of the products I used and my social media links.
Xoxo Lulu

Products used today.
Eyes:

Hard Candy Eyeshadow Primer
BH Cosmetics Shaaanxo Palette
Makeup Revolution Vivid Shimmer Brick, Rose Gold 
Broadway Beauty Eyebrow pencil, Black / Brown
Broadway Color Lengthening Mascara, Black
Rimmel Scandaleyes Waterproof pencil liner, Sparkling Black
La Colors Liquid Liner, Black

Face:
Maybelline Fit Me Matte + Poreless Foundation, Porcelain 110
Revlon Colorstay Foundation, shade 200
Ulta Beauty, Full Coverage Liquid Concealer, Waterproof Light Cool
Coty Airspun Face Powder, Naturally Neutral
NYC Bronzer, Sunny
E.L.F. Cosmetics Makeup Mist & Set

Lips:
Rimmel London, Show Off Lip Lacquer, Celestial

Brushes / Tools:
Real Techniques, Miracle Complexion Sponge
Generic Flat top Foundation brush
Pueen Large Powder Brush
Pueen Angled Blush Brush
Elf Defining Eye Brush
Elf Eyeshadow Brush
Generic Brand Fan Brush

Find me elsewhere:
Youtube: https://www.youtube.com/user/LINDAxHELLA
Twitter: https://twitter.com/Luluslife_blog
Instagram: https://www.instagram.com/lindaxhella/
Facebook: https://www.facebook.com/Lulus-Life-Blog
Pinterest: https://www.pinterest.com/lindaxhella/pins/
Tumblr: http://lindaxwoods.tumblr.com/


Soft Green Smoky Eye

Soft Green Smoky Eye


Hello everyone and welcome back to my blog! Today is December first and I am excited and ready for the future seasonal looks! Today I decided to do a mostly drugstore look featuring the Wet N Wild Comfort Zone palette. Focusing mainly on the pretty green in this palette. I am not use to using shades of greens or blues. This a fun little step out of my personal comfort zone, lol. I’m thinking next post is going to be a silvery sort of look. What do you guys suggest I do next? Leave me some suggestions down below! Now let’s get started!


To start out this look, as usual I used my favorite eyeshadow primer, but I didn’t set it this time. I really wanted the pigments to stick and be very vibrant without wetting my brush. For my lid share I went it in with frosty pale green shade and packed it on from inner to outer corner. The rest of my lid I used the creamy shimmer shade, it has some chunky flakes in it, but they aren’t very noticeable. It gives more of a soft sheen to the brow bone. For the crease I used the golden bronze and took it from the outer corner and bringing it thinner towards the inner corner. I didn’t being it all the way in, if I had it would of made my eyes look smaller. To deepen up the very outer V, I took the black shadow that has a very fine bronze shimmer and blended a tiny bit out in the outer edge of the shadow. One thing to note, these shadows are like butter! They are so pigmented and blend like a dream. This is a $5.00 eyeshadow palette that’s just as good, of not better than some expensive palettes!


Alright guys, that’s how I did the eyeshadow! Thank you so much for checking out this tutorial, I hope you love this look as much as I do. I know I say that a lot, but if I didn’t like a look, I wouldn’t blog it. Blogging it’s self is starting to become a challenge with any money coming in. In order for us to get paid, we rely on how long ads are displayed and clicks. Now I’m not asking for you to click on ads, but know if you do, they are not spam. I only use reputable ad agencies.


Products used today.
Eyes:
Hard Candy Eyeshadow Primer
Wet n Wild Comfort Zone palette
Broadway Beauty Eyebrow pencil, Black / Brown
Broadway Color Lengthening Mascara, Black
Rimmel Scandaleyes Waterproof pencil liner, Sparkling Black

Face:
Maybelline Fit Me Matte + Poreless Foundation, Porcelain 110
Dermacol Foundation Cover, 210
Ulta Beauty, Full Coverage Liquid Concealer, Waterproof Light Cool
Coty Airspun Face Powder, Naturally Neutral
NYC Bronzer, Sunny
E.L.F. Cosmetics Makeup Mist & Set

Lips:
Shaaanxo Palette with BH Cosmetics, second darker nude shade

Brushes / Tools:
Real Techniques, Miracle Complexion Sponge
Generic Flat top Foundation brush
Pueen Large Powder Brush
Pueen Angled Blush Brush
Elf Defining Eye Brush
Elf Eyeshadow Brush
Generic Brand Fan Brush

Find me elsewhere:
Youtube: https://www.youtube.com/user/LINDAxHELLA
Twitter: https://twitter.com/Luluslife_blog
Instagram: https://www.instagram.com/lindaxhella/
Facebook: https://www.facebook.com/Lulus-Life-Blog
Pinterest: https://www.pinterest.com/lindaxhella/pins/
Tumblr: http://lindaxwoods.tumblr.com/


Dusty Pink Subtle Glam Makeup Tutorial

Hello everyone and welcome back to my blog! Today I wanted to share with you the makeup look I did for my family’s thanksgiving dinner! I’ve been sick all week so I want to cover up these dark circles and bronze up my face a little. I still ended up looking super fair and sickly, lol. These pictures were taken at the end of the day. I had the makeup on about six hours! I went for full coverage glam that still looks natural. I know that’s not exactly realistic but you know, that’s life as a woman. I was a bit more matte and washed out looking than I intended, But I was in a rush to leave and put on too much powder. Let's get to it!


I ended up using the Carli Bybel palette today for today’s look. This palette is super pigmented, blends like a dream and had all the colors I needed. I actually used one of the highlight shades as the main lid shade. To start out this look I used my favorite eyeshadow primer and set it with the matte cream shade, it has a slight yellow tone so it blends well with my natural undertones. A girl can appreciate a good nude shadow, especially with it's this buttery! In my crease, I went in with the warm light brown shade and the lighter mauve. I went in back and forth with a little bit of shadow each time. Alternating between the two, I went a little above the crease to ensure the color showed up on my hooded eyes. On the lid, I took the pale frosty pink on a wet brush and put it across my lid the inner third. For the middle color, I took the first shadow in the second row (soft gold with a pink undertone), on a wet brush and blended it across from the pale pink to the outer third. To finish off the lid, I took the darker maroon and lightly blended the line in the outer third and deepened the outer corner. Under the bottom lash line I took the two lid colors and outer corner color and mirrored them under what I did on top. That little step really brought the look together!

Thank you so much for checking out this tutorial. I hope you have a very happy thanksgiving if your in the US, or just an awesome Thursday! Please feel free to share this post and please comment down below some suggestions. I’ve been a bit slow this week on post because my hubby and daughter have been on vacation this week. It’s been good being able to spent time with them this week. Monday morning it’s back to work and school! Until next time,
Xoxo Lulu


Products used today.
Eyes:
Hard Candy Eyeshadow Primer
BH Cosmetics Carli Bybel Palette
Broadway Beauty Eyebrow pencil, Black / Brown
Broadway Color Lengthening Mascara, Black
Rimmel Scandaleyes Waterproof pencil liner, Sparkling Black

Face:
Maybelline Baby Skin Instant matte primer
Maybelline Fit Me Matte + Poreless Foundation, Porcelain 110
Dermacol Foundation Cover, 210
Ulta Beauty, Full Coverage Liquid Concealer, Waterproof Light Cool
Coty Airspun Face Powder, Naturally Neutral
Wet n Wild Contouring and Highlight palette, Dulce De Leche
E.L.F. Cosmetics Makeup Mist & Set

Lips:
Maybelline Color Sensational, 015 Born With It

Brushes / Tools:
Real Techniques, Miracle Complexion Sponge
Pueen Large Powder Brush
Pueen Angled Blush Brush
Elf Defining Eye Brush
Elf Eyeshadow Brush
Generic Brand Fan Brush

Find me elsewhere:
Youtube: https://www.youtube.com/user/LINDAxHELLA
Twitter: https://twitter.com/Luluslife_blog
Instagram: https://www.instagram.com/lindaxhella/
Facebook: https://www.facebook.com/Lulus-Life-Blog
Pinterest: https://www.pinterest.com/lindaxhella/pins/
Tumblr: http://lindaxwoods.tumblr.com/


Shaaanxo Smokey Eye Tutorial

Shaaanxo Smokey Eye Tutorial

Hello everyone and welcome back to my blog! Today’s makeup look is a cool and warm toned smoky look using the Shaaanxo palette! Not only is this one of my favorite palettes, but it’s so pigmented and beautiful. This is her first collaboration palette she did with BH Cosmetics, and has a second one coming out, or it might be out already! The one I have has 9 eyeshadows on one side and 9 lipsticks on the other. The new one will have the same first 9 shadows and the other side will be 9 new eyeshadows! This time the shadows all have names! So I can now tell you names of the shadows I’m going to be using, which is so helpful.

The Best Makeup Brushes 
Real quick I want to tell you guys about this awesome website. They have gone through 16 different brands of makeup brushes from low end to high end compiling tons of information. It’s so knowledgeable about brushes and they tell you their picks of which ones they think are the best. I looked over this site a few times and it has so much information. If you are looking into getting a new set of makeup brushes, Go check out this website! You won’t regret it!


Alright guys, I had no idea what I was doing when I went into this look. I started out as I always do with priming my eyelids with the Hard Candy Eyeshadow Prime and set that with the shade Clarity. To build up some color on the lid and in the crease I went in with the shade Buttercup all over the lid and above the crease. I kept in the crease with the shade Terracotta to bring in a lot of warmth. On the lid, I wet the shade Toasted and brought it from inner corner to two thirds across the lid and slightly above. For the outer third and above the crease, I went in with the shade Avocado, I again wet this shade for intensity. On the brow bone and for my face highlight today I used the shade Holy Grail. I am in love with this look so much guys. I’ll tell you down below what brushes I used today along with the full makeup look products listed!


Products used today.
Eyes:
Hard Candy Eyeshadow Primer
BH Cosmetics Shaaanxo Palette
Broadway Beauty Eyebrow pencil, Black / Brown
Maybelline The Rocket, Waterproof
Rimmel Scandaleyes Waterproof pencil liner, Sparkling Black

Face:
Maybelline Baby Skin Instant matte primer
Maybelline Fit Me Matte + Poreless Foundation, Porcelain 110
Dermacol Foundation Cover, 210
Ulta Beauty, Full Coverage Liquid Concealer, Waterproof Light Cool
Coty Airspun Face Powder, Naturally Neutral
Wet n Wild Contouring and Highlight palette, Dulce De Leche
E.L.F. Cosmetics Makeup Mist & Set

Lips:
Maybelline Color Sensational, 015 Born With It

Brushes / Tools:
Real Techniques, Miracle Complexion Sponge
Pueen Large Powder Brush
Pueen Angled Blush Brush
Elf Defining Eye Brush
Elf Eyeshadow Brush
Generic Brand Fan Brush

Find me elsewhere:
Youtube: https://www.youtube.com/user/LINDAxHELLA
Twitter: https://twitter.com/Luluslife_blog
Instagram: https://www.instagram.com/lindaxhella/
Facebook: https://www.facebook.com/Lulus-Life-Blog
Pinterest: https://www.pinterest.com/lindaxhella/pins/
Tumblr: http://lindaxwoods.tumblr.com/

Red and Gold Eyeshadow Tutorial | Autumn Inspired

Red and Gold Eyeshadow Tutorial


Red and Gold Eyeshadow Tutorial
Hello everyone and welcome back to my blog! I know I have not been posting enough, That is due to personal issues with depression. I'm not going to let it hold me back anymore. I want this to become my career. I love doing it and I'd love if you could comment. My numbers are okay, I just don't get any comments or feedback. Even one word would be helpful at this point lol.

Today I was really inspired by the trees in my yard to create an eye look around. These colors are so beautiful in nature and I thought, hey why not try this color combo on my eyes. I am so in love with this look. I’m going to be sad when Fall is over and it won’t be in season! Here’s to hoping Winter has some beautiful and inspiring scenery!

Let’s get right into this look! Today’s eyeshadow look is really simple and easy to do. It uses only five shadows, from three different palettes. I know that's annoying, but initially I hadn't intended on blogging this look. I just loved it so much I had to! Keep in mind, you don’t have to use the exact eyeshadow palettes, just find some colors that are similar to help you achieve this look!


Red and Gold Eyeshadow Tutorial
To start out this look I primed my eyelids and set it with a cream color. I always do this, it creates a smooth surface to blend. To start building up the crease, I went in with a medium toned brown shade and brought it above to crease. I have hooded eyes, so I have to bring the shadow up higher to exaggerate my crease and make it look higher. If I didn't do this, all the color would be basically hidden. To start warming up the crease I used a cooler orangey red shade and built up the intensity a little at a time. It's so much easier to add color, than it is to take color away. To add depth I added a dark rusty red color in my outer third of my crease. Remember to use a little at a time to build up the depth. Now for the shiny glorious golden lid! I took the Gold 'highlight' in the Carli Bybel palette on a flat shader brush and wet it to intensify the shine. I pat the color on the inner two thirds of the lid, slowly blending it out a little at a time to soften edges. That's it, it was so simple and so beautiful I had to share it with you! Thank you all so much for stopping by and checking out this tutorial. I hope you love it as much as I do. Tell me what you want to see in the comments down below.


Products used today.
Eyes:
Hard Candy Eyeshadow Primer
Makeup Revolution #Slay Palette
BH Cosmetics Carli Bybel Palette
BH Cosmetics Shaaanxo Palette
Broadway Beauty Eyebrow pencil, Black / Brown
Broadway Colors Lengthening Mascara in Black
Rimmel Scandaleyes Waterproof pencil liner, Sparkling Black

Face:
Maybelline Baby Skin Instant matte primer
Maybelline Fit Me Matte + Poreless Foundation, Porcelain 110
Revlon Colorstay Combo / Oily, in 200 Nude
Coty Airspun Face Powder, Naturally Neutral
Wet n Wild Contouring and Highlight palette, Dulce De Leche
BH Cosmetics Carli Bybel Highlight, Light nude shade
E.L.F. Cosmetics Makeup Mist & Set

Lips:
J Cat Beauty Lipfinity Matte Kissproof Lip in Champagne Buzz


Find me elsewhere:
Youtube: https://www.youtube.com/user/LINDAxHELLA
Twitter: https://twitter.com/Luluslife_blog
Instagram: https://www.instagram.com/lindaxhella/
Facebook: https://www.facebook.com/Lulus-Life-Blog
Pinterest: https://www.pinterest.com/lindaxhella/pins/
Tumblr: http://lindaxwoods.tumblr.com/

Dermacol Foundation Cover - Real VS Fake

Dermacol Foundation Cover - Real VS Fake


Hello everyone and welcome back to my blog! A lot of people have been getting scammed by people selling Fake Dermacol Foundation! I set out to buy a fake, on purpose to show you how to spot a fake! Also to warn you the danger in using counterfeit cosmetics. This article is so helpful and full of tons of great information. Counterfeit cosmetics are legitimately scary! I was lucky enough to purchase a real Dermacol on Amazon and didn’t get scammed. I did color match myself very wrong though, lol.

Real VS Fake Dermacol Foundation CoverDifferences in the boxes packaging:

Real: The packaging has less vibrant colors and design.
Fake: The colors are very vibrant and stand out in contrast.

Real: The pink has a cool tone hue with a subtle texture. 
Fake:  The pink is a really warm almost peachy pink.

Real: The black is almost a really dark charcoal, again with a fine texture. 
Fake: The black is a true black, again very contrasted. 

Real: The silver flower pattern is again less shiny, and seems to blend with the packing.
Fake: The floral pattern is very silver, and stands out very bright.

Real: The gold is a softer yellow gold.
Fake: The gold is a vivid yellow gold.

Real: The gold holographic Dermacol sticker is lined up evenly, sharp clean edges with the letters and flowers that are holographic and just a shiny background.
Fake: The gold holographic sticker doesn’t fit quite right with rounded corners and the entire sticker is holographic.

Real: The sticker that has the shade, expiration and batch number is matte and lined up straight.
Fake: The sticker is shiny, crooked and the font is a little thinner. 


Real VS Fake Dermacol Foundation CoverDifferences is Tubes packing:

Real: Bronzey gold metal tube.
Fake: Lighter yellow gold metal tube.

Real: Darker gold cap with a fat puncture tip.
Fake: Light gold cap with slim puncture tip.

Real: End of tube is folded and pressed very flat.
Fake: End of tube is folded over and can be unfolded easily.

Real: Charcoal black colored text lined up straight.
Fake: Medium grey font that's crooked.

Real: Color shade text is medium size and clearly typed.
Fake: Smaller font that's lighter and softer in color.

Real: Scent is soft yet floral.
Fake: Strong floral chemical scent.

Real: Thick formula with smooth texture.
Fake: Formula is almost greasy and oily, kind if slimy.

Real: Coverage is full, and covers a tattoo.
Fake: Medium sheer coverage, can’t cover even a faded tattoo.


Real VS Fake Dermacol Foundation Cover
The Difference is pretty obvious here!


Find me elsewhere:
Youtube: https://www.youtube.com/user/LINDAxHELLA
Twitter: https://twitter.com/Luluslife_blog
Instagram: https://www.instagram.com/lindaxhella/
Facebook: https://www.facebook.com/Lulus-Life-Blog
Pinterest: https://www.pinterest.com/lindaxhella/pins/
Tumblr: http://lindaxwoods.tumblr.com/

Halloween Zombie Makeup Tutorial (simple)

Hello everyone and welcome back to my blog! Today is my first Halloween makeup tutorial of 2017! Usually, all of the Halloween looks I do, I do on my kids. So that’s what I did today as well. We did a simple Zombie Makeup Tutorial and watched the new Beauty & The Beast! Although this look is simple it does involves a lot of blending. Don’t let that discourage you, it’s not that hard. I’m not the best at gore or special effects, but I would like to try some out! Without the intro getting too long, let’s get right into this tutorial!

Zombie Makeup TutorialThis look is a bit backwards for me. I did the face makeup first, which isn’t something I normally do. This is just a habit thing, I use to be real messy with blending. To start out this look I used the Maybelline Baby Skin Instant Pore Erasing Primer on her nose, cheeks and chin. I wanted to really wash her face out and make her super fair, so I used the Maybelline Matte and Poreless foundation in shade 110 Porcelain. This is the lightest shade in the line and has nice coverage. I used just a sheer layer with a generic flat top foundation brush, blending a light layer across the skin. I set the foundation with the Wet N Wild Contouring and Highlight palette in the highlight shade. For the shadowing around the eyes, cheek bones, temples and chin, I used a Natural fiber blending brush (white bristles with a rough texture) and the Maybelline Color Tattoo cream shadow in 35 Tough as Taupe. All you need is a grayish brown shadow to create the look of sunken in features. I used a little product at a time and built up the shadows till I was happy. I wanted to add a little color back into the look so I used the Wet N Wild 5 color shadow palette in The Naked Truth. I tapped into the Eyelid and Defined shades and went over everywhere we used the cream shadow. On the lid I patted a little of the shimmery brow bone shade. Here’s where I started second guessing and annoying myself, lol. I felt like it wasn’t warm enough so I took a blush I made, a shimmery warm pink, and lightly blended some around the eyes and cheekbones by the hairline. For the veiny look, I took the Hard Candy Powder Keg in Sinful (warm shimmer purple) and a dark generic purple shadow on a wet eyeliner brush and made some squiggles where I thought they looked right. On her lips, I used the two darkest red shades in the BH Cosmetics Shaaanxo Palette and blended them together with a flat lip brush. I also filled in brows lightly, added mascara and did a little highlight.


That’s it guys! It’s so simple. You don’t have to use all of the products I used, just improvise! Get creative and have fun. This is Halloween, it doesn’t have to be perfect! Perfect can be boring lol. Thank you so much for checking out this tutorial. We had fun doing it and I can’t wait to do more!
Xoxo Lulu


Products used today:
Maybelline Color Tattoo, Tough as Taupe
Wet n Wild, The Naked Truth
Hard Candy Powder Keg in Sinful
Dark Purple eyeshadow (No name, sorry)
Broadway Beauty Eyebrow pencil, Black / Brown
Broadway Colors Lengthening Mascara in Black
Maybelline Baby Skin Instant matte primer
Maybelline Matte + Poreless Foundation, Porcelain 110
Warm shimmery blush I made
Wet n Wild Contour and Highlight palette, Dulce De Leche
BH Cosmetics Carli Bybel Highlight, Light nude shade
BH Cosmetics Carli Bybel palette (lip side)

Brushes used today:
Flat top foundation brush
Natural fiber blending brush
Fluffy Blending brush
Blush Brush
Eyeliner brush
Flat lip brush

Find me elsewhere:
Youtube: https://www.youtube.com/user/LINDAxHELLA
Twitter: https://twitter.com/Luluslife_blog
Instagram: https://www.instagram.com/lindaxhella/
Facebook: https://www.facebook.com/Lulus-Life-Blog
Pinterest: https://www.pinterest.com/lindaxhella/pins/
Tumblr: http://lindaxwoods.tumblr.com/

Vampy Makeup Tutorial

Vampy Makeup Tutorial


Hello everyone and welcome back to my blog! Now that it’s officially fall, I felt it was time to do a red vampy look! This look to me is a bit grungy and smoky, I’m really feeling it though! For this look I decided to bring out the Makeup Revolution eye shadow palette in #Slay. It’s such a perfect fall palette and so affordable! They have such smooth blendability! I don’t know why I don’t use this palette more,  its such a smooth quality shadow. I want to do some pretty and some spooky Halloween makeup tutorials, If you have requests, let me know below! All you have to do is sign into your Google account!


To start out this look I used my favorite eyeshadow primer and set it with the matte cream shade called Destroy. To build up warmth and depth, I went in the crease with Impress. I went in a little at a time and then added Killed It to deepen up the crease more. On the lid I packed on the shade Queen and blended it up to further haze everything out. I wanted a bit of sheen to the look, so I took some of Great and patted it on the center of the lid. For the brow bone and inner corner I used the shade #Slay. To finish off the eyes, I added a small wing and some mascara. I tried to tight line and line my water line, but my pencil has dried up kind of and wouldn’t work well.

Thank you so much for checking out this tutorial! It’s such a warm vampy look. The only thing I would have done different, is I would have made the outer edge sharp and not so soft looking. I also would have done a bigger wing, as I am not the best at eyeliner, I didn’t try to push it lol.
Xoxo Lulu


Products used today.
Eyes:
Hard Candy Eyeshadow Primer
Makeup Revolution #Slay Palette
Broadway Beauty Eyebrow pencil, Black / Brown
Broadway Colors Lengthening Mascara in Black
Rimmel Scandaleyes Waterproof pencil liner, Sparkling Black

Face:
Maybelline Baby Skin Instant matte primer
Maybelline Fit Me Matte + Poreless Foundation, Porcelain 110
Revlon Colorstay Combo / Oily, in 200 Nude
Coty Airspun Face Powder, Naturally Neutral
Wet n Wild Contouring and Highlight palette, Dulce De Leche
BH Cosmetics Carli Bybel Highlight, Light nude shade
E.L.F. Cosmetics Makeup Mist & Set

Lips:
Maybelline Color Sensational, 015 Born With It


Find me elsewhere:
Youtube: https://www.youtube.com/user/LINDAxHELLA
Twitter: https://twitter.com/Luluslife_blog
Instagram: https://www.instagram.com/lindaxhella/
Facebook: https://www.facebook.com/Lulus-Life-Blog
Pinterest: https://www.pinterest.com/lindaxhella/pins/
Tumblr: http://lindaxwoods.tumblr.com/

Fall Copper Makeup Tutorial

Fall Copper Makeup Tutorial


Hello everyone and welcome back to my blog! Today I’m doing a Fall Copper Makeup Tutorial! I love all things copper, and it’s definitely a color that makes blue eyes just stand out so beautifully. I know your wondering and thinking, “uh, Linda? Your eyes are brownish green…” that is accurate. My daughter however has blue eyes! She wanted to be on my blog, and just wanted me to do her makeup for fun. So we did both! I hope you enjoy!

To start out her makeup look I primed her eyelids and set it with shade 1, a matte cream nude, like I always do! Through the crease I went in with shade 2, a cream sickle orange shade. In the outer corner I used shade 3, a deep brick red. I kept it right in the outer V. Now on to the shimmer shades that made this look really glowy! This next step is pretty easy, but looks really nice! I took shade 4 (copper) on the outer corner, 5 on the middle of the lid (pinky gold), and 6 on the inner 3rd (soft gold). Tapped each color on then lightly blended the edges. On the brow bone I used shade 1 again to keep it a little softer.

For the rest of her makeup, I did it how I normally do mine. Since she's young, I lightly did a little eyeliner in the waterline, lightly filled her brows and combed them and only used a little mascara. Just a little bit to make the look complete, she looked so pretty. She doesn’t need makeup to be beautiful and I’ve taught her that, but we enjoy playing beauty salon. :D


Thank you so much for checking out this tutorial! I appreciate is and my daughter is so excited to be on a post! I hope you enjoy this tutorial! My daughter and I had fun hanging out and playing in makeup. It’s not something we do all the time, but it’s fun to do and just relax and have girl time. Just to answer a few questions, she’s 11, in middle school and no she isn’t aloud to wear makeup out of the house. This is just something we do on occasion for fun. She asked me to post it on my blog, so that’s what we did. She has the prettiest eyes. I’m obsessed with these colors on her!
Xoxo Lulu

Products used today.
Eyes:

Hard Candy Eyeshadow Primer
BH Cosmetics Shaaanxo Palette
BH Cosmetics Carli Bybel palette 
Broadway Beauty Eyebrow pencil, Black / Brown
Broadway Colors Lengthening Mascara in Black
Rimmel Scandaleyes Waterproof pencil liner, Sparkling Black

Face: Maybelline Baby Skin Instant matte primer
Maybelline Fit Me Matte + Poreless Foundation, Porcelain 110
Revlon Colorstay Combo / Oily, in 200 Nude
Coty Airspun Face Powder, Naturally Neutral
Wet n Wild Contouring and Highlight palette, Dulce De Leche
BH Cosmetics Carli Bybel Highlight, Light nude shade
E.L.F. Cosmetics Makeup Mist & Set

Lips: Maybelline Color Sensational, 015 Born With It

Find me elsewhere:
Youtube: https://www.youtube.com/user/LINDAxHELLA
Twitter: https://twitter.com/Luluslife_blog
Instagram: https://www.instagram.com/lindaxhella/
Facebook: https://www.facebook.com/Lulus-Life-Blog
Pinterest: https://www.pinterest.com/lindaxhella/pins/
Tumblr: http://lindaxwoods.tumblr.com/

Pumpkin Pie Inspired Makeup Tutorial

Pumpkin Pie Inspired Makeup Tutorial

Hello everyone and welcome back to my blog! The day I’m writing this is the first day of autumn and I am so excited. I love this time of year with the leaves changing, Halloween, beautiful makeup, cozy clothes, and pumpkin spice everything! I can also start wearing my hair down because it won’t be hot and humid, being a long haired Italian girl has its setbacks. Today’s makeup look is definitely inspired by pumpkin pie, the kind with a nice golden crust. To add a little pop of something, I added an eyeshadow on the center of my lid that is a warm brown with a blue reflect! Today I decided to use the BH Cosmetics Shaaanxo Palette because it has so many perfect fall shades! I ended up using six out of the nine shades. I wanted a really blended gradient and I hope I achieved that! Today’s look is kind of like a halo eye, I think. I made the center of the lid a lighter pop of color. 


Starting off with my Hard Candy Eyeshadow Primer I put it lightly all over this lid and set it with shade 1. A matte creamy nude shadow, to even everything out and to create a smooth surface for blending. To start a transition through the crease I took color 2 on a soft blending brush and took it all the way through my crease and slightly above. It's a matte orange cream sickle shade. I have hooded eyelids, so I have to bring the colors up almost to the brow bone, or the color will be lost! To deepen the crease I went in with shade 3 on a stiffer blending brush, for more control. I brought it from outer corner to inner corner. I really wanted to deepen this look more than I usually would of. Next I took a tiny bit of shade 4 on the stiffer blending brush in the outer corner to help keep my eyes from looking too close. It's a really dark brown, almost black color with a little shimmer. If you have too much of one shade across the lid, it can make your eyes look closer together than they are. To give the eye lids a pop of something, I used shade 5 on an angled eyeshadow brush with some setting spray. It’s is a deep reddish brown that has a blue duo chrome sort of reflect. It such a beautiful color! To finish off the eyeshadow I used shade 6, a soft shimmery champagne color, on the brow bone to soften the edges.

Thank you so much for checking out this Pumpkin Pie Inspired Makeup Tutorial. I have many more fall themed tutorials to come. Suggestions are always welcome. The next tutorial I have going up is a special one. My 11yr old daughter wanted me to do her makeup and to be featured on my blog. So that's just what we did!
Xoxo Lulu

Products used today.
Eyes:

Hard Candy Eyeshadow Primer
BH Cosmetics Shaaanxo Palette
Ulta liquid pen liner
Broadway Beauty Eyebrow pencil, Black / Brown
Broadway Colors Lengthening Mascara in Black
Rimmel Scandaleyes Waterproof pencil liner, Sparkling Black

Face:
Maybelline Baby Skin Instant matte primer
Maybelline Fit Me Matte + Poreless Foundation, Porcelain 110
Revlon Colorstay Combo / Oily, in 200 Nude
Coty Airspun Face Powder, Naturally Neutral
Wet n Wild Contouring and Highlight palette, Dulce De Leche
BH Cosmetics Carli Bybel Highlight, Light nude shade
Ulta Cosmetics Blush, Tiger Lily/Flush
E.L.F. Cosmetics Makeup Mist & Set

Lips:
Maybelline color sensational 015 Born with it

Find me elsewhere:
Youtube: https://www.youtube.com/user/LINDAxHELLA
Twitter: https://twitter.com/Luluslife_blog
Instagram: https://www.instagram.com/lindaxhella/
Facebook: https://www.facebook.com/Lulus-Life-Blog
Pinterest: https://www.pinterest.com/lindaxhella/pins/
Tumblr: http://lindaxwoods.tumblr.com/

Smokey Eye Tutorial

Smokey Eye Tutorial


Hello everyone and welcome back to my blog! My last post I did a flawless “No Makeup, Makeup Tutorial” and I love that look, but this look is a little more my speed. It’s dark, smoky, and shimmery! Today I used the Makeup Revolution Redemption Eyeshadow Palette in Romantic Smoked. There are six shimmer shades ranging from dark to light, and six matte shades ranging from light to dark lol. For these palettes being only $7, they’re great! Makeup Revolution tends to nail whatever they do!
To start out this look I used the same primer as always. It’s the only one I have, but it works really well! I’m going to try and lay out this post a little different than normal. Let me known if you like it!

Step 1: Prime your eye lids with the Hard Candy Eyeshadow Primer and set it with the matte cream shade in the palette.

Step 2: Pick up a little of the dark gray and start working it through the crease and outer corner. Then go back in and start building up the color. Also bring it under the lash line 2/3 of the way.

Step 3: Once your eyes are smoky and soft, lightly add in the black shade tighter in the crease and corner. And outer third of the lower lash line.

Step 4: Here’s my favorite part! The lavender-ish silvery shimmer! I wet my brush with my Elf setting spray and packed on this shade all over the lid, bringing up any extra and getting rid of harsh lines. I also took this on the inner third of my bottom lash line.

Step 5: The edges looked kind of harsh so I took the cream matte shade on the brow bone to fade out the edges. For my actual brow bone shade, I took the frosty white shade and put a little just under my brow.

Step 6: For my waterline I used a sparkly black pencil and a lengthening Mascara in Black. I need a new eyeliner! Please recommend some that work well on wet eyes!

Thanks so much for checking out this post! I hope you’ve enjoyed it! The is the eye look finished! Down below I’ll list all of the products I used, as well as my social media links! Please do me a huge favor and comment or share this post! It helps me get my name out there and shows how you like the posts!
Xoxo Lulu

Products used today.
Eyes:

Hard Candy Eyeshadow Primer
Makeup Revolution Redemption Eyeshadow Palette in Romantic Smoked
Broadway Beauty Eyebrow pencil, Black / Brown
Broadway Colors Lengthening Mascara in Black
Rimmel Scandaleyes Waterproof pencil liner, Sparkling Black

Face:
Maybelline Baby Skin Instant matte primer
Maybelline Fit Me Matte + Poreless Foundation, Porcelain 110
Revlon Colorstay Combo / Oily, in 200 Nude
Coty Airspun Face Powder, Naturally Neutral
Wet n Wild Contouring and Highlight palette, Dulce De Leche
BH Cosmetics Carli Bybel Highlight, Light nude shade
E.L.F. Cosmetics Makeup Mist & Set

Lips:
Colour Pop Ultra Matte Liquid Lipstick, Beeper
Find me elsewhere:
Youtube: https://www.youtube.com/user/LINDAxHELLA
Twitter: https://twitter.com/Luluslife_blog
Instagram: https://www.instagram.com/lindaxhella/
Facebook: https://www.facebook.com/Lulus-Life-Blog
Pinterest: https://www.pinterest.com/lindaxhella/pins/
Tumblr: http://lindaxwoods.tumblr.com/

Popular Posts