Showing posts with label tutorial. Show all posts

Popfeel | Wish eyeshadow palette review and tutorial

Popfeel | Wish eyeshadow palette
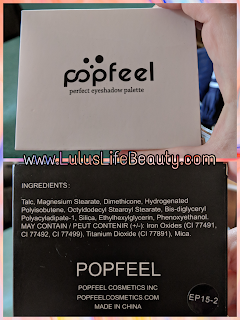
Hello everyone and welcome back to my blog! Today I have a combo review and tutorial for you using an eyeshadow palette from the Wish app! More specifically it’s by the brand Popfeel, which I’m not sure if it’s just on Wish or an actual brand. I know it’s one of the more popular brands for makeup on Wish and they don’t seem to be “copying” or “duping” any name brands. That’s always nice to see with a more inexpensive brand, they’re doing their own thing and not seeming to copy anyone else. At first I realized they actually sent me the wrong palette. What arrived was so tiny I couldn’t believe it. The pan sizes are very little as you’d expect. I have photos of me holding it to show how small it is, keep in mine I have child size hands lol. There is no weight listed on the packaging or the unicarton, but the unicarton has a list of ingredients. Are these real ingredients? I have no clue, but there doesn’t seem to be a ton of ingredients or harsh chemicals.


Popfeel | Wish eyeshadow palette
Shadows Swatched with brush & All of the colors.
Popfeel | Wish eyeshadow palette
Here you see the size of the package & the ingredients.

Swatching these shadows went well, and they seem to all have decent pigmentation which is shocking to me. The photo of them swatched on my hand, that was done with a flat shader brush and not with my fingers. Finger swatching eyeshadows can make them look more pigmented than they’ll actually be. So when doing these reviews I like to use a brush to show the real pigmentation of the products. I get very picky about it because I’ve seen people swatch an eyeshadow, then I’ve gotten the eyeshadow and been disappointed that there wasn’t any real pigmentation. I don’t want this post being super long, but I want it to be as formative as possible. Every shade in the palette is a shimmery shade. You can't do a complete eye look without substituting some crease shades. But I was able to make it all work out.


Popfeel | Wish eyeshadow palette
Starting out this makeup tutorial, I primed and set my eyelids with my foundation and setting powder. Going in with shade 1 I applied it all over the lower lid from inner to outer corner. I did have to end up wetting it to get it to have a vibrant punch. It had decent opacity alone, but i could see a little bit of patchiness. For the crease and outer third of the lid, I then went in with shade 2, softening the edges of the orange shadow. Shade 3 I took on my finger and patted out some of the line between the two lid shades to add a softer feel. Shade 4 I used to really help deepen up the outer corner for some more depth. I also took shade 4 and ran it under the outer two thirds of my lower lash line. Bringing in shade 5, i used it on the inner third of my lower lash line, buffing it into shade 4 slightly. Shade 6 is the brow bone and inner corner shade! It's a pretty simple look, I just wanted to use as many shades as I could without muddying things up.
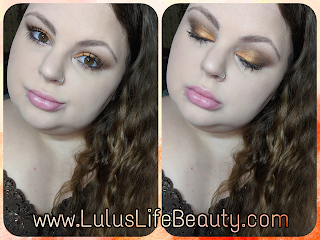
Popfeel | Wish eyeshadow paletteThank you all so much for stopping by to check out this tutorial. I hope you liked it. I personally love how the orange on the lid makes some of the green in my eyes stand out more than normal. Overall I would reccomend this palette. It was $1.00 plus that much in shipping. The shadows ended up being buttery and pretty pigmented. Attacthed down below in the product listing I will have the link to this palette. I don't know if I will be able to find the exact seller, But i've seen a few stores selling it!
Xoxo Lulu


Products used today.
Eyes:

Pop Feel Palette [ FIND IT HERE ]
Essence Kajal Eye Pencil, Black
Maybelline The Rocket Mascara, Waterproof in Black
Broadway Beauty eyebrow pencil, brown / black

Face: (My foundation is mixed half and half in the bottle)
Revlon Colorstay Foundation in 200
Maybelline Matte and Poreless in 120
Coty Airspun Face Powder, Naturally Neutral
Elf Contour Palette, light
E.L.F. Cosmetics Makeup Mist & Set

Highlight: Carli Bybel palette

Lips: Maybelline The Elixir, Gloss Rose Redefined

Brushes / Tools:
Real Techniques Sponge
Generic Flat Top Foundation Brush
Pueen Large Powder Brush
Pueen Angled Blush Brush
Generic Flat Packing Brush
Generic Brand Fan Brush
Generic Flat Shader Brush
Generic Natural Fiber Blending Brush

Find me elsewhere:
Youtube: https://www.youtube.com/user/LINDAxHELLA
Twitter: https://twitter.com/Luluslife_blog
Instagram: https://www.instagram.com/lindaxhella/
Facebook: https://www.facebook.com/Lulus-Life-Blog
Pinterest: https://www.pinterest.com/lindaxhella/pins/
Tumblr: http://lindaxwoods.tumblr.com/

Rusty Grunge Glam Tutorial

Rusty Grunge Glam Tutorial


Hello everyone and welcome back to my blog! Today I felt like doing another Smokey eye. I don’t know what has gotten into me with loving these darker looks, but I’m really feeling myself in them lol. Today I went with a rusty red-ish orange and a black Smokey look. I dipped really lightly into the black since it’s so pigmented, I’ll get into that later in the tutorial. Today’s tutorial is using the BH Cosmetics palette Take Me Back To Brazil. When I get new palettes, I like to use them more than my others. It’s like anything else, new things are so much fun. This palette has so many endless looks you could do with it, and I’ve barely dipped my toes in the water lol. Alright guys, let’s get right into this tutorial!


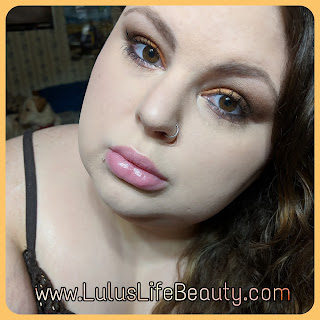
Starting out this look, it was a complete mess to be honest. I had no idea what I was doing and I ended up with this rusty, sort of grunge look. To me it screams, clean grunge lol. I primed my eyelids with my usual primer and set it with my setting powder. On the lid I packed on the burgundy color all over, then picked up the red and started to blend that in too over the burgundy and up through the crease. On a flimsy fluffy brush, I picked up a tiny bit of black and lightly blended it and half way through the crease and in the outer third. This black is no joke, it’s so pigmented, be aware if your using this palette lol. After that, I picked up both of the red and burgundy shades and softened the edges on everything. I also brought them underneath the lashline to smoke it out. I added a winged liner, tight lined and lined my waterline in black. I had to add lashes to this look, it just wasn’t complete without them. The eyelids were too heavy not to add lashes and lots of mascara.


Thank you so much for checking out this makeup tutorial, I hope you like it and if you try it out, tag me on social media! I’ll have everything tagged down below, The products, brushes and social media links! If there’s any looks you want me to try or any colors you want to see me use, comment down below or tag me online. I’d love to chat with you guys and hear what you want to see.
Xoxo Lulu

Products used today.
Eyes:
Hard Candy Eyeshadow Primer
BH Cosmetics Take Me Back To Brazil palette
Essence Kajal Eye Pencil, Black
BH Cosmetics “BH Liquid Eyeliner”felt tip
Maybelline The Rocket Mascara, Waterproof in Black
Broadway Beauty eyebrow pencil, brown / black
Elf Clear Brow Gel
Ardell Wispies False Lashes

Face:
Maybelline Pore Eraser Primer
Bare Minerals Custom shade Foundation
Makeup Revolution Liquid Highlight, Champagne
Coty Airspun Face Powder, Naturally Neutral
Elf Contour Palette, light
E.L.F. Cosmetics Makeup Mist & Set
Blush, it's one I made myself!

Highlight:
Makeup Revolution Liquid Highlight, Champagne

Lips:
Maybelline ColorSensational, Born With It

Brushes / Tools:
Real Techniques Miracle Complexion Sponge
Pueen Large Powder Brush
Pueen Angled Blush Brush
Pueen Flat Shader Brush
Elf Defining Eye Brush
Elf Eyeshadow Brush
Elf Flat Contour Brush
Generic Brand Fan Brush
Generic Blending Brush
Generic Natural Fiber Blending Brush

Find me elsewhere:
Youtube: https://www.youtube.com/user/LINDAxHELLA
Twitter: https://twitter.com/Luluslife_blog
Instagram: https://www.instagram.com/lindaxhella/
Facebook: https://www.facebook.com/Lulus-Life-Blog
Pinterest: https://www.pinterest.com/lindaxhella/pins/
Tumblr: http://lindaxwoods.tumblr.com/


Go-to Gold Smoky Eye

  Gold Smoky Eye

Bronze Smoky EyeHello everyone and welcome back to my blog! I hope you’re all having an amazing new year! Mine has been good, a bit rough with my hubs out of town. But I’m pushing through and putting my mind to work. Today’s tutorial isn’t anything crazy or amazing to the average person, but this is my go to Smokey eye. With this makeup look, I feel like I can do anything. This is seriously the look I do all the time, weather I’m in a rush or have unlimited time to do my makeup. There are a few other looks I do pretty often, but I’m trying to branch out and do more fun, creative looks!


Bronze Smoky Eye
Today I did my face makeup before I did my eyes, so I primed my eyelids with my concealer. I used the Carli Bybel palette and set my lids with the bone cream shade. In the crease I used the camel brown shade on a soft fluffy brush, creating depth and shadow. I built the color up until I had a smooth transition with no harsh lines. In the outer corner I used the dark brown shade to really deepen things up. I love when I have a strong outer crease with a sharp edge. On the lid I used the golden bronze “highlight” color on a wet brush packing it on and gently fading it back towards the outer corner. On my bottom lash line, I used the dark brown on the outer half and the gold shade on the inner half.

Thank you so much for stopping by to check out this tutorial! I hope you liked it, and I hope you’ll comment and let me know what you think of this look. Please feel free to share this post with your friends and family or any makeup lovers out there! Also, I’d love if you followed me on social media, I have all of my links below along with a list of the products I used today in this look.
Xoxo Lulu


Products used today.
Eyes:
Ulta Beauty waterproof concealer, light cool
BH Cosmetics Carli Bybel Palette
Rimmel Scandaleyes Waterproof, Shimmering Black Liner
Broadway Color Lengthening Mascara, Black
Broadway Beauty Eyebrow pencil, Black / Brown

Face:
Maybelline Baby Skin Poreless Primer
Revlon Colorstay Foundation, 200
Maybelline Matte n Poreless Foundation, Porcelain
Coty Airspun Face Powder, Naturally Neutral
Wet n Wild Contouring and Highlight palette, Dulce De Leche
E.L.F. Cosmetics Makeup Mist & Set
Carli Bybel palette, Highlight (light cream shade)

Lips:
Maybelline Color Sensational Lipstick, 015 Born With It

Brushes / Tools:
Real Techniques Miracle Complexion Sponge
Pueen Large Powder Brush
Pueen Angled Blush Brush
Pueen Flat Shader Brush
Elf Defining Eye Brush
Elf Eyeshadow Brush
Generic Brand Fan Brush
Generic Blending Brush
Generic Natural Fiber Blending Brush

Find me elsewhere:
Youtube: https://www.youtube.com/user/LINDAxHELLA
Twitter: https://twitter.com/Luluslife_blog
Instagram: https://www.instagram.com/lindaxhella/
Facebook: https://www.facebook.com/Lulus-Life-Blog
Pinterest: https://www.pinterest.com/lindaxhella/pins/
Tumblr: http://lindaxwoods.tumblr.com/


Makeup Revolution Vivid Shimmer Brick Tutorial

Makeup Revolution Vivid Shimmer Brick Tutorial

Hey guys and welcome back to my blog! Last week I posted a review of the Makeup Revolution Vivid Shimmer Brick, which you can find Here! Now, last week when I posted that review I didn’t even think to do multiple styles of swatches. What I mean by multiple swatch styles is a brush swatch, with and without primer, also what it looks like wet. I will be adding in those swatches in at the end of the post! Now let’s get started.

Starting out this look I’m going to prime my eyelids with the Hard Candy Eyeshadow Primer like I always do! It’s my favorite primer, it keeps my eyes crease free all day! I’m going to set my primer using the nude shade in the Carli Bybel palette to ensure a smooth surface for blending. Through the crease I’m going to use the top middle matte brown shade, it’s the perfect warm brown for transition. In the outer corner, I’m going to use the matte darkest brown shade for depth. For the lids, this is where things get fun. I’m going to pick up the colors from the Makeup Revolution Vivid Shimmer Brick, and spray them with water to make them look more metallic and vibrant.

On the lids I’m going to try using three shades from this Makeup Revolution Vivid Shimmer Brick. For the main lid shade, I’m going in with second color which is a mauve pink. I’m going to pick up a good amount on a flat shader brush and spritz it with some water. The water really helps colors, especially shimmers. Pop and stand out a lot more than they would without it. For the inner corner, I’m going to be using the white shade. On the outer corner I’m going to use the darkest brown. I’ll be putting it on wet, then going back into the darkest matte brown shade I used to soften up the outer corner and bringing in the crease shade to soften the middle crease area. I want to keep everything very soft and hazy.

Products Used Today:

Eyes:
Hard Candy Eyes the Limit Eye Shadow Primer
BH Cosmetics Carli Bybel palette
Makeup Revolution Vivid Shimmer Brick, Rose Gold
Broadway Beauty Eyebrow pencil, Black / Brown
Broadway Colors Lengthening Mascara in Black
Rimmel Scandaleyes Waterproof Pencil, Sparkling Black

Face:
Maybelline Baby Skin Instant Pore Eraser Primer
Maybelline Fit Me Matte + Poreless Foundation, Porcelain 110
Dermacol Foundation in 210
Ulta Full Coverage Concealer, Light Cool
Coty Airspun Face Powder, Naturally Neutral
L.A. Girl Pro Setting Powder, Translucent
DIY Glowy Blush
NYC Smooth Skin Bronzing Powder, Sunny
Carli Bybel Highlight, Light nude shade
E.L.F. Cosmetics Makeup Mist & Set
Lips: Maybelline Color Sensational, Born With It
Thank you so much for checking out this post! I hope you enjoyed it as much as I did! I love dark smoky looks like this with a shiny lid! I think it’s so beautiful, for an occasion. If you enjoyed this post, please share this with anyone you think would be interested. Don’t forget to talk me on social media! Links Below!
Xoxo
Lulu
Twitter: https://twitter.com/Luluslife_blog
Instagram: https://www.instagram.com/lindaxhella/
Facebook: https://www.facebook.com/Lulus-Life-Blog
Pinterest: https://www.pinterest.com/lindaxhella/pins/
Tumblr: http://lindaxwoods.tumblr.com/

Lana Del Rey Makeup Tutorial

Lana Del Rey Makeup Tutorial

Lana Del Rey Makeup Tutorial


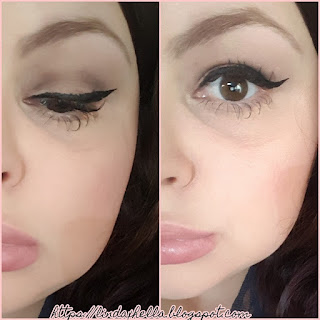
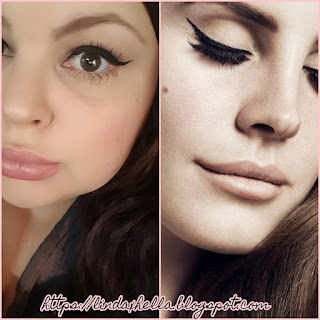
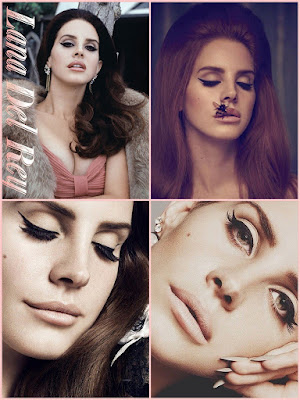
Hey guys and welcome back to my blog! Are you guys in love with Lana del Rey as much as I am? If so I hope you love this makeup look. It’s super natural and flawless looking with a bold cat eye! It’s almost a “no makeup, makeup look” with some sassiness. I’d honestly wear this look daily if I had time to do my makeup everyday, lol. The eyeshadow it’s self is minimal, but you have to be careful how you place the color through the crease.

Let’s get started with the eye makeup!

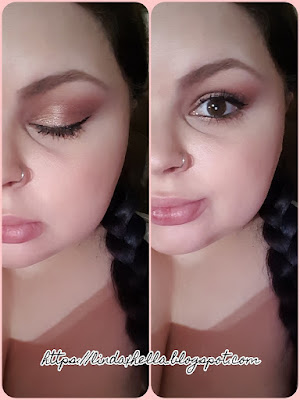
To start out this look I’m going to prime my eyelids with the Hard Candy Eyeshadow Primer and set it with a matte cream shade from the Shaaanxo palette. That’s going to give everything a smooth surface for blending, if you don’t set your eyelids your eyeshadow can drag and look choppy. For the crease, I’m going in with the darkest matte shade in the palette. What you want to do is take a tightly packed pencil brush, dipped in the darkest shade and keep it right in the crease. Lana does a soft a subtle dark faded line through the crease. It’s almost hidden, but brought pretty far into the inner part of the crease. If it’s too dark, take a soft fluffy brush with the light matte shade and blend the line out so it’s softer. To finish off the iconic Lana Del Rey Makeup look, you have to add the strong black wing! I’m using the Ulta Classic Felt Tip Liner. Lana has a long wing normally, so I’m going to use some scotch tape to keep the liner even and straight.
Lana Del Rey Makeup Tutorial

Bottom Lash Line & Mascara.

Now, for the bottom lash line, she does a few things. This is where you want to decide which if Lana Del Rey’s eye looks suit your look. Sometimes she has a thicker wing with heavy black liner on her lash line. One thing I’ve noticed, she doesn’t often have anything in her waterline. In your waterline you want to either use a nude or white pencil. If you’re the kind of person who hates the look of nothing in their waterline, line it, you do you. I have a hard time not having black liner on my waterline, but for the sake of the look I’m using a white liner. Lana's bottom lashes always have mascara, very spread out and evenly coated is the goal. A tip I have if your lashes want to clump, use a clean tooth pick to gently separate your lashes once they’ve dried. I’ll have all of the products I used in this look listed below!

Lana Del Rey Makeup Tutorial

List of products used in the Lana Del Rey Makeup Tutorial.

Eyes:
Hard Candy Eyeshadow Primer
Bh Cosmetics Shaaanxo Palette
Ulta Classic Felt Tip Liner
Maybelline Volum' Express The Rocket Mascara
Broadway Beauty Eyebrow pencil in Black/Brown
L.A. Colors Auto Eyeliner in White

Face & Lips:
Maybelline Baby Skin Instant Pore Eraser Primer
Maybelline Fit Me Matte + Poreless Foundation, Porcelain 110
Revlon ColorStay Makeup with SoftFlex Combination/Oily Skin, 200 Nude
Ulta Full Coverage Concealer, Light Cool
Coty Airspun Face Powder, Naturally Neutral
L.A. Girl Pro Setting Powder, Translucent
DIY Glowy pink blush
NYC Smooth Skin Bronzing Powder, Sunny
Carli Bybel Highlight, Light nude shade
E.L.F. Cosmetics Makeup Mist & Set
Maybelline Color Sensational 015, Born With It


Lana Del Rey Makeup Tutorial
Thank you so much for checking out this tutorial. I hope you loved this Lana Del Rey inspired Makeup Tutorial! I love her and I love her music. Lana Del Rey has such a beautiful soul and a beautiful voice! Let me know in the comments what your favorite Lana Del Rey song is!
Xoxo
Lulu

Shaaanxo Palette Review and Tutorial


Shaaanxo Palette
Hey guys and welcome back to my blog! I recently ordered some items from Ulta, one of which was the Shaaanxo Palette. In today’s post I’m going to do a quick tutorial and review. I hope you enjoy! Let me know in the comments!

~~~~~~
Before I start this post, is like to give a huge shout out to the awesome Zeba Noor! She runs an awesome blog full of useful DIY's and reviews, including beauty and lifestyle posts! Please check out her blog!
 blog: https://heartydiaries.blogspot.in
Instagram: instagram.com/heartydiariesblog
Roposo: roposo.com/@heartydiaries
Twitter: twitter.com/heartydiaries
~~~~~~
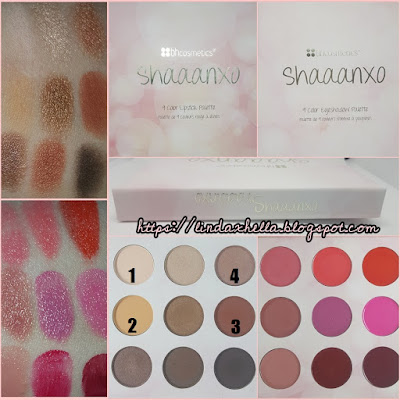
To start out, the packaging is beautiful. It looks like diffused and blurred twinkle lights, which are always in her video background. One side is more of a baby pink and white version of the lights, and the other side has a peachy pink tint to it. The palette contains nine eye shadows and nine lipsticks. Each side has a mirror, the side with the lipsticks has a smaller mirror, but still awesome that there even is one on each side. Can we just appreciate the fact that the lipstick and eye shadows are on completely separate sides? That is amazing. I hate when palettes have creams and powders side by side. Your lipsticks end up with powder in them and they’re ruined. Pigmentation for the eye shadows and lipsticks are both so amazing! The eye shadows blend like a dream! Some of the more shiny shades are even more intense wet, I’m so in love with it. You can go from day to night in a snap, the Shaaanxo Palette has all the matte, shimmer, lights, darks, cool and warm tones you could ask for! I see myself using it all the time. I’m so impressed with the pigment and quality of everything in the palette! I would definitely recommend the Shaaanxo Palette to anyone in search of an affordable palette that can lips and eyes!

Shaaanxo Palette
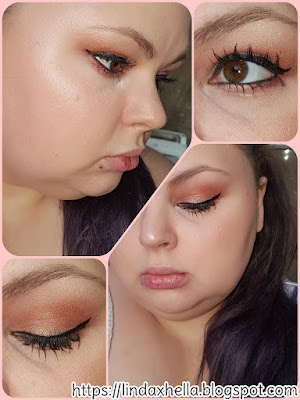
Let’s get into this tutorial! I definitely had fun with it! I'll be numbering the eyeshadows since they don't have names. I started out by priming my eyelids with the Hard Candy Eyeshadow Primer and set it with shade 1. I took a fluffy blending brush and blended shade 2 through and above the crease. In the outer crease and corner of the lid I blended shade 3 to deepen and warm things up a bit. To finish off the eyeshadow I light patted on shade 4 on my brow bone and lightly on my lid. Underneath the lash line I took shade 3 on the outer two thirds, and shade four on the inner third. Down below I’ll list all of the products I used to complete this look!


Shaaanxo Palette
Products Used Today:
Eyes:
Hard Candy Eyes the Limit Eye Shadow Primer
Shaaanxo 18 Color Palette
Ulta classic felt tip liner in black
Broadway Beauty Eyebrow pencil, Black / Brown
Broadway Colors Lengthening Mascara in Black
Rimmel Scandaleyes Waterproof Pencil, Sparkling Black
Face:
Maybelline Baby Skin Instant Pore Eraser Primer
[2 pumps] Maybelline Fit Me Matte + Poreless Foundation, Porcelain 110
[2 pumps] Revlon ColorStay Makeup with SoftFlex for Combination/Oily Skin, 200 Nude
Ulta Full Coverage Concealer, Light Cool
Coty Airspun Face Powder, Naturally Neutral
L.A. Girl Pro Setting Powder, Translucent
Ulta Velvet Blush in Princess
NYC Smooth Skin Bronzing Powder, Sunny
Carli Bybel Highlight, Light nude shade
E.L.F. Cosmetics Makeup Mist & Set

Thank you so much for checking out this tutorial and review. I truly hope you enjoyed it. Don't forget to stalk me on social media! Links below!
Xoxo
Lulu.


Carli Bybel Palette Review and Tutorial


Carli Bybel Palette Review and Tutorial

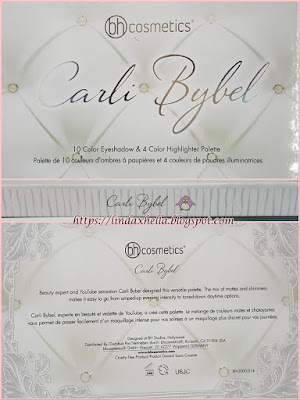
Carli Bybel PaletteHey guys and welcome back to my blog! I finally got the Carli Bybel palette! I know it's been out for about a year or so, but I was finally able to get it and some other things for my 28th Birthday. I was so excited when my Ulta package came that I immediately opened everything and was in heaven! My first Impressions of  the Carli Bybel Palette were that it was so clean and beautiful. The white tufted and pearl background are so beautiful, especially with the contrast of the silver and black text on the front. The inside has again a beautiful white and silver striped look with filigree accented corners, a large mirror on the inside of the life with the quote “Aspire to Inspire”. I honestly love that quote, not to sound too corny or ironic, it’s actually such an inspiring quote. There are ten eye shadows and four highlight shades. Five matte shades and five shimmer shades, and of course the highlight shades are shiny and shimmery. All of these shadows and highlights are silky, creamy and so pigmented and blendable. I was so impressed with the quality of the shadows and highlights, I’ve never had such a nice palette. The shades all range from nudes, browns, bronzes, pinks and plums. They’re all so beautiful. You can honestly create so many looks using the Carli Bybel palette! I'm so happy with my purchase!

Carli Bybel Palette

Carli Bybel PaletteTo start of this look I primed my eyelids with the Hard Candy Eye shadow primer, it’s the only one I’ve found that I love. Since the colors don’t have names, I have the photo numbered and will be referencing the shadows by the number on the photo. I set my eyes with shade 1 to create an even lid shade and make it smoother for blending. I went in and a little above the crease with shade 2 a few times, building up the faded hazy look. Then I went in the outer half of the crease with shade 3 and kept it in and just below the crease. On the lid, I used shade 4 and blended it up to the crease, and I brought it on to the bottom lash line. For my highlight, I used shade 5. Today I tried a lot of new products, I’m going to say a few things about each.


Carli Bybel PaletteProducts Used Today:
Hard Candy Eyes the Limit Eye Shadow Primer
Carli Bybel 14 Color Eyeshadow & Highlighter Palette
Ulta classic felt tip liner in black. - It’s so pigmented and easy to use. Would recommend.
Maybelline Fit Me Matte + Poreless Foundation, Porcelain 110. - Sheer to medium coverage.
Maybelline Baby Skin Instant Pore Eraser Primer. - Silky, clear, seems like it works alright.
Broadway Beauty Eyebrow pencil, Black / Brown. - I love this thing!
Broadway Colors Lengthening Mascara in Black. - Dryer formula, had fibers. I really like it.
Ulta Full Coverage Concealer, Light Cool. - Holy grail concealer!
E.L.F. Cosmetics Makeup Mist & Set. - This is the only setting spray I’ve tried, I like it.
L.A. Girl Pro Setting Powder, Translucent. - So silky and beautiful, Horrible flash back!
Ulta Velvet Blush in Princess. - Such a natural look, very soft and pigmented.
NYC Smooth Skin Bronzing Powder, Sunny. - Warm, pigmented and easy to blend.
Coty Airspun Face Powder, Naturally Neutral. – Holy grail setting powder.
Juice Infused Lip Oil, Cranberry + Pomegranate. – Goes on clean, smells amazing. Thick and stays on a long time.

Thank you guys for checking out my review today, I hope you enjoyed it! I had a lot of fun playing in the Carli Bybel palette and I love it so much! I’m going to do so many more looks using it! Don’t forget to comment down below and follow me on social media!

Xoxo
Lulu

Twitter: https://twitter.com/Luluslife_blog
Instagram: https://www.instagram.com/lindaxhella/
Facebook: https://www.facebook.com/Lulus-Life-Blog
Pinterest: https://www.pinterest.com/lindaxhella/pins/
Tumblr: http://lindaxwoods.tumblr.com/

Kylie Jenner Inspired Makeup Look


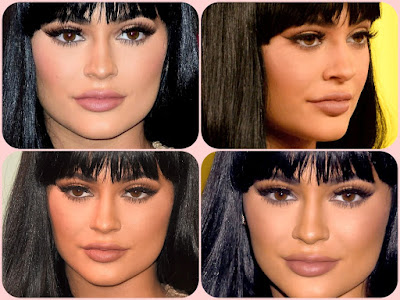
Kylier Jenner Inspired Makeup LookHey guys and welcome back to my blog! Today I’m going to do a makeup look based on one of my many Queens, Kylie Jenner! I love her makeup look from the 2015 MTV VMA's. It's a very beautiful full glam golden goddess look with a thin long wing, bronzed up with a nude lip. Now, I'm definitely not as tan as her, so this will be adjusted to suit us more pale women. If you have a darker skin tone, just adjust and use your favorite products. I for one, am very fair and burn easily. I am so jealous of people who get a tan in the summer. If I get one, I have to get sun burnt first. I will never be as tan as Kylie, Lol.
Kylier Jenner Inspired Makeup Look
First things first, I had to dig through all of my eye makeup to find a gold shadow that works. It would be so much easier if my Ulta order came in already! I ordered the Carli Bybel palette, that would of been perfect for this look! Luckily I was able to find the perfect gold shade in the Makeup Revolution Iconic 3 palette. All of these shades are so pigmented and buttery! One down side to the palette is, the shades don't have names. I'll have to number the shades and list them that way! Also, huge bonus is that this palette is only $7.00 on the Ulta website, and they always have deals going on!


Makeup Revolution Iconic 3 Palette
Kylier Jenner Inspired Makeup Look
To start out this look I used the mini eye shadow primer that came with my makeup revolution #slay palette. It’s a sheer frosty texture. This is my first time trying it, so hopefully it doesn’t crease, it had a silky texture that I’m not sure about. I completed this look using only four eyeshadow. To set the primer I used the matte nude shade and used the light cool toned taupe shade through the crease. I kept building it up until my crease was hazy and soft. On the lid I used a flat shader brush, spritzed with setting spray, and packed on the gold shade all over the lid and just above the crease. On the outter corner I blended in some of the dark gray / purple and used a clean brush to blend out all of the edges and make everything blended and soft. To finish off the eye look, I used a black liquid liner and did a very thin line and thin wing. I finished the rest of my makeup look by doing my normal foundation routine, which you can find here. This time I switched bronzer for my NYC bronzer in sunny. That completes this look! If you enjoyed this post and get inspired to recreate it, tag me on social media! Thank you for checking out this tutorial!

Xoxo
Lulu.

Natural makeup with colorful Liner


Natural makeup with colorful LinerHey guys, lately I’ve seen these trends going around with super natural glowy makeup that’s flawless and beautiful with pops of color in their liner. So I’m going to try that today! I’m not very good at eye liner as it is, so this should be interesting! I really hope you like this look and find some inspiration in this look I'm going to try out today! If you’re interested in suggesting any looks you want me to try out for you guys, but up the comments down below!

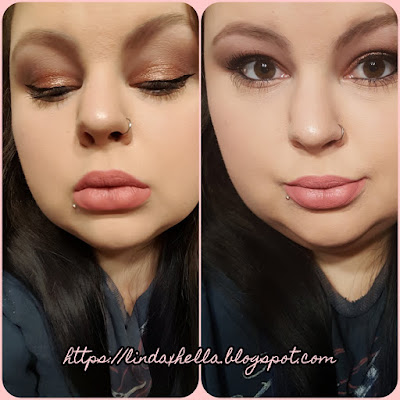
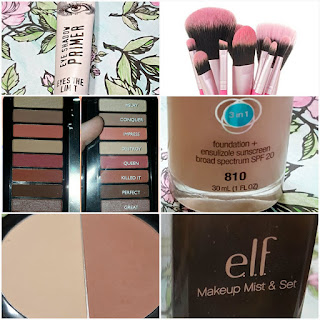
Today’s look is using the Makeup Revolution #Slay palette! It is so pigmented and easy to blend that I had to use it today. I started out by priming my eyelids with the Hard Candy Eyeshadow Primer and setting it with the shade #Slay, it’s a nude cream color with a fine shimmer in it. For the crease I started out with Conquer, a soft light taupe, running it through and building up opacity until it was soft and hazy. In the outer corner I used the shade perfect, a matte chocolate brown color. I kept it only in the outer third of the crease. I made sure to keep the lid light with the cream shade. For the wing, I used setting Spray on a small angled brow brush in the great, which is a shimmery purple gray. I didn’t like the way it looked, it didn’t pop enough! So over the top I went in with the red shade, Queen and built up the color until it stood out enough for me. I then took it on a fluffy blending brush and smoked out the bottom lash line. I then finished the rest of my makeup and touched up the bottom lash line, a little smeared away when I put on the rest of my makeup. Here’s a list of the products I used in today’s look!


Makeup Revolution #Slay palette
Eyes:
Natural makeup with colorful LinerHard Candy Eyeshadow Primer
Makeup Revolution #Slay Palette
Rimmel Scandaleyes Waterproof in Sparkling Black
Broadway Beauty Eyebrow pencil in Black/Brown
Broadway Colors Lengthening Mascara in Black

Face:
Nicel Daily Repair Vitamin A and Retinol cream
CoverGirl 3in1 foundation, shade 810
Ulta Full Coverage Waterproof Concealer in Light Cool
Coty Airspun Loose Face Powder in Naturally Neutral
Wet n Wild Contouring and Highlight palette in Dulce De Leche
A homemade highlighting blush
Elf setting Spray

Other:
Chapstick in Pumpkin Pie
Pueen makeup brushes
- Blending eye brush
- Flat shader brush
- Angled shadow brush
- Fluffy face brush
- Angled blush brush

I hope you guys enjoying this tutorial / makeup look! I love it, it's so different than what I'm used to!
Xoxo
Lulu.

Pink Sparkly Eyeshadow Tutorial


Pink Sparkly Eyeshadow TutorialHey guys, the last few weeks of actually playing in my Ulta box, I’ve discovered that the glitter shades are actually really pretty on the eye. I decided to use them today because I was feeling a little sassy I guess lol. I promise, this will be the last post using this makeup box for a while since I know you can’t buy it anymore. But I know Ulta sells their own range of singles. I think some of these are part of their range.


The Ulta Be Discovered 67 piece Collection
To start out this look, I used my trusty Hard Candy Eyeshadow Primer all over the lid and set it with the shade Au Natural. I thought that shade would be too dark, but it actually matched my skin perfectly. I lightly tapped into Brave and Camel, running them lightly through the crease and put her corner, just to bring in warmth and some depth. On the lid, I tapped on In The Buff, but it hardly showed up at all. So I rolled with it and went into the bottom drawer of colors and used the Color Coat in Platinum, it’s a thick cream shadow that kind of drags on the lid. I just used it as a base across the eyelid and packed on the glitter shade Pretty Princess on the inner two thirds and Glam Rock on the outter third. Then I took my blending brush and softened all the edges and added a little Havana Nights in the outter corner the help blend things out.

The Ulta Be Discovered 67 piece Collection

The Ulta Be Discovered 67 piece CollectionFor eyeliner I used the purple eyeliner that came in the box set, it wasn’t very pigmented soon used a little of that same dark purple just to smudge under the outter half of my lash line. On the top lash line I used the same purple liner and set it with a black shadow. Recently I've been taking the liner two thirds on my lash line, it makes my eyes look bigger, which I love the look of. For my brows I used the Broadway Beauty Eyebrow pencil in Black / Brown and the Broadway Colors Lengthening Mascara in Black. Those two have become some of my favorites. To finish off my face makeup, I used my cover girl 3 in 1 foundation, Ulta Full Coverage Waterproof Concealer, Coty Airspun Loose Face Powder, Wet n Wild Contouring and Highlight palette, blush and Highlight duo and lip gloss included in the ulta box. I actually really liked the highlight, it was really silky and had great pigment. The gloss had a pretty shine without being sticky and stayed on for an hour or two!
Covergirl, ulta, hard candy, broadway colo, wet n wild,

Thank you so much for checking out this tutorial, I hope you love this look as much as I do. I wore out to Red Lobster for my birthday dinner with my boyfriend and daughter! Might I add, their Cheddar Bay Biscuits give me life! Haha.

Xoxo
Lulu.

Wet n Wild Petal Pusher

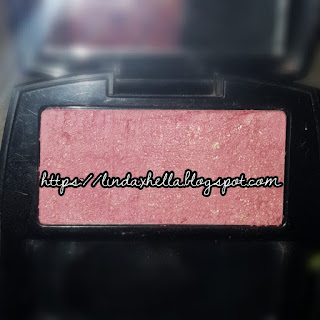
Wet n Wild Petal Pusher TutorialLet’s throw things back to 2011, when one of my favorite Wet n Wild palettes came out, Petal Pusher! This week I’m doing a polar opposite of last week and doing a light spring look. I’m going to utilize the right “brow bone” color. I honestly do not consider it a brow color. It’s a frosty metallic pink! Since metallic eyeshadow looks are on trend, why not do a tutorial using one of my only metal looking shadows. This palette does not have a matte nude shade, so I’ll be using the other brow bone color anyway! I hope you love this look as much as I do!


Wet n Wild Petal Pusher
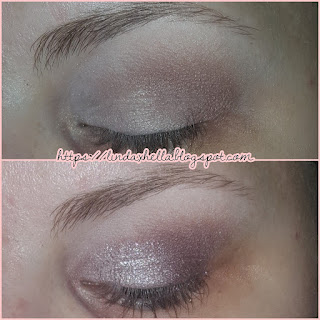
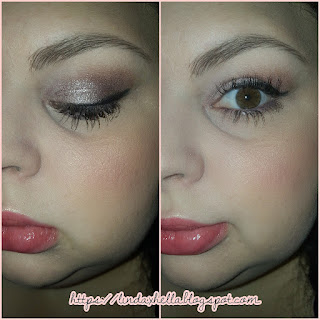
To start out the eyes, I use my trusty Hard Candy Eyeshadow primer I always use. It never creases on me and has a light nude tint to it, there’s no color concealing to. To set the primer I took the left brow bone color all over the lid to insure the look wouldn’t crease before I got shadows on. For my lid color I used the right brow bone color and packed on a little at a time to build up the opacity and metal look. I could have done it wet, but that always feels weird to me, lol. After I had the lid color as intense as I wanted, I started blending it up in the crease using a little of the right lid shade. Bringing in that soft light purple really helped define the crease and blend things out easily. To darken up the outer corner I used the left crease color lightly just to add more definition. For the bottom lash line is used a little of the of the same darker purple crease color and on the inner half ad inner corner I used the shade put on my eye lids.

Wet n Wild Petal Pusher Tutorial

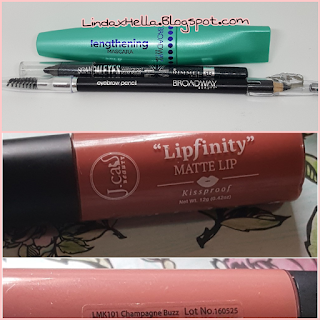
Broadway Beauty Eyebrow pencil, Black / Brown, Broadway Colors Lengthening Mascara in Black, J Cat Beauty Lipfinity Matte Lip, Champagne Pop,Finishing everything off I did my face makeup the same way I have it in my drug store foundation routine. I didn’t use any eyeliner for once. But for mascara and brows I used two new products my boyfriend picked up randomly for me at the store one evening. The brow pencil is Broadway Beauty Eyebrow pencil in Black / Brown, it’s kind of hard and not crazy pigmented. So I like it a lot. For mascara I used the Broadway Colors Lengthening Mascara in Black. The formula has little fibers in it doesn't seem to flake or smear when I sweat. The wand has a curve on the end, it isn’t too weird to be honest. For my lips I put on my J Cat Beauty Lipfinity Matte Lip in Champagne Pop! It’s my favorite matte lip color. To finish I sprayed my face with the Elf setting spray, and that’s it! It’s so simple and pretty and perfect for!


I hope you enjoyed this post and get inspired to have a little fun with some soft spring colors!

Xoxo,
Lulu.


Popular Posts