Showing posts with label Makeup Tutorial. Show all posts

Spring Time Inspiration Tutorial

Spring Time InspirationHello everyone and welcome back to my blog! Today I have this bright, super cute spring inspired makeup tutorial for you! I’ve been in a bit of a rut when it comes to inspiration, I’m not sure what it is. I think I’ve just been in a bit of a funk and stuck doing a lot of the same looks. So today I decided to pop open my Take Me Back To Brazil palette and use my three favorite colors in this tutorial. As you can see, my favorite colors are pink, lavender and mint, luckily they’re all complimentary colors and I was able to create I look I really liked! Let’s get into this tutorial guys!


Spring Time Inspiration
Starting out to prime my eyes, I used my Hard Candy primer. It’s like four years old, almost empty finally and getting weirdly thick. I need suggestions down below on what I should get next! Setting my lids I used my setting powder, there isn’t a matte cream shade in the palette so I had to use that. Going in with the crease, I took both lighter pink shades circled and built up a hazy warm pink smoky vibe, lol. For the outer corner I used the two darker  purples circled. I used the lighter one through the crease and the darker one in the outer V with a touch of the blue circled. The dark blue I used, goes on very ultraviolet, I’m obsessed with it! For the main lid, I did a cut crease to make the hot pink pop! I used a concealer to cut it then packed on the hot pink and faded the edges with a clean brush! After I finished my face makeup, I went in with the minty blue shade circled and ran it under my bottom lash line in the middle with the ultraviolet on the outer corner and the circled highlight shade on the inner third and inner corner.

Spring Time Inspiration

That’s it guys! Let me know how you liked the look. Is there anything you would change? Let me know in the comments down below. I hope you have enjoyed this makeup tutorial! I love this look, I’m not sure if I would wear this look out and about because I am far too chicken to do that. I don’t know why, I love the look and I’m proud of my abilities, if you want to call it that lol. Thanks so much for your times, I appreciate you.
Xoxo Lulu

Products used today.
Eyes:

Hard Candy Eyeshadow Primer
BH Cosmetics Take Me Back To Brazil palette
Essence Kajal Eye Pencil, Black
Ulta Beauty Waterproof Concealer, light cool
Maybelline The Rocket Mascara, Waterproof in Black
Broadway Beauty eyebrow pencil, brown / black
Elf Clear Brow Gel

Face: Maybelline Pore Eraser Primer
Bare Minerals Custom shade Foundation
Makeup Revolution Liquid Highlight, Champagne
Coty Airspun Face Powder, Naturally Neutral
Elf Contour Palette, light
E.L.F. Cosmetics Makeup Mist & Set
Blush, it's one I made myself!

Highlight: Makeup Revolution Liquid Highlight, Champagne

Lips: La Colors Matte Liquid Lipstick, Vixen

Brushes / Tools:
Generic Flat Top Foundation Brush
Pueen Large Powder Brush
Pueen Angled Blush Brush
Pueen Flat Shader Brush
Elf Defining Eye Brush
Elf Eyeshadow Brush
Elf Flat Contour Brush
Generic Brand Fan Brush
Generic Blending Brush
Generic Natural Fiber Blending Brush

Find me elsewhere:
Youtube: https://www.youtube.com/user/LINDAxHELLA
Twitter: https://twitter.com/Luluslife_blog
Instagram: https://www.instagram.com/lindaxhella/
Facebook: https://www.facebook.com/Lulus-Life-Blog
Pinterest: https://www.pinterest.com/lindaxhella/pins/
Tumblr: http://lindaxwoods.tumblr.com/


Navy Smokey Eye

Navy Smokey Eye


Hello everyone and welcome back to my blog! Today I had a really fun idea. I don’t know if anyone has done this or not before and it sounded like an awesome idea… I let my eleven year old daughter Trinity pick my eyeshadow colors. I wasn’t sure how this would go, she can be kind of crazy lol. Now she didn’t pick a matte all over color or a crease color, so I used my setting powder and my contour cool brown shade. Everything worked out in the end, even though I has some issues blending out the navy eyeshadow. I’ll go into the details when it comes to that part of the tutorial. Let’s get started!

Starting out this makeup look today, I primed my eye lids and set them with my setting powder. Like I said, my daughter did not pick out any matte or neutral colors, so I had to make due with what I had lol. For my crease I took the cool toned brown contour color and built up a nice deep crease. I knew with the navy eyeshadow she picked, I’d need a darker crease to compliment the colors. With the navy eyeshadow, I wet my brush to apply it in the end. I tried it dry and it was looking more black and patchy than navy. This shadow isn’t sold anymore my Ulta, I got it in a holiday train case set. On the center of the lid, I took my ring finger and packed on the color Deep End. This shadow is a deep emerald green with a holographic glitter in it. I tried it with a brush and it went everywhere. So using my finger was the only option, and there was still fallout because it is a glitter and I don’t have glitter glue. Over top of that I went in with a green from the Take Me Back To Brazil palette, the emerald wasn’t popping against the navy like I wanted it to. Adding the green on top was just what this look needed. I ran a little under my bottom lash line along with the navy in outer edge. 

For the rest of this makeup, I did my face like a always do. If you would like to see how I do my face makeup, I’ll link my latest makeup tutorial down below. It was a mermaid inspired look. A lot of the products will be the same. If anything is different, don’t worry I’ll have a full list down below of all my makeup products used in today’s tutorial, along with my brushes and tools. I will have all of my social media links down there too if you feel like following me! I’d love if you followed me and commented and let me know you came from my blog!
Xoxo Lulu

Little Mermaid Makeup Tutorial

Products used today.
Eyes:
Hard Candy Eyeshadow Primer
BH Cosmetics Take Me Back To Brazil palette (1 green shade)
Ulta Beauty Glitter Eye Top Coat, Deep End
Ulta Beauty Eyeshadow, Sapphire
Essence Kajal Eye Pencil, Black
Maybelline The Rocket Mascara, Waterproof in Black
Broadway Beauty eyebrow pencil, brown / black
Elf Clear Brow Gel
Ardell Wispies False Lashes
Duo Eyelash Glue

Face:
Maybelline Pore Eraser Primer
Bare Minerals Custom shade Foundation
Makeup Revolution Liquid Highlight, Champagne
Coty Airspun Face Powder, Naturally Neutral
Elf Contour Palette, light
E.L.F. Cosmetics Makeup Mist & Set
Blush, it's one I made myself!

Highlight:
Makeup Revolution Liquid Highlight, Champagne

Lips:
J Cat Beauty Kiss proof matte liquid lipstick, Champagne Buzz

Brushes / Tools:
Real Techniques Miracle Complexion Sponge
Pueen Large Powder Brush
Pueen Angled Blush Brush
Pueen Flat Shader Brush
Elf Defining Eye Brush
Elf Eyeshadow Brush
Elf Flat Contour Brush
Generic Brand Fan Brush
Generic Blending Brush
Generic Natural Fiber Blending Brush

Find me elsewhere:
Youtube: https://www.youtube.com/user/LINDAxHELLA
Twitter: https://twitter.com/Luluslife_blog
Instagram: https://www.instagram.com/lindaxhella/
Facebook: https://www.facebook.com/Lulus-Life-Blog
Pinterest: https://www.pinterest.com/lindaxhella/pins/
Tumblr: http://lindaxwoods.tumblr.com/


Flirty Fairy Makeup Tutorial

Flirty Fairy Makeup Tutorial
 Flirty Fairy Makeup Tutorial


Hello everyone and welcome back to my blog. A few weeks ago I did a Facebook poll on two tutorials I was wanting to do. It was between Mermaid or Fairy. Mermaid had won and that tutorial is up on my blog and on my YouTube. So today I did the fairy look since a lot of people had wanted to see it too. I didn’t film today’s look, I just wasn’t feeling up to filming because I didn’t know how this look would turn out or how I was going to do it. One thing I wish I had to really complete this look, is some glitter. I need to invest in some cosmetic glitters! Hit me up in the comments with some recommendations.


Flirty Fairy Makeup Tutorial
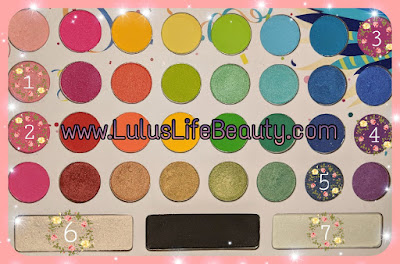
Starting out this look I primed my eye lids with my concealer and went straight in with colors without setting it. I did it this way because I wanted the pinks to pop more than it would, had I set it. This look is using the BH Cosmetics palette, Take Me Back To Brazil. I used two pinks, two purples and a blue. I also used both of the iridescent shadows for brown bone and cheek highlights. With this palette, the shades aren’t named which is so frustrating. I’ll have the photo here numbered to make things easier to follow. Through the whole process of  building up color in my crease, I’m avoiding the lid area. I decided to do a cut crease number this week! Going in with the first two pinks, I built them up all the way from inner to outer corner, darkening up the pink slowly. Once I got the pink bright enough, I went in with shades 3 and 4, keeping them in the outer corner. Going back and forth adding a little at a time to blend things evenly. In the very outer corner I took shade 5 and lightly patted some in. On the bottom lash line, I took shades 5, 4 and 2 and blended them out in an ombre. I lastly cut out the lid with concealer and patted on shade 6, bringing it in the inner corner as well.
 
Flirty Fairy Makeup Tutorial

Thanks so much for stopping by! I hope you like today’s tutorial as much as I do! I thought it was super pretty, I just wish I had glitter to add to the list! That’s all this look took, I don’t know if it was simple or easy to follow. If you have any suggestions on how I can make these tutorials cleaner, let me know down below in the comments. All of my products, tools and social media links are listed down below!
Xoxo Lulu

Flirty Fairy Makeup Tutorial

Products used today.
Eyes:
Hard Candy Eyeshadow Primer
BH Cosmetics Take Me Back To Brazil palette
Essence Kajal Eye Pencil, Black
Broadway Color Lengthening Mascara, Black
Broadway Beauty eyebrow pencil, brown / black
Elf Clear Brow Gel

Face:
Maybelline Pore Eraser Primer
Bare Minerals Custom shade Foundation
Makeup Revolution Liquid Highlight, Champagne
Coty Airspun Face Powder, Naturally Neutral
Elf Contour Palette, light
E.L.F. Cosmetics Makeup Mist & Set
Blush, it's one I made myself!

Highlight:
Makeup Revolution Liquid Highlight, Champagne
BH Cosmetics palette Take Me Back To Brazil

Lips:
Makeup Revolution Matte Lipstick, Lust

Brushes / Tools:
Real Techniques Miracle Complexion Sponge
Pueen Large Powder Brush
Pueen Angled Blush Brush
Pueen Flat Shader Brush
Elf Defining Eye Brush
Elf Eyeshadow Brush
Elf Flat Contour Brush
Generic Brand Fan Brush
Generic Blending Brush
Generic Natural Fiber Blending Brush

Socials:
https://beacons.ai/luluslife 


Sultry Warm Tone Makeup Tutorial

Sultry Warm Tone Makeup Tutorial


Hello everyone and welcome back to my blog! I’m a little late this week with Fridays tutorial. Thanks to my daughter being in public school, she brings all kinds of germs home. Guess who ends up ten times sicker than she does? That would be me, and I hate it lol. I felt like doing a Halo eye, but I also felt like doing something really warmed tones and sultry. I haven’t done a winged liner in a while so I threw that in too for the fun of it. I’m not the best at winged liner but I’m getting better, they can really pull a look together. False lashes were a must for this look with how bold the eye shadow was. Let’s get right into the tutorial!


I started out this tutorial like I always do by priming and setting my lids with shade 1. This is my number one tip for a soft even blend. I have thin eyelids and if I don’t do this, my Eyeshadow won’t blend smoothly and it’ll look like it’s skidded. Today’s eyeshadow palette is the Makeup Revolution Reloaded Iconic Newtrals 2. It’s a very long name lol, but the shadows aren’t names. That’s a big pet peeve of mine. But I’ll include a picture of course with everything numbered, dedicated to my craft y’all lol. To build up the color all over my lid and above my crease I dipped into shades 2, 3 and 4 and just blended like crazy. I then went in with shade 5 and deepened the inner and outer corners. On the center of my lid I took my concealer and patted it out and blended shades 6 and 7 together over it softening the edges. That’s all this look consisted of, a lot of Shadow’s in different warm tones and a lot of blending. I took shadows 5, 6 and 7 and ran them under my lash line, darker on the outer corner, lightest on the inner corner.

Thank you so much for checking out this tutorial. Let me know how you liked it down below in the comments and send me any suggestions of future looks you’d like me to do! I love this look so much, I’m just sad I have no where to go to flaunt this look. As always down below I will have a full product list of everything I used in the makeup look including tools. I’ll also have all of my social media links down below so you can follow me. I’m trying to break a thousand followers on Instagram right now. Who wants to help, lol.
Xoxo Lulu

Products used today.
Eyes:
Hard Candy Eyeshadow Primer
Makeup Revolution Reloaded Iconic Newtrals 2
Essence Kajal Eye Pencil, Black
Maybelline The Rocket Mascara, Black
Ulta Beauty Classic Felt Tip Liner pen
Broadway Beauty eye brow pencil, brown / black
Elf Clear Brow Gel

Face:
Bare Minerals Custom shade Foundation
Makeup Revolution Liquid Highlight, Champagne
Coty Airspun Face Powder, Naturally Neutral
Elf Contour Palette, light
E.L.F. Cosmetics Makeup Mist & Set
Blush, it's one I made myself!

Highlight:
Carli Bybel palette, Champagne shade

Lips:
Maybelline Color Sensational, 015 Born With It
OR
J Cat Beauty matte kiss proof lip, Champagne Buzz
Mixed with
L.a. Colors Matte Liquid Lip Color, Vixen


Brushes / Tools:
Real Techniques Miracle Complexion Sponge
Pueen Large Powder Brush
Pueen Angled Blush Brush
Pueen Flat Shader Brush
Elf Defining Eye Brush
Elf Eyeshadow Brush
Elf Flat Contour Brush
Generic Brand Fan Brush
Generic Blending Brush
Generic Natural Fiber Blending Brush

Find me elsewhere:
Youtube: https://www.youtube.com/user/LINDAxHELLA
Twitter: https://twitter.com/Luluslife_blog
Instagram: https://www.instagram.com/lindaxhella/
Facebook: https://www.facebook.com/Lulus-Life-Blog
Pinterest: https://www.pinterest.com/lindaxhella/pins/
Tumblr: http://lindaxwoods.tumblr.com/


Night Out Smokey Eye Tutorial

Night Out Smokey Eye Tutorial


Night Out Smokey Eye TutorialHello everyone and welcome back to my blog! Today for you I have clubbing, Smokey eye look I’ve been wanting to post for a while and never really had an excuse to do it. Then I remembered, I don’t need an excuse to do this look. Makeup is all about having fun and creative. When my step daughter suggested for me to do a look like this, I decided it was time to do it. I love dark looks and I feel like I had a blessed makeup application. Everything just went right! It’s currently Thursday morning at 1am when I’m done and writing this. I don’t sleep anymore, lol. Let’s get into this tutorial!


Night Out Smokey Eye Tutorial
This tutorial uses two BH Cosmetics pallets, the Take Me Back To Brazil palette and the original Carli Bybel palette. The only color I used from the Take Me Back To Brazil palette is the black, it’s a really good black and I don’t have any other true matte black shadow. To start out this look I primed my eyes and set them with a creamy bone shade, like I always do. Through the crease I took the cool toned darker brown shade on a fluffy blending brush and built it up not only through the crease but in the whole outer corner. I then took the black on a natural fiber blending brush adding a little at a time to the outer corner and crease. I didn’t want to make my eyes look smaller so I went a little light with the black so it looked dark gray not a harsh black. After that I took the darkest 'highlight' shade in the Carli Bybel palette on a flat packing brush and packed it all over the lid, avoiding the very outer corner. On the inner corner I used a brighter gold for a pop of brightness. The lower lash liner basically mimics the lid colors, just a lot less shadow lol. On my brows bone I used the champagne highlight, I also used it on my cheek bones as well.


Thank you so much for stopping by and checking out this makeup tutorial. I did a few things differently I wanted to mention. For my foundation I used 3 pumps and 1 drop of liquid highlight and mixed them together and buffed it in with a flat top brush. I don’t normally use a brush and I’ve never tried adding highlight to my foundation. It didn’t make me shiny or gross. There was a soft glow added and everything went on top of it so nicely. Everything I used is listed down below including makeup, tools and social media if you feel like following me! I’m trying to break 1k on Instagram and I can’t get past 924 lol.
Xoxo Lulu

Products used today.
Eyes:
Hard Candy Eyeshadow Primer
BH Cosmetics Take Me Back To Brazil palette
BH Cosmetics Carli Bybel palette
Essence Kajal Eye Pencil, Black
Broadway Color Lengthening Mascara, Black
Elf  Eye Brow Kit, Light
Elf Clear Brow Gel

Face:
Maybelline Pore Eraser Primer
Bare Minerals Custom shade Foundation
Makeup Revolution Liquid Highlight, Champagne
Coty Airspun Face Powder, Naturally Neutral
Elf Contour Palette, light
E.L.F. Cosmetics Makeup Mist & Set
Blush, it's one I made myself!

Highlight:
Carli Bybel palette

Lips:
Maybelline Color Sensational, 015 Born With It

Brushes / Tools:
Generic Brand flat top foundation brush
Pueen Large Powder Brush
Pueen Angled Blush Brush
Pueen Flat Shader Brush
Elf Defining Eye Brush
Elf Eyeshadow Brush
Elf Flat Contour Brush
Generic Brand Fan Brush
Generic Blending Brush
Generic Natural Fiber Blending Brush

Find me elsewhere:
Youtube: https://www.youtube.com/user/LINDAxHELLA
Twitter: https://twitter.com/Luluslife_blog
Instagram: https://www.instagram.com/lindaxhella/
Facebook: https://www.facebook.com/Lulus-Life-Blog
Pinterest: https://www.pinterest.com/lindaxhella/pins/
Tumblr: http://lindaxwoods.tumblr.com/


The Little Mermaid Makeup Tutorial

The Little Mermaid Makeup Tutorial

Hello everyone and welcome back to my blog! Real quick, if you notice, I got my very own website domain name! I’m official y’all lol… Today I felt like having fun with this tutorial. I decided to do a poll on Facebook & the two options I wanted to do were Fairy or Mermaid. Mermaid won by a lot! I thought since mermaid won, I’d have even more fun and base it around one of my favorite child hood movie, The Little Mermaid! This tutorial was also filmed all for the ease of not having to read. Lol. I do love writing so much, but I know not everyone likes to read. Once in a while, I’m going to start actually filming some of the looks I do and include them in the blog posts. Below like always I will have my products listed and my social media links!


For this tutorial I’m using a foundation primer sample I received in my latest Ulta order. A little review, it smelled like cream oranges and I loved so soft my skin felt! I’m going to look into how much it costs. I know I don’t have wrinkles and that it’s an Anti-aging Face Primer, but preventative maintenance is necessary! The foundation I received complimentary from the Influenster app. I used the Bare Minerals Made 2 Fit app to mind my perfect foundation shade. The formula is a thicker texture and really smooth. I have acne and it’s hard to cover my spots, this foundation is a light to medium coverage. It smells clean, there isn’t a gross scent or perfume smell. I was very pleased is was almost scent free. It’s not matte, but it looks so good on my skin, it almost looks natural. I’m thinking matte foundations aren’t working for my skin anymore.


Thank you very much for checking out this blog post and YouTube video. I hope you enjoyed it as much as I did creating it. I would actually love to wear this look out and about. The colors are bright and out there, that’s not something in my comfort zone, but I’m digging it a lot. Comment down below and let me know what you want to see next!
Xoxo Lulu

Products used today.
Eyes:
Hard Candy Eyeshadow Primer
Wet n Wild single, Brule
BH Cosmetics, Take Me Back To Brazil
Essence Kajal Eye Pencil, Black
Maybelline The Rocket, Waterproof Mascara, Black
Ulta Beauty, Classic Felt Tip Liner
Elf  Eye Brow Kit, Light
Elf Clear Brow Gel
Ardell Wispies Lashes

Face:
IT Cosmetics Anti-aging Face Primer
Bare Minerals, Custom shade Foundation
Ulta Beauty, Waterproof Concealer, Light Cool
Coty Airspun Face Powder, Naturally Neutral
Elf Contour Palette, light
E.L.F. Cosmetics Makeup Mist & Set
Blush, it's one I made myself!

Highlight:
Revolution Liquid Highlight, Champagne

Lips:
Makeup Revolution, Iconic Matte Nude, Lust
La Colors, Nude pink gloss

Brushes / Tools:
Real Techniques Miracle Complexion Sponge
Pueen Large Powder Brush
Pueen Angled Blush Brush
Elf Flat Contour Brush
Pueen Flat Shader Brush
Elf Defining Eye Brush
Generic Flat Packing Brush
Generic Brand Fan Brush
Generic Blending Brush
Generic Natural Fiber Blending Brush

Think Pink Makeup Tutorial

Think Pink Makeup Tutorial


Think Pink Makeup Tutorial
Hello everyone and welcome back to my blog! Today I'm bringing you a beautiful pink and burgundy eyeshadow look i did with one of my new palettes, Makeup Revolution Reloaded Iconic Newtrals 2. I got this about two weeks ago and this is my first tutorial using it. A little review is included in the tutorial along with how to achieve the look! I did end up using a lot more shades than I really needed to, but that was because I did a lot of blending and gradients. By the way, I know my lashes are wonky. They  wouldn't sit right, this is only my second time ever using them though lol. Now let's get into this tutorial.


Think Pink Makeup Tutorial
To prime my eyelids I used my Hard Candy Eyeshadow primer I've used for years, it's so good. I have never had an issue with creasing and I have oily eyelids. I went ahead and numbered the shades since they aren’t named, I find that makes it easier to follow along. To set my lid, I did as I normally do and used shade 1, the light bone shade and put it all over. This look is pretty simple to do, but it uses a lot of shades. In the crease I took shade 2 and brought it from outer corner to about half way in. These shadows are very pigmented, so I only used a little bit of it to create a hazy warm crease. On the eyelids with a packing brush I used shadows marked as 3, 4 & 5 in that order and patted them on my lid from inner corner with the lightest, to the outer corner with the darkest. With a clean blending brush, I went in the crease to soften any of the harsh lines. I also took the same three lid shades and blending them on my bottom lash line. On the very inner corner and brow bone, I used shade 6. That’s all I did to achieve this look and I love it. There’s so pink and burgundy loveliness, it gives me all the feels!


Think Pink Makeup Tutorial

Thank you so much for stopping by to check out this tutorial. I hope you loved it as much as I do! Let me know if you can see a difference in the photo quality and if it’s better or worse. I’m using something different for my photos and I’m not sure if they’re better or worse. All of the makeup products, tools and social media links will be down below! Please feel free to share this with your friends if they’re looking for inspiration.
Xoxo Lulu


Products used today.
Eyes:
Hard Candy Eyeshadow Primer
Makeup Revolution Iconic Newtrals 2
Essence Kajal Eye Pencil, Black
Broadway Color Lengthening Mascara, Black
Elf  Eye Brow Kit, Light
Elf Clear Brow Gel
Ardell Wispies Lashes

Face:
Dermacol Foundation Cover, 210
Maybelline Matte n Poreless Foundation, Porcelain
Coty Airspun Face Powder, Naturally Neutral
Elf Contour Palette, light
E.L.F. Cosmetics Makeup Mist & Set
Blush, it's one I made myself!

Highlight:
Revolution Liquid Highlight, Champagne

Lips:
Makeup Revolution, Iconic Matte Nude, Lust
(Shade “3” in eyeshadow palette patted on top)

Brushes / Tools:
Real Techniques Miracle Complexion Sponge
Pueen Large Powder Brush
Pueen Angled Blush Brush
Pueen Flat Shader Brush
Elf Defining Eye Brush
Elf Eyeshadow Brush
Elf Flat Contour Brush
Generic Brand Fan Brush
Generic Blending Brush
Generic Natural Fiber Blending Brush

Find me elsewhere:
Youtube: https://www.youtube.com/user/LINDAxHELLA
Twitter: https://twitter.com/Luluslife_blog
Instagram: https://www.instagram.com/lindaxhella/
Facebook: https://www.facebook.com/Lulus-Life-Blog
Pinterest: https://www.pinterest.com/lindaxhella/pins/
Tumblr: http://lindaxwoods.tumblr.com/


Sunrise Makeup Tutorial

Sunrise Makeup Tutorial 


Sunrise Makeup Tutorial Hello everyone and welcome back to my blog! I was recently able to purchase some new makeup items. I purchased two eyeshadow palettes, the Makeup Revolution The Newtrals 2 and the BH Cosmetics Take Me Back To Brazil palette! The BH Cosmetics palette is all crazy bright colors, colors I did not have. First thing I did was create a look I’ve always wanted to try, a Sunrise makeup tutorial! I am in love with this look and so excited to be sharing it with you!

Sunrise Makeup Tutorial
Starting out this look I used my favorite eyeshadow primer from Hard Candy and set it with the wet n wild single shadow in Brulé. This look involves a lot of layering and blending out the shades. Since none of them are named it makes it a little harder to be as concise as I would like. I did however make sure I had a photo of the palette with the shades circled and numbered. I worked from lightest to darkest, bringing each shadow a little lower. Starting out with the light yellow, I put it in and above my crease to compensate for my hooded eyes. I took the shadows from outer corner almost all the way in. Next I went in with the brighter yellow shade blending it slightly lower and building up the brightness. Next up I took the bright orange and put it through my crease and then took the darker orange bringing it a little lower. For the outer corner and slightly into the crease, I used the deep brick color to help with dimension. On the lid I used a bright fuchsia purple patting it from inner corner to the edge of the brick shade, blending them at the line. On my brow bone I took the iridescent white with a pink shift to it. I would have used the other one with the blue / green shift, but it didn’t seem to fit the look, lol. On my lower lash line I used brick, bright orange and light yellow and ombre’d them out!


Sunrise Makeup Tutorial Thank you so much for checking out this tutorial! I used so many new products today and I’ll have them all down below as I always do! I hope you enjoyed this tutorial and if you did, let me know down below! If you would like reviews of any of the items I have listed below, just let me know and I’ll do as many as I can! Everything with a * is new!
Xoxo Lulu


Products used today.
Eyes:
Hard Candy Eyeshadow Primer
*BH Cosmetics Take Me Back To Brazil palette
*Essence Kajal Eye Pencil, Black
Broadway Color Lengthening Mascara, Black
Elf  Eye Brow Kit, Light
*Elf Clear Brow Gel
Ulta Beauty Classic Felt Tip Liner
*Ardell Wispies Lashes

Face:
Revlon Colorstay Foundation, 200
Maybelline Matte n Poreless Foundation, Porcelain
Coty Airspun Face Powder, Naturally Neutral
*Elf Contour Palette, light
E.L.F. Cosmetics Makeup Mist & Set
Blush, it's one I made myself!

Highlight:
*Makeup Revolution Liquid Highlight, Champagne

Lips:
*Makeup Revolution, Iconic Matte Nude, Lust

Brushes / Tools:
Real Techniques Miracle Complexion Sponge
Pueen Large Powder Brush
Pueen Angled Blush Brush
Pueen Flat Shader Brush
Elf Defining Eye Brush
Elf Eyeshadow Brush
Elf Flat Contour Brush
Generic Brand Fan Brush
Generic Blending Brush
Generic Natural Fiber Blending Brush

Find me elsewhere:
Youtube: https://www.youtube.com/user/LINDAxHELLA
Twitter: https://twitter.com/Luluslife_blog
Instagram: https://www.instagram.com/lindaxhella/
Facebook: https://www.facebook.com/Lulus-Life-Blog
Pinterest: https://www.pinterest.com/lindaxhella/pins/
Tumblr: http://lindaxwoods.tumblr.com/


Valentine's Makeup Tutorial

Valentine's Makeup Tutorial 


Hello everyone and welcome back to my blog! Today’s makeup tutorial is how I wore my makeup for Valentine’s day this year! It’s s simple look and really easy to do, but it just looks so beautiful. Everything used in today’s tutorial is either drug store or from Ulta, at drugstore priced items. Speaking of Ulta, I have an order coming in including two new eyeshadow palettes and I’m really excited to create some new looks with them. Spoiler, I got the BH Cosmetics Take Me Back To Brazil palette. I don’t use a lot of bright colors like that, because I don’t own any. So I’m very excited to try some new things!


I primed my eyelids with my Ulta concealer and set it with the bone shade to soften everything. Today’s look is using the Carli Bybel palette, the original one. I’m pretty sure the four eyeshadows I used are also in the Deluxe Edition as well. Yes, the whole look only uses four shadows! To start out the crease I went in with the light cool plum shade and brought it from outer corner to two thirds of the way in. Next I used the darker warm plum shade in the outer corner for added depth. With a flat shader brush I took concealer and cut my lid giving it a sticky base for the shimmery lid. Pack on the concealer I used the soft peachy pink that has a yellow / gold shift. I gently patted back and forth with the lid shade and outer corner shade to create a soft blended transition. Under my lash line I swept the three main eyeshadows in a gradient, lightest shade on the inner corner, if course.


For the rest of the makeup look I added a wing and finished my face makeup and all of my products used will be down below as usual! I hope you enjoyed this makeup tutorial. I thought it was perfect for Valentine’s day since it was pinky and purple and light. Thank you so much for checking out this tutorial! Please let me know what you think down below, down there you’ll also find all of my social media links!
Xoxo Lulu

Products used today.
Eyes:
Ulta Full Coverage Waterproof concealer, light
Carli Bybel palette
Rimmel Scandaleyes Waterproof, Shimmering Black Liner
Broadway Color Lengthening Mascara, Black
Broadway Beauty Eyebrow pencil, Black / Brown
Ulta Beauty Classic Felt Tip Liner

Face:
Maybelline Baby Skin Poreless Primer
Revlon Colorstay Foundation, 200
Maybelline Matte n Poreless Foundation, Porcelain
Coty Airspun Face Powder, Naturally Neutral
NYC Bronzer, Sunny
E.L.F. Cosmetics Makeup Mist & Set
Blush, it's one I made myself!
Highlight, BH Cosmetics Carli Bybel palette (light nude shade)

Lips:
J.Cat Beauty Lipfinity' Matte Kissproof Lip, Champagne Buzz

Brushes / Tools:
Real Techniques Miracle Complexion Sponge
Pueen Large Powder Brush
Pueen Angled Blush Brush
Pueen Flat Shader Brush
Elf Defining Eye Brush
Generic Flat Packing Brush
Generic Brand Fan Brush
Generic Blending Brush
Generic Natural Fiber Blending Brush

Find me elsewhere:
Youtube: https://www.youtube.com/user/LINDAxHELLA
Twitter: https://twitter.com/Luluslife_blog
Instagram: https://www.instagram.com/lindaxhella/
Facebook: https://www.facebook.com/Lulus-Life-Blog
Pinterest: https://www.pinterest.com/lindaxhella/pins/
Tumblr: http://lindaxwoods.tumblr.com/


Everyday Makeup Tutorial (Updated)

Everyday Makeup Tutorial (Updated)


Hello everyone and welcome back to my blog! How has 2018 been treating you so far? Personally, I've been sick most of if, but that's how every winter goes for me. Hence why I've missed a few uploads! I hate missing posts, but I'm pushing myself to get this post up on time! Today I'm sharing with you my updated everyday sort of makeup tutorial. Wheater it comes to running errands or just having to leave my house in general, I like a little makeup on. I don't think I need makeup, I just love doing it! Let's get into this tutorial!


Today I'm using the Carli Bybel palette, because what else do you expect from me, lol. I don't have many palettes. Hopefully for my birthday I can get a good one, reccomendations below please! To prime my eyelids, I used my hard candy eyeshadow primer and set it with the matte cream shade as always. Since this is more of a softer look for me, it only uses four colors from the palette. On a natural fiber blending brush I picked up the medium warm brown and brought it through the crease and a little above. I have hooded eyes, so I have to bring the colors higher up to keep them visible. I brought the crease shade only half way in to keep my eyes open and bright looking. I of course took a clean fluffy brush anf blended the edges!
On my lids, I used the light creamy highlight shade on a flat shader brush. I took the shadow from inner corner to two thirds of the way out and lightly patted and blended the edges on my crease color. On my lower lash line I used the warm soft purple on a small natural fiber blending brush and smoked it out softly just to add a pop of color. To finish off the look, I used my eyeliner pen and did a small flick, bringing the line in super fine and all the way to the tear duct. This created an elongated shape to my eyes, which I honestly love the look of!

Thank you so much for checking out this tutorial! I hope it was easy enough to follow, if you have any questions about look, let me know in the comments down below. If you know anyone who would love this look, please share it with them! If you have the time, I would love some feedback on this tutorial. Was it easy to follow? Should I lay out the text spaced out more? I appreciate you stopping by and taking time to read my new post!
Xoxo Lulu

Products used today.
Eyes:
Hard Candy Eyeshadow Primer
Carli Bybel palette
Rimmel Scandaleyes Waterproof, Shimmering Black Liner
Broadway Color Lengthening Mascara, Black
Broadway Beauty Eyebrow pencil, Black / Brown
Ulta Beauty Classic Felt Tip Liner

Face:
Maybelline Baby Skin Poreless Primer
Revlon Colorstay Foundation, 200
Maybelline Matte n Poreless Foundation, Porcelain
Coty Airspun Face Powder, Naturally Neutral
NYC Bronzer, Sunny
E.L.F. Cosmetics Makeup Mist & Set
Blush, it's one I made myself!
Highlight, BH Cosmetics Carli Bybel palette (light nude shade)

Lips:
Maybelline Color Sensational, 015 Born With It

Brushes / Tools:
Real Techniques Miracle Complexion Sponge
Pueen Large Powder Brush
Pueen Angled Blush Brush
Pueen Flat Shader Brush
Elf Defining Eye Brush
Generic Brand Fan Brush
Generic Blending Brush
Generic Natural Fiber Blending Brush

Find me elsewhere:
Youtube: https://www.youtube.com/user/LINDAxHELLA
Twitter: https://twitter.com/Luluslife_blog
Instagram: https://www.instagram.com/lindaxhella/
Facebook: https://www.facebook.com/Lulus-Life-Blog
Pinterest: https://www.pinterest.com/lindaxhella/pins/
Tumblr: http://lindaxwoods.tumblr.com/


Cranberry Smokey Eye

Cranberry Smokey Eye


Cranberry Smokey Eye
Hello everyone and welcome back to my blog! Today I thought I'd share with you this beautiful Cranberry makeup look I created. I'm using all drugstore / drugstore priced items! The eyeshadow palette I used is the Makeup Revolution Redemption 3 palette. It's almost an exact dupe for the Urban Decay Naked 3 palette! I personally can't afford the Urban Decay palette, but it's good to know there's an affordable dupe out there for us makeup lovers on a budget! For how I did my base makeup, I have a foundation routine linked Here. It will include everything I use, products, tools, and how I apply it. 

Cranberry Smokey Eye
Since this eyeshadow palette doesn't have any names, I'm going to reference the names from the Urban Decay palette. I primed my eyelids with the Hard Candy Eyeshadow Primer. I then set it with the shade Strange to set everything and create a smooth surface for blending. On a fluffy blending brush I went through the crease with the shades Limit & Nooner. I blended until there was no harsh lines or edges. To create a lot of depth in the outer third, I used a natural fiber blending brush and the shade Darkside. I buffed and blended adding a little at a time until it was the right amount of Smokey and dark, lol. For my eyelid I used a flat packing brush and the Maybelline Color Tattoo in Too Cool, from inner corner to two thirds of the way in. I then took a flat shader brush in the shade Buzz. It's a beautiful cranberry color. The cream shadow under helped it to pop and look more metallic. I packed and patted the shadow back to the outer corner to ensue soften edges. For the small wing, I used a small angled brush with setting spray and used the shade Darkside. I made a thin line from the mid lid to the outer corner and added a small flick.
Finishing the rest if my eye makeup, I used in my waterline the Rimmel Scandaleyes waterproof liner in Sparkling Black, Broadway Colors Lengthening Mascara in Black. On the bottom lash line I took a small blending brush and dipped into Darkside connecting where the edge of the wing is and brought it half way in. I then took the shade Buzz on the same brush and took it from the inner corner and blended it back into Darkside. That's it for the eyes!

Thank you so much for checking out this tutorial. I hope you liked this eye look, if you did let me know! I have all of the products I used today listed down below, including the tools I used. Don’t forget to share this post and follow me on social media! Links below!
Xoxo Lulu


Products used today.
Eyes:
Hard Candy Eyeshadow Primer
Makeup Revolution Iconic 3
Maybelline Color Tattoo, Too Cool
Rimmel Scandaleyes Waterproof, Shimmering Black Liner
Broadway Color Lengthening Mascara, Black
Broadway Beauty Eyebrow pencil, Black / Brown

Face:
Maybelline Baby Skin Poreless Primer
Revlon Colorstay Foundation, 200
Maybelline Matte n Poreless Foundation, Porcelain
Coty Airspun Face Powder, Naturally Neutral
NYC Bronzer, Sunny
E.L.F. Cosmetics Makeup Mist & Set
Blush, it's one I made myself!

Lips:
Nothing today, I couldn’t find one I liked!

Brushes / Tools:
Real Techniques Miracle Complexion Sponge
Pueen Large Powder Brush
Pueen Angled Blush Brush
Pueen Flat Shader Brush
Elf Defining Eye Brush
Elf Eyeshadow Brush
Generic Brand Fan Brush
Generic Blending Brush
Generic Natural Fiber Blending Brush

Find me elsewhere:
Youtube: https://www.youtube.com/user/LINDAxHELLA
Twitter: https://twitter.com/Luluslife_blog
Instagram: https://www.instagram.com/lindaxhella/
Facebook: https://www.facebook.com/Lulus-Life-Blog
Pinterest: https://www.pinterest.com/lindaxhella/pins/
Tumblr: http://lindaxwoods.tumblr.com/

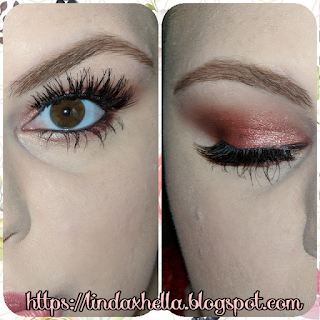
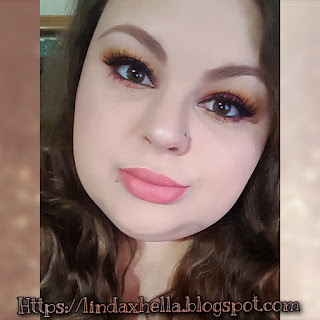
Go-to Gold Smoky Eye

  Gold Smoky Eye

Bronze Smoky EyeHello everyone and welcome back to my blog! I hope you’re all having an amazing new year! Mine has been good, a bit rough with my hubs out of town. But I’m pushing through and putting my mind to work. Today’s tutorial isn’t anything crazy or amazing to the average person, but this is my go to Smokey eye. With this makeup look, I feel like I can do anything. This is seriously the look I do all the time, weather I’m in a rush or have unlimited time to do my makeup. There are a few other looks I do pretty often, but I’m trying to branch out and do more fun, creative looks!


Bronze Smoky Eye
Today I did my face makeup before I did my eyes, so I primed my eyelids with my concealer. I used the Carli Bybel palette and set my lids with the bone cream shade. In the crease I used the camel brown shade on a soft fluffy brush, creating depth and shadow. I built the color up until I had a smooth transition with no harsh lines. In the outer corner I used the dark brown shade to really deepen things up. I love when I have a strong outer crease with a sharp edge. On the lid I used the golden bronze “highlight” color on a wet brush packing it on and gently fading it back towards the outer corner. On my bottom lash line, I used the dark brown on the outer half and the gold shade on the inner half.

Thank you so much for stopping by to check out this tutorial! I hope you liked it, and I hope you’ll comment and let me know what you think of this look. Please feel free to share this post with your friends and family or any makeup lovers out there! Also, I’d love if you followed me on social media, I have all of my links below along with a list of the products I used today in this look.
Xoxo Lulu


Products used today.
Eyes:
Ulta Beauty waterproof concealer, light cool
BH Cosmetics Carli Bybel Palette
Rimmel Scandaleyes Waterproof, Shimmering Black Liner
Broadway Color Lengthening Mascara, Black
Broadway Beauty Eyebrow pencil, Black / Brown

Face:
Maybelline Baby Skin Poreless Primer
Revlon Colorstay Foundation, 200
Maybelline Matte n Poreless Foundation, Porcelain
Coty Airspun Face Powder, Naturally Neutral
Wet n Wild Contouring and Highlight palette, Dulce De Leche
E.L.F. Cosmetics Makeup Mist & Set
Carli Bybel palette, Highlight (light cream shade)

Lips:
Maybelline Color Sensational Lipstick, 015 Born With It

Brushes / Tools:
Real Techniques Miracle Complexion Sponge
Pueen Large Powder Brush
Pueen Angled Blush Brush
Pueen Flat Shader Brush
Elf Defining Eye Brush
Elf Eyeshadow Brush
Generic Brand Fan Brush
Generic Blending Brush
Generic Natural Fiber Blending Brush

Find me elsewhere:
Youtube: https://www.youtube.com/user/LINDAxHELLA
Twitter: https://twitter.com/Luluslife_blog
Instagram: https://www.instagram.com/lindaxhella/
Facebook: https://www.facebook.com/Lulus-Life-Blog
Pinterest: https://www.pinterest.com/lindaxhella/pins/
Tumblr: http://lindaxwoods.tumblr.com/


Simple Glam with a Bold Lip

Simple Glam with a Bold Lip

Hello everyone and welcome back to my blog! Happy New Years!! Today I have a special guest on my blog! One of my eldest step daughters, Katelyn! She’s almost 19, one of my best friends and she truly gets me at my weirdest of moments. I hope you guys love her as much as I do. Also, she’s like really pretty, sorry for the mean girls reference lol. For this makeup look I did a full coverage base using Dermacol, a natural but shimmery eye with the Carli Bybel palette and a bold lip. Unlike me, Kate can pull off a bold lip! I’m just too fair to pull it off, lol. If you’re a pale girl like me and know of any good bold lip sticks, hit me up in the comments or on social media! I want to look into some more daring lip colors for fun. Alright, Let’s get right into this tutorial!


Starting out this look, I had Kate wash her face and get it all soft and clean for the makeup. That’s what I always personally do, it helps my makeup go on smooth and look a lot nicer! Starting with the eyes and the Carli Bybel palette, I primed her lids and set them the nude cream shade. I went into the crease and started creating warmth and depth with the medium brown shade. Once it was to a soft hazy blend, I added some of the lighter purple shade mainly in the outer crease and outer V. The lid shade I used is the soft satin pink on a wet brush, that way it went in more metallic. I wanted this eye look to be a really beautiful everyday ‘done up’ look. That’s exactly how it ended up and I love it so much. For her lips I used a cool toned dark red. The lipstick is one from the Halloween shop I got like two years ago, lol.

Thank you so much for stopping by today. I appreciate you taking time out if your day to look at this tutorial. I had a lot of fun with my step daughter hanging out and playing in makeup. This is something we’ve done for years, now I get to have her on my blog! I love this kid so much!
Xoxo Lulu

Products used today.
Eyes:
Hard Candy Eyeshadow Primer
BH Cosmetics Carli Bybel Palette
Rimmel Scandaleyes Waterproof, Shimmering Black Liner
Broadway Color Lengthening Mascara, Black

Face:
Maybelline Baby Skin Poreless Primer
Dermacol Foundation Cover, 210
Revlon Colorstay Foundation, 200
Dermacol Foundation Cover, 210
Coty Airspun Face Powder, Naturally Neutral
Wet n Wild Contouring and Highlight palette, Dulce De Leche
E.L.F. Cosmetics Makeup Mist & Set
Carli Bybel palette, Highlight (light cream shade)

Lips:
Cool Tone Deep Red Lipstick

Brushes / Tools:
Real Techniques Miracle Complexion Sponge
Pueen Large Powder Brush
Pueen Angled Blush Brush
Pueen Flat Shader Brush
Elf Defining Eye Brush
Elf Eyeshadow Brush
Generic Brand Fan Brush
Generic Blending Brush
Generic Natural Fiber Blending Brush

Find me elsewhere:
Youtube: https://www.youtube.com/user/LINDAxHELLA
Twitter: https://twitter.com/Luluslife_blog
Instagram: https://www.instagram.com/lindaxhella/
Facebook: https://www.facebook.com/Lulus-Life-Blog
Pinterest: https://www.pinterest.com/lindaxhella/pins/
Tumblr: http://lindaxwoods.tumblr.com/


New Years Eve Makeup Tutorial

New Years Eve Makeup Tutorial


Hello everyone and welcome back to my blog! It’s almost New Years Eve, and have I got a makeup tutorial for you! The look turned out so much better than I expected. I wasn’t sure how the Smokey eye would pair with a yellow / gold lid, but it turned out so pretty, if I do say so myself! I had a lot of fun doing this look, I hung out with my daughter and watched spooky shows on Netflix and ate dinner. Right now my hubby is out of town for 5 weeks going through training for trucking. So I’m going to power all of my sadness into my blog posts! Let’s get into this thing!

To start out this look I used the Hard Candy Eyeshadow Primer and as always, set it with a matte cream shade (Clarity) to create an even blending surface. Going into the crease with a natural fiber blending brush I picked up a creamy orange shade (buttercup) and fluffed it through the crease building depth. To deepen the crease and add dimension I blended in some brick red (Terracotta) in as well. The end result doesn't doesn’t show much of the warm tones, but it definitely helped create a good hazy blend. Now for the Smokey tones, I went in with a brownish black (silhouette) and just darkened everything up. I took the dark shade in pretty far. I wanted to create a lot of depth and sexiness. For the sparkly golden yellow lid, I took my eye shadow primer and applied it to my lid from inner corner to two thirds out. I then used my finger and patted on the Ulta Glitter Top Coat in Gold Digger, all over the primer so it’ll stick. These glitter shades need a sticky base or they'll fall off and go everywhere. That’s the eye look done, with winged liner, pencil liner and mascara added to finish!


Thank you so much for checking out this tutorial! I want to wish all of you a Very Happy New Years! If you recreate this look, tag me on social media or with #luluslife! All of the products I used are listed & linked along with all of my social media links are all below! Please be sure to leave a comment and share this post if you’re feeling kind. All of the views count.
Xoxo Lulu

Products used today.
Eyes:
Hard Candy Eyeshadow Primer
BH Cosmetics Shaaanxo Palette
Ulta Beauty Glitter Top Coat, Gold Digger
Broadway Beauty Eyebrow pencil, Black / Brown
E.L.F Eyebrow Kit, Light
Broadway Color Lengthening Mascara, Black

Face:
Maybelline Baby Skin Poreless Primer
Maybelline Fit Me Matte + Poreless Foundation, Porcelain 110
Dermacol Foundation Cover, 210
Coty Airspun Face Powder, Naturally Neutral
Wet n Wild Contouring and Highlight palette, Dulce De Leche
E.L.F. Cosmetics Makeup Mist & Set
Shaaanxo Eyeshadow for Highlight, Holy Grail

Lips:
BH Cosmetics Shaaanxo Palette, second lightest nude shade

Brushes / Tools:
Generic Compact flat top Foundation brush
Pueen Large Powder Brush
Pueen Angled Blush Brush
Pueen Flat Shader Brush
Elf Defining Eye Brush
Elf Eyeshadow Brush
Generic Brand Fan Brush
Generic Blending Brush
Generic Natural Fiber Blending Brush

Find me elsewhere:
Youtube: https://www.youtube.com/user/LINDAxHELLA
Twitter: https://twitter.com/Luluslife_blog
Instagram: https://www.instagram.com/lindaxhella/
Facebook: https://www.facebook.com/Lulus-Life-Blog
Pinterest: https://www.pinterest.com/lindaxhella/pins/
Tumblr: http://lindaxwoods.tumblr.com/


Popular Posts