Bronze Goddess Makeup Tutorial

Bronze Goddess Makeup TutorialHey guys what’s up? Welcome back to my blog! Today I started playing in makeup and ended up doing a super bronze, orangey smoky eye look that I am loving!!! So I thought I’d hop on and share this look with you today! I know this is not a very summery look, but I love it none the less. I hope you love it as much as I do! To create this eye look I used both the Carli Bybel palette and the Shaaanxo palette. To achieve this look you need a matte cream shade, some orange, brick, dark brown and of course a deep bronze shimmer. Let’s get into the look!
To start out this look, I did all of my face makeup first. Items used will be listed below. To start the eyes, I primed using my concealer and set it with the matte nude in the Carli Bybel palette. Next I took the orange and brick shades in the Shaaanxo palette on a fluffy brush and blended it through the crease going well above with the lighter orange. Going back into the Carli Bybel palette I picked up the darkest matte brown shade and ran it through the outer crease to deepen everything up. I wanted this look to be darker than what it turned out, but these shadows are so pigmented and easy to blend that I didn’t want to overdo it. For the lid I went in with the darkest “highlight” shade, and packed it all over the lid. I went back in with a clean blending brush to soften the edges. Under the lash line I went back in with the bronze shade and blended it up to the outer lash line. That’s the eye shadow done! 
Carli Bybel Palette Shaaanxo Palette
Bronze Goddess


I really love this look and I hope you love it much as I do! Down below I’m going to have all of the products I used listed including shades when it comes to face makeup.
Products Used Today:
Eyes:
BH Cosmetics Carli Bybel palette
BH Cosmetics Shaaanxo palette
Broadway Beauty Eyebrow pencil, Black / Brown
Broadway Colors Lengthening Mascara in Black
Rimmel Scandaleyes Waterproof Pencil, Sparkling Black
Face:
Maybelline Baby Skin Instant Pore Eraser Primer
Maybelline Fit Me Matte + Poreless Foundation, Porcelain 110
Revlon ColorStay Makeup with SoftFlex Combination/Oily Skin, 200 Nude
Ulta Full Coverage Concealer, Light Cool
Coty Airspun Face Powder, Naturally Neutral
L.A. Girl Pro Setting Powder, Translucent
DIY Glowy Blush
NYC Smooth Skin Bronzing Powder, Sunny
Carli Bybel Highlight, Light nude shade
E.L.F. Cosmetics Makeup Mist & Set
Lips: 
Three lightest shades in the Shaaanxo Lip side of the Palette

Thank you so much for checking out this tutorial and I hope you like it! If you have any suggestions, don’t forget to comment them down below! Please feel free to share this post online with your friends and don’t forget to stalk me on social media! I’ll have all of my links below!
Xoxo Lulu.

Twitter: https://twitter.com/Luluslife_blog
Instagram: https://www.instagram.com/lindaxhella/
Facebook: https://www.facebook.com/Lulus-Life-Blog
Pinterest: https://www.pinterest.com/lindaxhella/pins/
Tumblr: http://lindaxwoods.tumblr.com/

Dermacol Make-up Cover Foundation Review and Demo

Dermacol Make-up Cover Foundation Review and Demo

Hey guys and welcome back to my blog! Today I’m reviewing the widely talked about, Dermacol Makeup Cover! The wording on the box is a little strange, which makes sense considering it’s from Prague and translated into English. This is marketed as a "Extreme Full Coverage" foundation that you can use alone and not have to worry about concealer. There are some huge claims on the box along with an instructions booklet in multiple languages. I'll have the full list of facts and claims below! 

Dermacol Make-up Cover
The Application Process and My Final Thoughts.

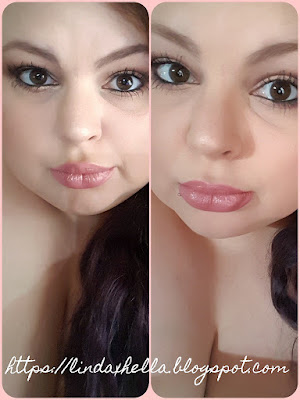
To start out my makeup today I made sure to was my face really well, moisturize and prime my face like I normally would. I was to give the foundation the best shot at working how it claims to. One thing to note, please look at a lot of reviews. I didn't do enough research on the shades and just went with what I thought looked my shade, But it's too dark and very orange on me! Just based on my experience, the shade in the tube is much darker than it looks like it would be online. In order for me to get it to be the correct shade, I have to mix it with my super light Maybelline Fit Me Matte and Pore-less Foundation in shade Porcelain 110. When I mix it, I use half a pea size amount of the Dermacol and about six times that amount of the Maybelline. The foundation mixed in that ration, was perfect for my skin tone. It lasted all day, I was over 80 degrees the other day and I sweat my ass off and it stayed put! I noticed it did wear away right at my hair line where I sweat the most.


Dermacol Make-up Cover
I am going to repurchase this in my shade, and keep this darker one for if I have a tan this summer and for maybe cream contour. I don't do much contouring. I don't do it well so I stick to bronzing up my skin a little. I have a large tattoo on my left forearm, so I'm going to test coverage on it and show some picture for reference, since so many claim it covers tattoos! It doesn't feel heavy on the skin, and it has a light scent. It almost smells like the Marc Jacobs Decadence One, but a little lighter! It's so nice smelling. To buy this foundation, just google it. You can find it on Amazon, Ebay, Wish, and many others. To make sure you aren't getting a weird off brand product, i'd recommend using Amazon.


Benefits:
Waterproof
Hypoallergenic
Lightly Scented
For All Skin Types
SPF 30
Preservative Free
24m Expiration
13 Shades

Contains: 
30 g / 1.05 oz

Coverage: 
Full (Extreme)
Dermacol Make-up Cover

The websites description and claims.

"The clinically tested, extreme covering Make up Cover was created as the first of its kind in Europe and one of the first in the world. The license for this foundation was eventually sold to Hollywood. It contains 50% pigments, which makes it a weapon against skin imperfections. DERMACOL MAKE-UP COVER provides PERFECT COVERAGE even in thin layers and is the perfect corrector for dark under-eye, unpleasant spots and skin blemishes. It completely covers acne, loss of pigmentation, post surgical bruising, tattoos etc. It may be used on the entire face or body for color correction, darkening or lightening the skin tones, and ensuring ideal balance. It is widely used as a professional make-up for photo or film shoots, modeling and for festive occasions."

Thank you guys so much for checking out my blog post today, I hope you enjoyed it! I know I love this foundation and can't wait for the correct shade to come! Please share this with your friends and don't forget to follow me on social media!

Xoxo
Lulu

Twitter: https://twitter.com/Luluslife_blog
Instagram: https://www.instagram.com/lindaxhella/
Facebook: https://www.facebook.com/Lulus-Life-Blog
Pinterest: https://www.pinterest.com/lindaxhella/pins/
Tumblr: http://lindaxwoods.tumblr.com/
Youtube: https://www.youtube.com/user/LINDAxHELLA


Makeup Revolution Vivid Shimmer Brick Tutorial

Makeup Revolution Vivid Shimmer Brick Tutorial

Hey guys and welcome back to my blog! Last week I posted a review of the Makeup Revolution Vivid Shimmer Brick, which you can find Here! Now, last week when I posted that review I didn’t even think to do multiple styles of swatches. What I mean by multiple swatch styles is a brush swatch, with and without primer, also what it looks like wet. I will be adding in those swatches in at the end of the post! Now let’s get started.

Starting out this look I’m going to prime my eyelids with the Hard Candy Eyeshadow Primer like I always do! It’s my favorite primer, it keeps my eyes crease free all day! I’m going to set my primer using the nude shade in the Carli Bybel palette to ensure a smooth surface for blending. Through the crease I’m going to use the top middle matte brown shade, it’s the perfect warm brown for transition. In the outer corner, I’m going to use the matte darkest brown shade for depth. For the lids, this is where things get fun. I’m going to pick up the colors from the Makeup Revolution Vivid Shimmer Brick, and spray them with water to make them look more metallic and vibrant.

On the lids I’m going to try using three shades from this Makeup Revolution Vivid Shimmer Brick. For the main lid shade, I’m going in with second color which is a mauve pink. I’m going to pick up a good amount on a flat shader brush and spritz it with some water. The water really helps colors, especially shimmers. Pop and stand out a lot more than they would without it. For the inner corner, I’m going to be using the white shade. On the outer corner I’m going to use the darkest brown. I’ll be putting it on wet, then going back into the darkest matte brown shade I used to soften up the outer corner and bringing in the crease shade to soften the middle crease area. I want to keep everything very soft and hazy.

Products Used Today:

Eyes:
Hard Candy Eyes the Limit Eye Shadow Primer
BH Cosmetics Carli Bybel palette
Makeup Revolution Vivid Shimmer Brick, Rose Gold
Broadway Beauty Eyebrow pencil, Black / Brown
Broadway Colors Lengthening Mascara in Black
Rimmel Scandaleyes Waterproof Pencil, Sparkling Black

Face:
Maybelline Baby Skin Instant Pore Eraser Primer
Maybelline Fit Me Matte + Poreless Foundation, Porcelain 110
Dermacol Foundation in 210
Ulta Full Coverage Concealer, Light Cool
Coty Airspun Face Powder, Naturally Neutral
L.A. Girl Pro Setting Powder, Translucent
DIY Glowy Blush
NYC Smooth Skin Bronzing Powder, Sunny
Carli Bybel Highlight, Light nude shade
E.L.F. Cosmetics Makeup Mist & Set
Lips: Maybelline Color Sensational, Born With It
Thank you so much for checking out this post! I hope you enjoyed it as much as I did! I love dark smoky looks like this with a shiny lid! I think it’s so beautiful, for an occasion. If you enjoyed this post, please share this with anyone you think would be interested. Don’t forget to talk me on social media! Links Below!
Xoxo
Lulu
Twitter: https://twitter.com/Luluslife_blog
Instagram: https://www.instagram.com/lindaxhella/
Facebook: https://www.facebook.com/Lulus-Life-Blog
Pinterest: https://www.pinterest.com/lindaxhella/pins/
Tumblr: http://lindaxwoods.tumblr.com/

Lana Del Rey Makeup Tutorial

Lana Del Rey Makeup Tutorial

Lana Del Rey Makeup Tutorial


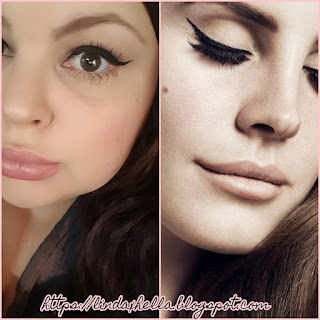
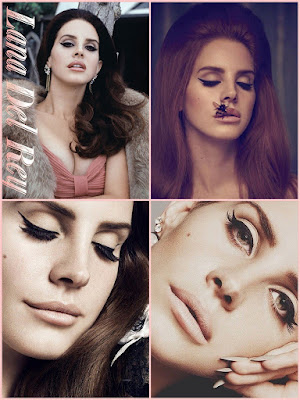
Hey guys and welcome back to my blog! Are you guys in love with Lana del Rey as much as I am? If so I hope you love this makeup look. It’s super natural and flawless looking with a bold cat eye! It’s almost a “no makeup, makeup look” with some sassiness. I’d honestly wear this look daily if I had time to do my makeup everyday, lol. The eyeshadow it’s self is minimal, but you have to be careful how you place the color through the crease.

Let’s get started with the eye makeup!

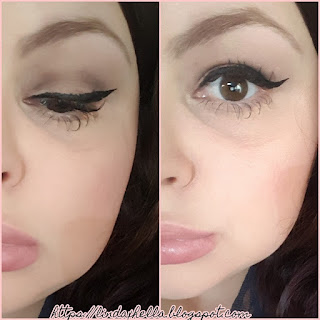
To start out this look I’m going to prime my eyelids with the Hard Candy Eyeshadow Primer and set it with a matte cream shade from the Shaaanxo palette. That’s going to give everything a smooth surface for blending, if you don’t set your eyelids your eyeshadow can drag and look choppy. For the crease, I’m going in with the darkest matte shade in the palette. What you want to do is take a tightly packed pencil brush, dipped in the darkest shade and keep it right in the crease. Lana does a soft a subtle dark faded line through the crease. It’s almost hidden, but brought pretty far into the inner part of the crease. If it’s too dark, take a soft fluffy brush with the light matte shade and blend the line out so it’s softer. To finish off the iconic Lana Del Rey Makeup look, you have to add the strong black wing! I’m using the Ulta Classic Felt Tip Liner. Lana has a long wing normally, so I’m going to use some scotch tape to keep the liner even and straight.
Lana Del Rey Makeup Tutorial

Bottom Lash Line & Mascara.

Now, for the bottom lash line, she does a few things. This is where you want to decide which if Lana Del Rey’s eye looks suit your look. Sometimes she has a thicker wing with heavy black liner on her lash line. One thing I’ve noticed, she doesn’t often have anything in her waterline. In your waterline you want to either use a nude or white pencil. If you’re the kind of person who hates the look of nothing in their waterline, line it, you do you. I have a hard time not having black liner on my waterline, but for the sake of the look I’m using a white liner. Lana's bottom lashes always have mascara, very spread out and evenly coated is the goal. A tip I have if your lashes want to clump, use a clean tooth pick to gently separate your lashes once they’ve dried. I’ll have all of the products I used in this look listed below!

Lana Del Rey Makeup Tutorial

List of products used in the Lana Del Rey Makeup Tutorial.

Eyes:
Hard Candy Eyeshadow Primer
Bh Cosmetics Shaaanxo Palette
Ulta Classic Felt Tip Liner
Maybelline Volum' Express The Rocket Mascara
Broadway Beauty Eyebrow pencil in Black/Brown
L.A. Colors Auto Eyeliner in White

Face & Lips:
Maybelline Baby Skin Instant Pore Eraser Primer
Maybelline Fit Me Matte + Poreless Foundation, Porcelain 110
Revlon ColorStay Makeup with SoftFlex Combination/Oily Skin, 200 Nude
Ulta Full Coverage Concealer, Light Cool
Coty Airspun Face Powder, Naturally Neutral
L.A. Girl Pro Setting Powder, Translucent
DIY Glowy pink blush
NYC Smooth Skin Bronzing Powder, Sunny
Carli Bybel Highlight, Light nude shade
E.L.F. Cosmetics Makeup Mist & Set
Maybelline Color Sensational 015, Born With It


Lana Del Rey Makeup Tutorial
Thank you so much for checking out this tutorial. I hope you loved this Lana Del Rey inspired Makeup Tutorial! I love her and I love her music. Lana Del Rey has such a beautiful soul and a beautiful voice! Let me know in the comments what your favorite Lana Del Rey song is!
Xoxo
Lulu

Popular Posts